
Fixed: VNC Viewer File Transfer Greyed Out [4 Solutions]
Wondering how to fix the VNC Viewer file transfer greyed out issue? Don't worry, this article will help you, this article reveals the solution to this problem and provides you with better free file transfer alternatives. Read on to solve your problem.
By Carolyn / Updated on December 13, 2024
How do I enable file transfer in VNC?
I have a PC with VNC Viewer installed and I want to transfer files between two PCs. However, when I connect to the PC with VNC Viewer installed, the "Action --> Transfer Files" option in the menu is disabled and files cannot be transferred! Why is it disabled? It is very important for me to transfer files between two computers! Do you have a solution to transfer my files between two computers and enable the "Transfer Files" option? Thank you for helping me.
- Question from Jma

It's easy to transfer files using VNC. Simply open the VNC viewer and right-click on the VNC server on the computer you control. The icon is located in the system tray. Select "File Transfer" from the menu. However, many users will encounter problems when using VNC Viewer, such as VNC Viewer connection being rejected by the computer, VNC Viewer file transfer greyed out, and so on. How can I fix the VNC Viewer file transfer greyed out issue? You can discover the solution here, so don't worry.
How to fix VNC Viewer file transfer greyed out [4 solutions]
If you are experiencing VNC Viewer transfer files greyed out, there could be multiple reasons for this. These troubleshooting procedures should help you fix the problem.
Notes: VNC Viewer only supports file transfer on paid plans, please make sure you have purchased a paid plan and check if your subscription includes file transfer before proceeding with any action.
Solution 1. Check VNC Server settings
Causing the VNC Viewer file transfer send button is greyed out may be due to incorrect VNC Server settings. You need to check whether VNC Server file transfer permission is enabled.
Step 1. On your device, launch VNC Viewer.
Step 2. Then go to VNC Server "Options".
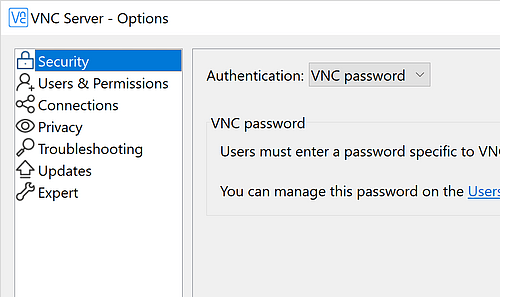
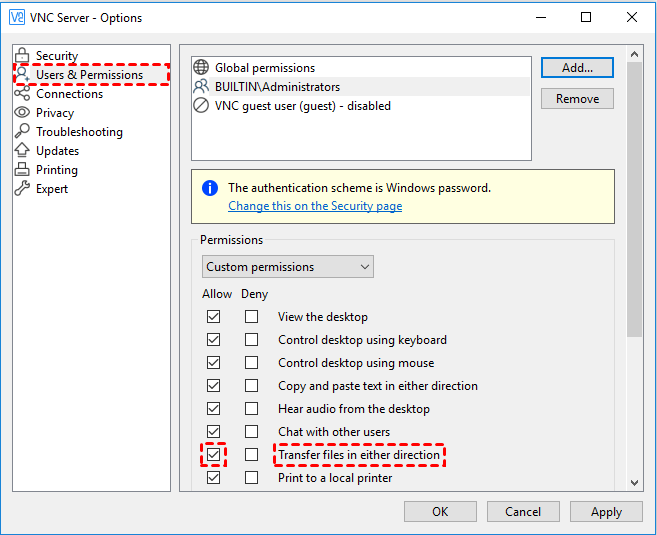
Step 3. Click on “Users & Permissions”, find “Transfer files” on the right and confirm that Transfer files permissions are turned on.
Solution 2. Update VNC Viewer
Make sure that both VNC Server and VNC Viewer are up to date. Outdated software can sometimes have compatibility issues that affect file transfer functionality.
Step 1. Open VNC Viewer on your device.
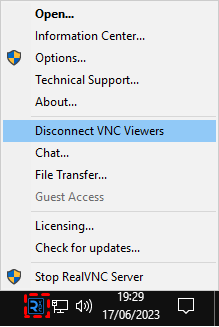
Step 2. Locate the VNC Viewer icon in the bottom right corner of your computer and right-click on the icon to open the menu.
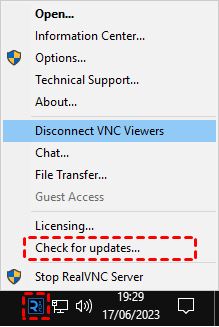
Step 3. Just select Check for Updates.
Step 4. If you check that there is a new version available for upgrade, please download and install it.
Solution 3. Restart the VNC Server and Viewer
If neither of these methods proves effective in addressing the VNC Viewer file transfer greyed out issue, it's advisable to initiate a restart of both the VNC server and VNC Viewer. This course of action involves refreshing the VNC Server and VNC Viewer to their original states, potentially rectifying any underlying issues or temporary glitches that could be responsible for the file transfer restrictions. By executing this procedure, you clear any temporary glitches or issues that might have accumulated during your usage, ensuring a smooth and optimal VNC experience.
Solution 4. Reinstall VNC Viewer
If restarting VNC Viewer does not work, there may be a problem with the VNC Viewer application. You can try reinstalling VNC Viewer to resolve the issue.
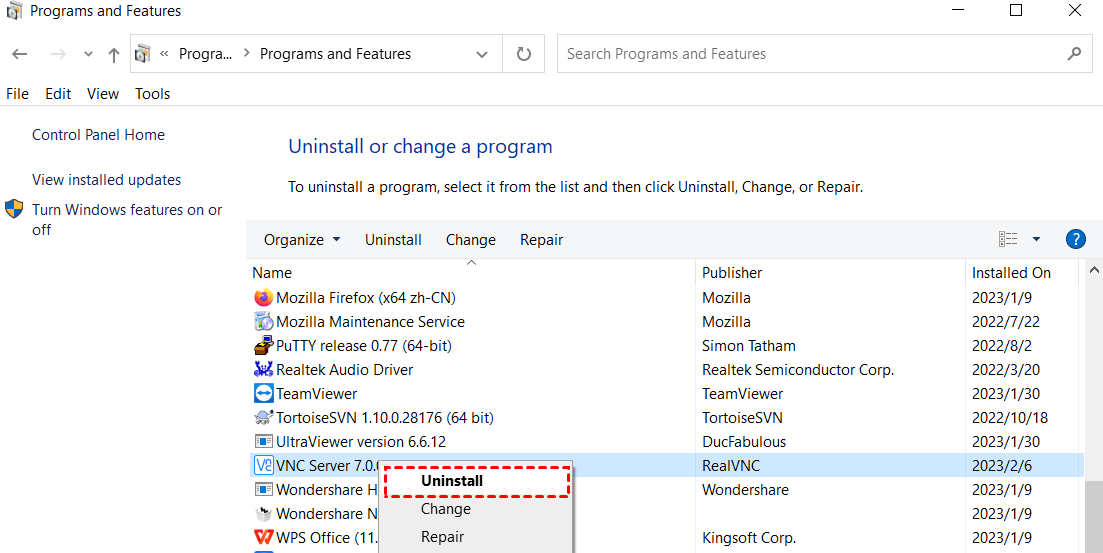
Step 1. Navigate to the "Control Panel," select "Uninstall a program," choose "VNC Server," and then right-click and select "Uninstall."
Step 2. Re-download and reinstall VNC from the official site. you can then try again to see if the problem is resolved.
AnyViewer: The best free VNC Viewer alternative for large file transfer
If the file transfer option is still greyed out after performing these steps and are tired of always encountering problems with VNC Viewer, it is highly recommended to explore alternatives to VNC Viewer. AnyViewer comes highly recommended as a professional and free file transfer tool with fast and easy transfer speeds and a large number of transferred files. It is popular among users for its fast, efficient, and convenient file transfer features.
Best of all, VNC Viewer is only available to users for a 14-day free trial, after which it must be purchased to continue using it. AnyViewer, on the other hand, offers a free plan for both personal use as well as business use. The free plan includes all the basics, which is enough to satisfy users' needs. The AnyViewer free plan allows users to transfer a number of files up to 100 at the same time. This is something that VNC Viewer cannot do.
On top of that, AnyViewer offers a range of great features, including one-click control, screen sharing, syncing remote sound, text chat, mirror iPhone screen, multi-monitor support, and more.
Download AnyViewer to start the fast file transfer experience!
Step 1. After installing and starting AnyViewer on both of your devices, go to “Log in” and click “Sign up” to create an AnyViewer account.

Step 2. Fill out the registration form to complete the new account creation and login to this account on all devices.

Step 3. Your device will be automatically associated with your account after all devices have successfully logged in to the same account.

Step 4. On your local device, go to “Device” and choose the target device, then click “File transfer”.

Tips: You can also choose “One-click control” for unattended remote access to another computer. To transfer files during a remote session, simply click the “File" button in the menu bar.

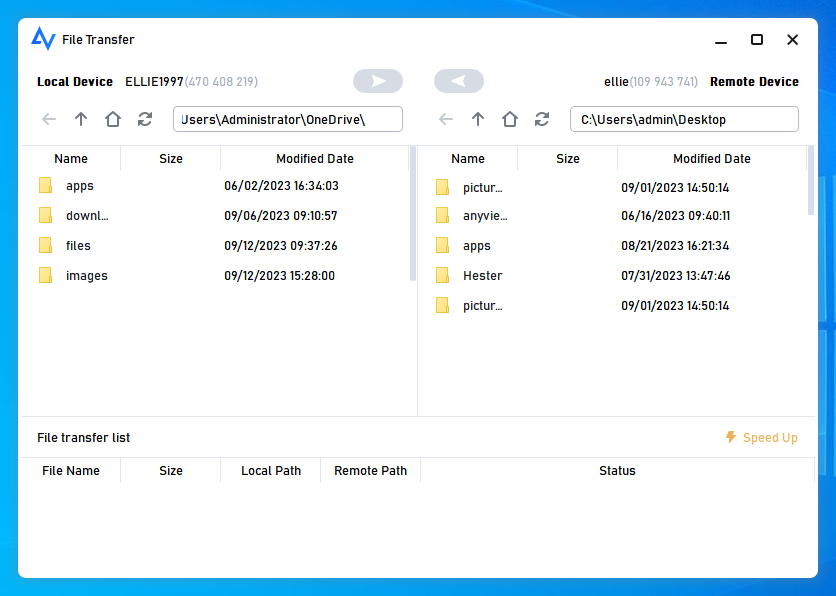
Step 5. The File Manager display has two panes. The left side displays the path to local computer files, while the right side shows the path to files on the remote computer. To transfer a file, simply select the file you want and use the arrow buttons to initiate the transfer.
- ★Tips: For faster file transfer speeds and larger file sizes, you can upgrade your account to a Professional or Enterprise plan, you can also get more benefits:
- Control more devices with one-click control to enable remote unattended access.
- Enjoy remote connection in Privacy Mode.
- One computer is capable of controlling an unlimited number of devices at the same time.
- Create groups for corporations to more efficiently handle huge numbers of devices.
- Enjoy higher image quality.
- ...
Conclusion
Apart from the fact that VNC Viewer file transfers are greyed out and distressing, the fact that it doesn't offer a free plan is also a headache for users. After reading this article, it is highly recommended to explore alternatives to VNC Viewer. AnyViewer will be your best choice. It helps you transfer files between computers faster and easier, regardless of the size. For a more convenient, swift, and secure file transfer experience, download and utilize AnyViewer today!
