
5 Tested Ways to Fix TeamViewer Sound Not Working
If you encounter the situation where you are unable to hear any sound from the remote computer while using TeamViewer for remote connections, there's no need to panic. This post provides five tested solutions to help you fix TeamViewer sound not working.
By Ellie / Updated on December 13, 2024
No sound from the remote computer, worked previously
I've been using the free version of TeamViewer to access my home computer for a while now. However, starting last week, I've been facing an issue where I can't hear any audio when I connect. I reached out to TeamViewer on Twitter about a week ago, but haven't received a response yet. So, I'm hoping that posting my problem here will help me find a solution.”
- Question from TeamViewer Community
How to fix the TeamViewer sound not working [5 methods]
When the TeamViewer sound not working, there are several settings that you can check to fix this issue.
Method 1. Enable the Play computer sounds and music
To address the TeamViewer audio not working issue, the first solution involves ensuring that the "Play computer sounds and music" setting is enabled. Follow these steps:
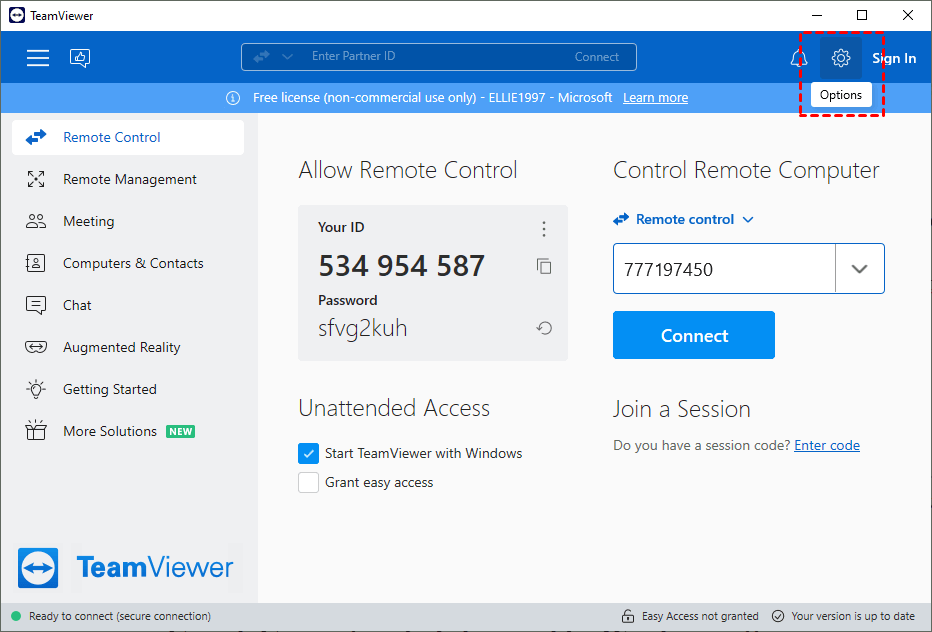
Step 1. Access the TeamViewer Options window.
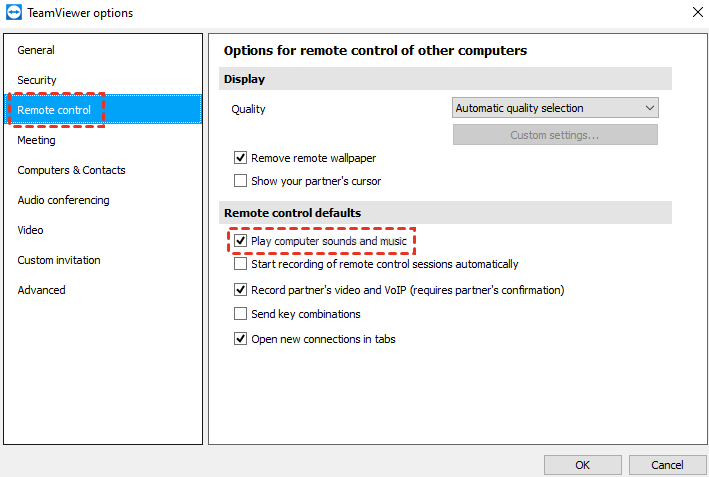
Step 2. Navigate to the Remote control section located on the left side of the window.
Step 3. On the right side of the pane, locate the Remote control defaults category.
Step 4. Verify that the "Play computer sounds and music" option is checked.
Method 2. Change the “Speakers” option
Another effective method to resolve the audio issue in TeamViewer is to modify the "Speakers" option, despite its misleading placement and labeling. Contrary to expectations, this setting governs not only the remote device's microphone input but also the playback of all sounds originating from it.
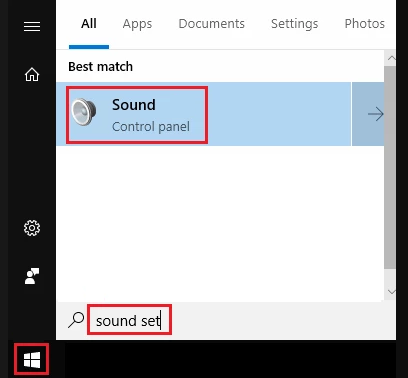
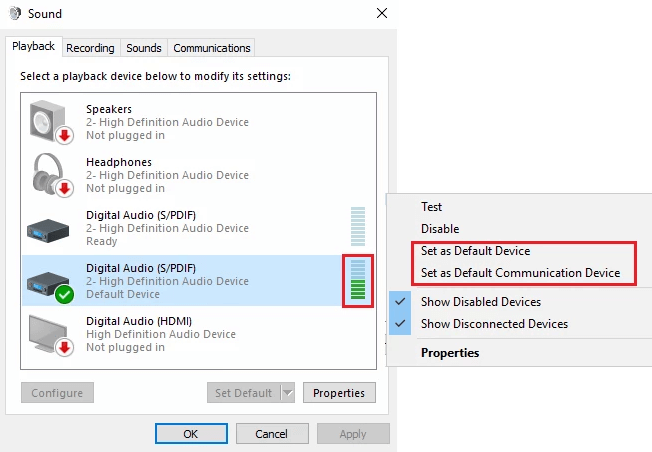
Step 1. Open the Windows Start menu on your local computer, type "sound set," and select "Sound."
Step 2. Check the Playback tab to identify the device playing your music. Right-click it to confirm it's the Default Device and Default Communication Device.
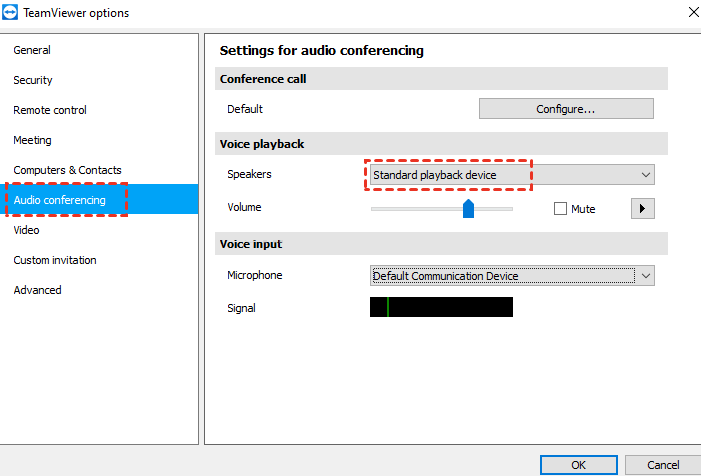
Step 3. On your remote computer, right-click the TeamViewer icon and choose "Options."
Step 4. In the Options menu, go to "Audio conferencing," select "Standard playback device" as your Speakers, and max out the volume slider.
Step 5. Repeat steps 4 and 5 on your local computer to ensure matching Audio conferencing settings on both ends. Now, your audio should work seamlessly.
Method 3. Check “Computer sound”
To ensure that the remote sound in TeamViewer is functioning properly, it is important to verify that the "Computer sound" option is enabled on both ends of the connection. This may cause the TeamViewer remote sound not working.
Step 1. Initiate a remote session using TeamViewer.
Step 2. Once the session is established, locate the toolbar at the top of the screen.
Step 3. Under the "Communicate" section of the toolbar, ensure that the checkbox for "Computer sound" is checked, indicated by a checkmark.

Method 4. Upgrade to the newest version
Keeping your TeamViewer client up-to-date is crucial as using an outdated version can lead to various issues. To ensure smooth functioning, it is recommended to regularly check for the latest releases from TeamViewer's official website. Follow these steps to check for updates and install them if available:
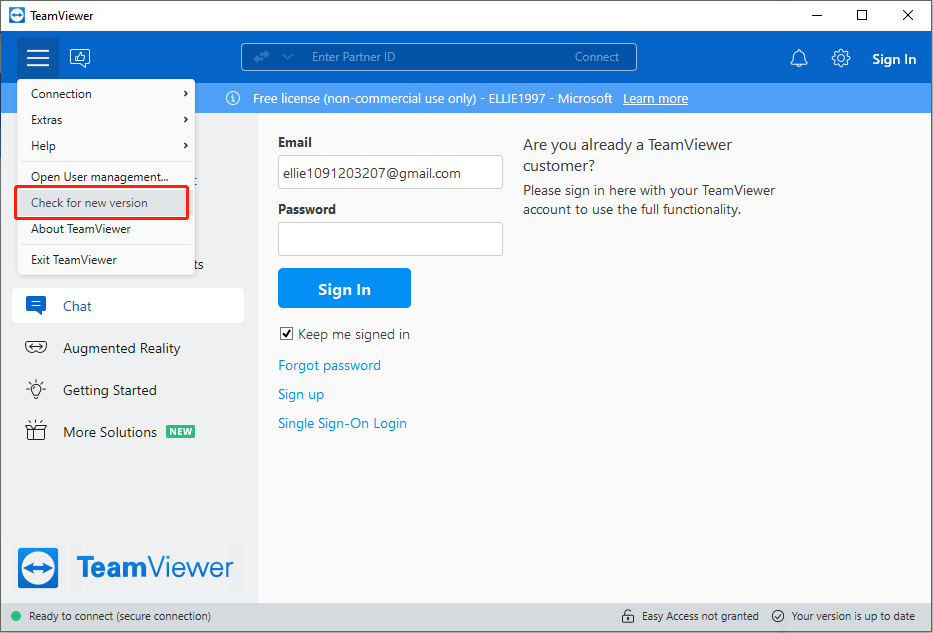
Step 1. Click on the menu icon within the TeamViewer application.
Step 2. From the menu options, select the "Check for new version" feature.
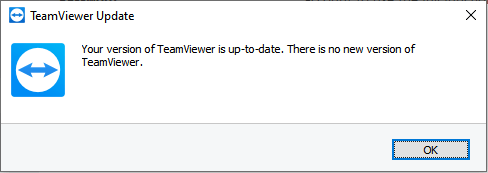
Step 3. The application will now verify if your current version is up-to-date. If updates are available, proceed with downloading and installing the latest version provided by TeamViewer.
Method 5. Try a TeamViewer alternative
If you've been struggling with sound issues while using TeamViewer, it might be time to consider alternative remote desktop software that can offer a more seamless audio experience. Here's the best option.
AnyViewer is a popular free remote desktop application known for its high-speed performance. It boasts low latency and excellent audio quality, making it a suitable choice for those seeking an alternative to TeamViewer's sound issues. AnyViewer offers a free version for both personal and commercial uses, while TeamViewer restricts free usage to personal use only.
Step 1. Install AnyViewer on your chosen devices.
Step 2. Establish the foundational setup by registering and logging in with the same account on both devices.

Step 3. On your local device, locate the target remote computer listed under Devices and initiate connections effortlessly using the One-click control feature.

Step 4. To enable remote sound, make sure sound is activated in the toolbar.

- ★Tips:
- Unlock a host of additional benefits by upgrading to a Professional or Enterprise plan, including:
- Increased device allocation for simplified one-click control.
- Enhanced file transfer speeds for efficiency.
- Secure connections with privacy mode to safeguard your data.
- High-quality image rendering for an immersive remote experience.
- Efficient device management through group creation in an enterprise context.
- And a plethora of other advanced features to meet your diverse remote desktop needs.
The bottom line
While TeamViewer is a widely used remote desktop solution, it may not always provide the best audio experience, which can be frustrating for users dealing with sound-related issues during remote sessions. After diligently following the provided solutions, the TeamViewer sound not working issue is expected to be successfully resolved.
If you ever want a TeamViewer alternative, it is highly recommended to choose AnyViewer. It serves as an excellent free remote desktop software choice due to its comprehensive features and capabilities. Notably, AnyViewer stands out for providing free remote desktop functionality.
