
2025 Guide to TeamViewer Screen Share [PCs & Phones]
For those eager to learn how to utilize TeamViewer screen share, this article provides a thorough tutorial. Moreover, it introduces a simple and free alternative, ensuring a hassle-free screen-sharing experience. Keep reading to unlock the secrets of seamless share screen on TeamViewer.
By Carolyn / Updated on December 13, 2024
How do I share screen with TeamViewer?
In today's interconnected world, seamless collaboration is key to productivity and success. TeamViewer, a leading remote access and support solution, takes collaboration to the next level with its powerful screen sharing feature. Whether you're working remotely, providing technical support, or conducting virtual meetings, TeamViewer's screen share functionality empowers users to share their desktops with colleagues or clients in real time.

However many users have a lot of confusion when using TeamViewer, such as how to use TeamViewer screen share, how to deal with TeamViewer blurry screen, etc. But don’t worry, this article will answer your first question and guide you through the steps to initiate share screen on TeamViewer.
How to use TeamViewer screen share
TeamViewer's screen sharing feature enables users to broadcast their desktop or a specific application window to a remote device. This real-time sharing facilitates collaboration, troubleshooting, and presentations, eliminating the barriers of physical distance.
How to share screen with TeamViewer? Don’t worry, this article is here to provide you with a guide on sharing both your computer and mobile screens. Read on to master this skill.
Sharing your screen with TeamViewer is a straightforward process, and the operational steps for both Windows and Mac are identical. After granting the necessary permissions, please follow the steps below. This article will use sharing the Windows screen as an example.
Step 1. Download TeamViewer on your device, selecting the purpose (business or personal) during installation.

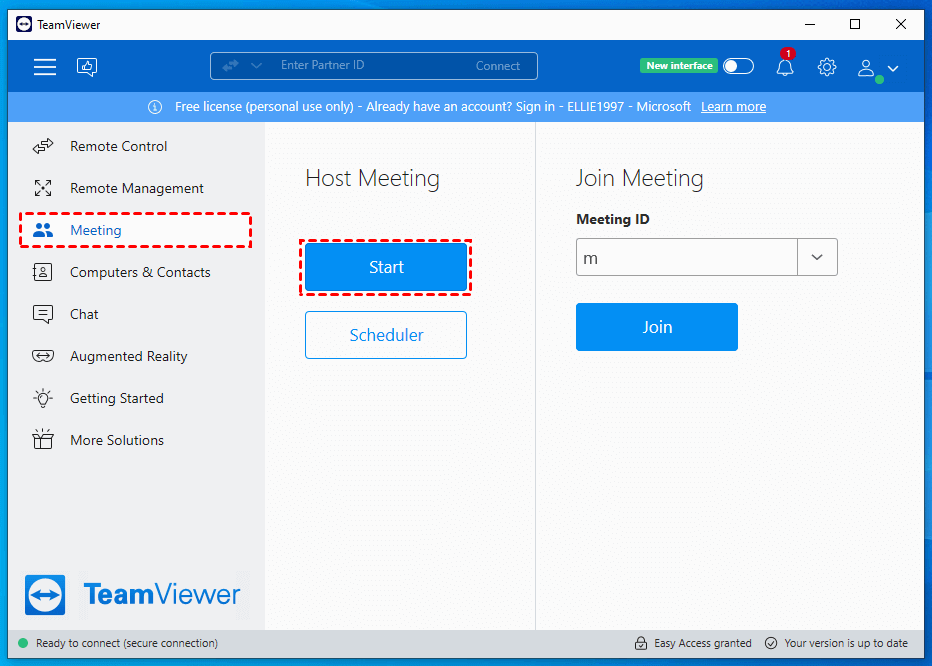
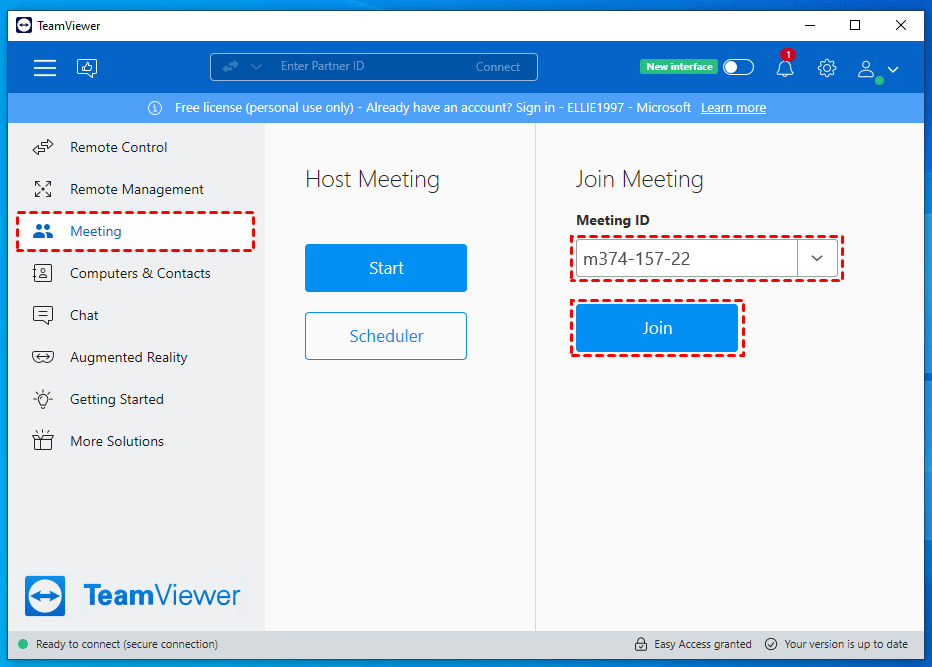
Step 2. After logging into your TeamViewer account, navigate to the left side of the main interface on your client computer. Click "Meeting" and click “Start” to start a new meeting.
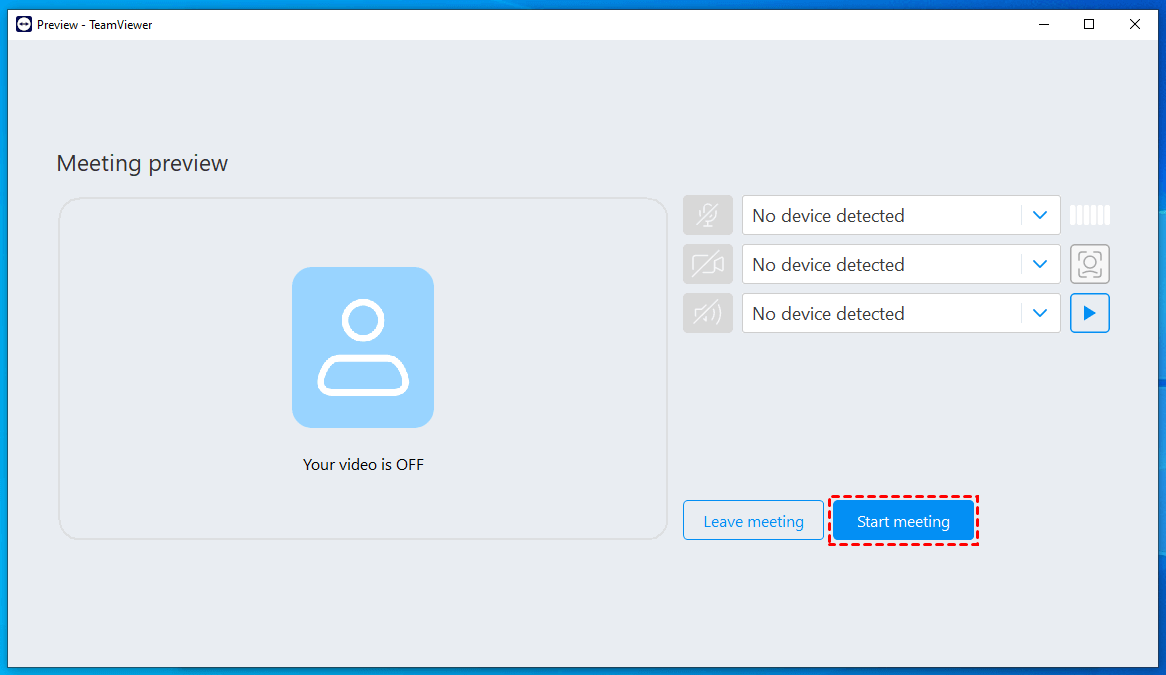
Step 3. After turning it on, you can choose whether to turn on the microphone, camera and other operations on the right side. After setting up, click "Start Meeting".
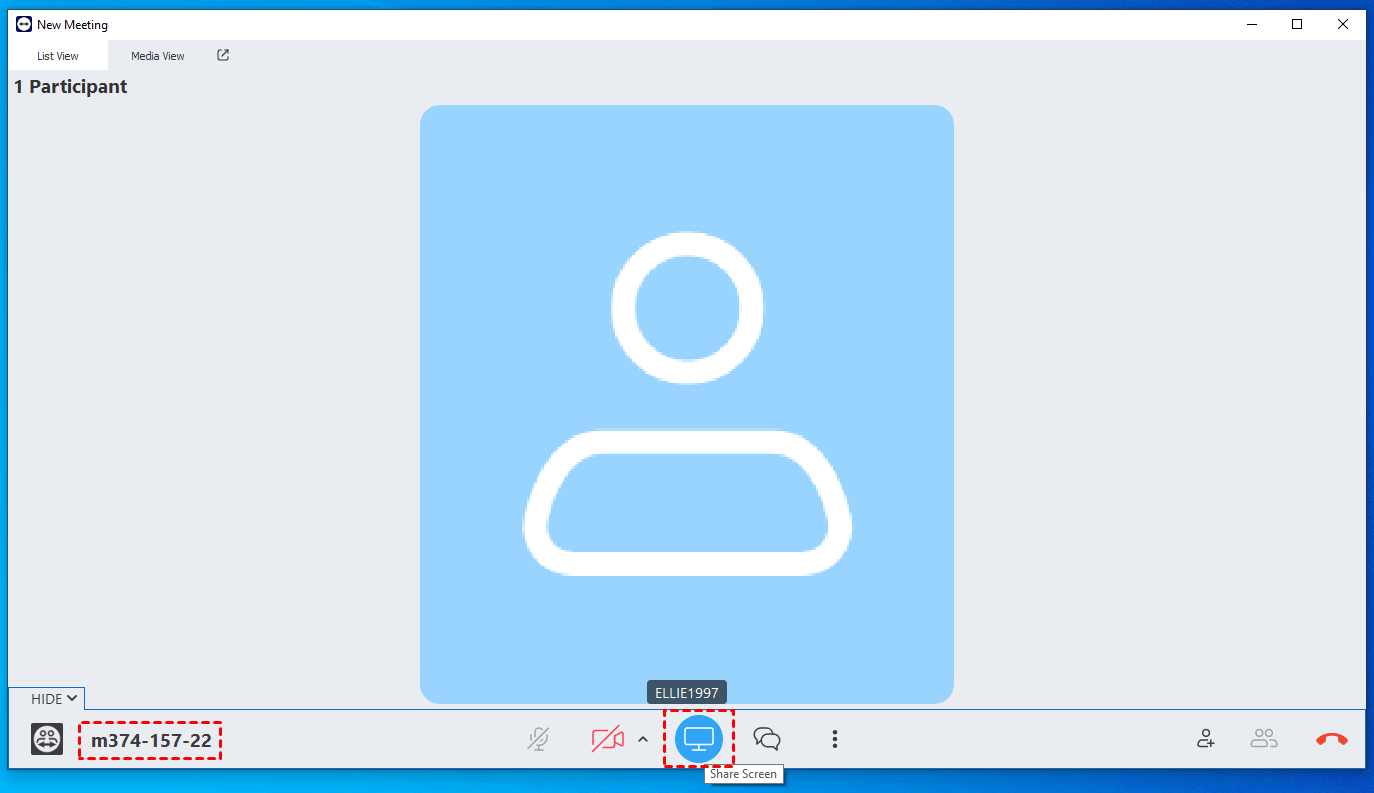
Step 4. After starting a meeting, the meeting ID will appear in the lower left corner. You need to share this ID with the device you want to share the screen with. Click the "Share Screen" computer icon in the middle.
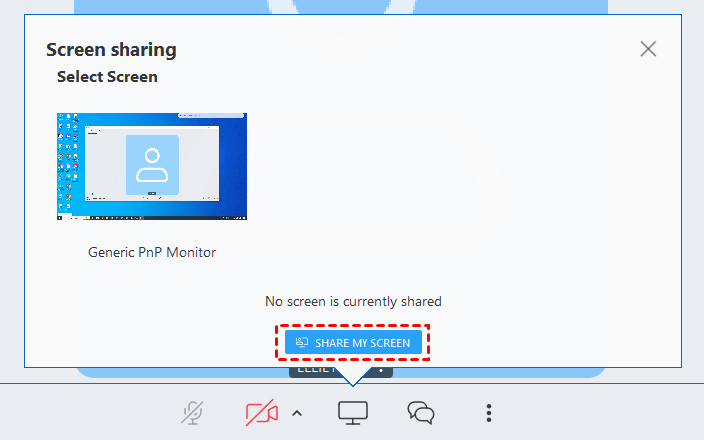
Step 5. Then, select the screen you want to share and click "Share my screen".
Step 6. On the other device, enter the meeting ID provided and click "Join".
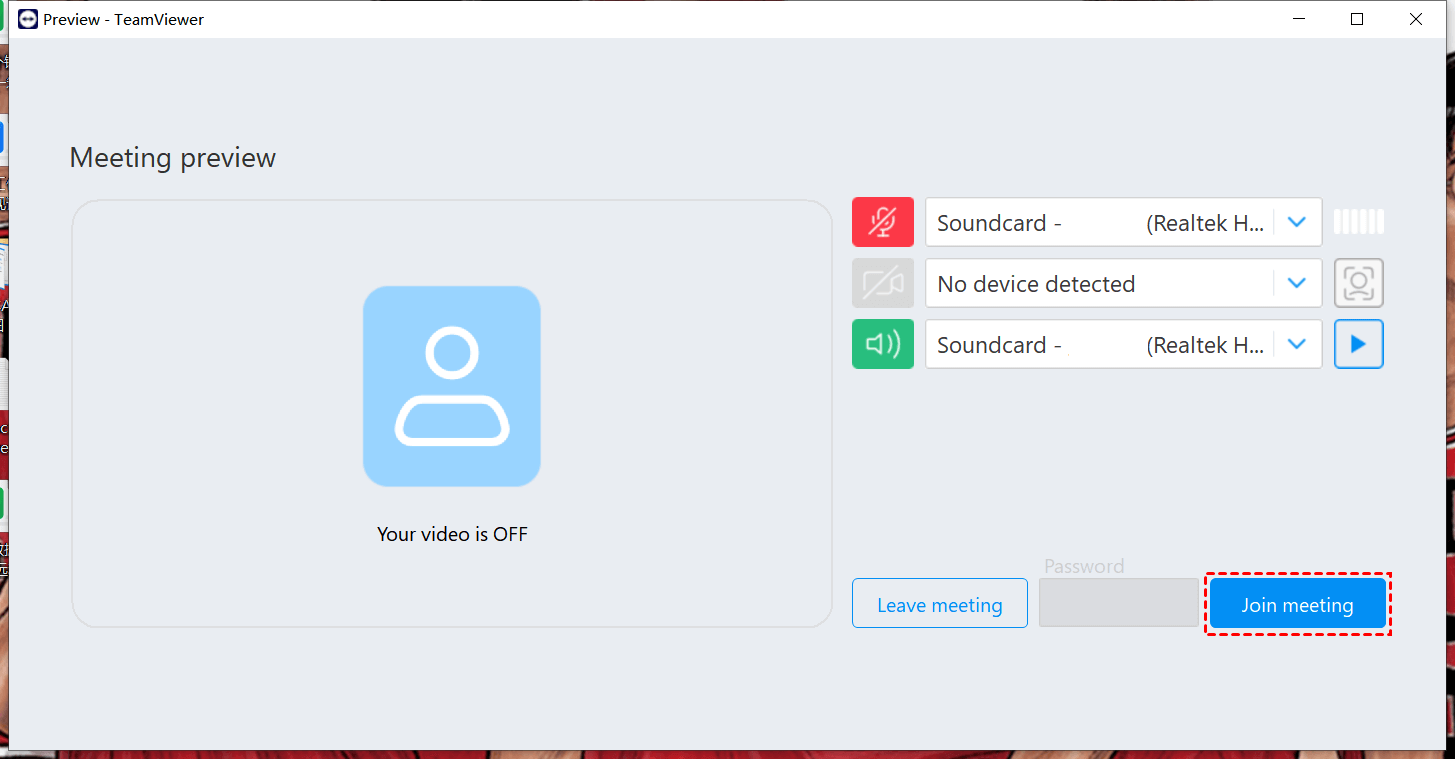
Step 7. After clicking Join, you can also select the microphone and speakers. Then click "Join Meeting."
Step 8. Now the remote side can view your shared screen.

AnyViewre: Best free TeamViewer alternative for screen share
AnyViewer emerges as a highly recommended solution—a secure, potent, and free screen-sharing software that streamlines the sharing process between your phone and PC, as well as between PCs, regardless of your location. Essentially, it empowers you to project your phone screen to your PC remotely and wirelessly, facilitating the sharing of your PC screen with your phone or another PC, transcending geographical constraints.
It stands out as the premier TeamViewer alternative for the following reasons:
- Free. AnyViewer provides an extensive free plan, laden with diverse additional features suitable for both personal and commercial usage. Furthermore, the connection speed is notably swift.
- High compatibility. AnyViewer exhibits high compatibility, catering not only to a range of Windows versions, including Windows 11/10/8.1/8 and Windows Server 2022/2019/2016/2012 R2 but also extending support to Android and iOS systems.
- Flexible connection methods. With flexible connection methods, users can request remote control through a control request or establish unattended remote access by entering a security code.
- High security. To ensure the security of your data during remote sessions, AnyViewer employs Elliptic Curve Cryptography (ECC) encryption technology, complemented by two-factor authentication.
- Easy to use. Featuring an intuitive and concise interface, AnyViewer prioritizes user-friendliness, steering clear of complicated operations and a steep learning curve, ensuring a seamless and straightforward starting experience.
- Efficient. Positioned as an all-in-one software, AnyViewer goes beyond basic functionality, offering an array of practical features including quick operation, screen sharing, text chat and more. These attributes collectively contribute to enhancing remote work efficiency.
Now let us take a look at how to use AnyViewr for screen sharing. The following will introduce you to the steps using Windows and iPhone as examples.
Part 1. Share Windows screen
Sharing your Windows screen using AnyViewer is easy, follow these steps:
Step 1. Initiate the process by downloading, installing, and launching AnyViewer on your respective devices. When prompted to "log in", choose "Sign up."

Step 2. Fill out the registration form to create a new account, ensuring you use the same account to log in on both devices.

Step 3. Upon successful login, your devices will be automatically associated with the same account.

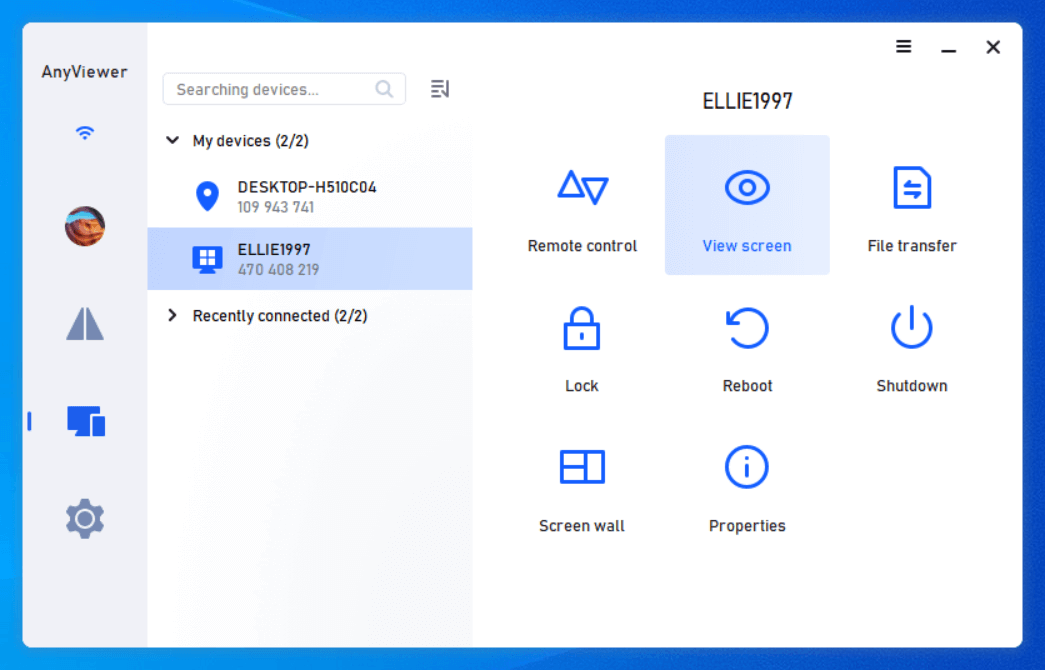
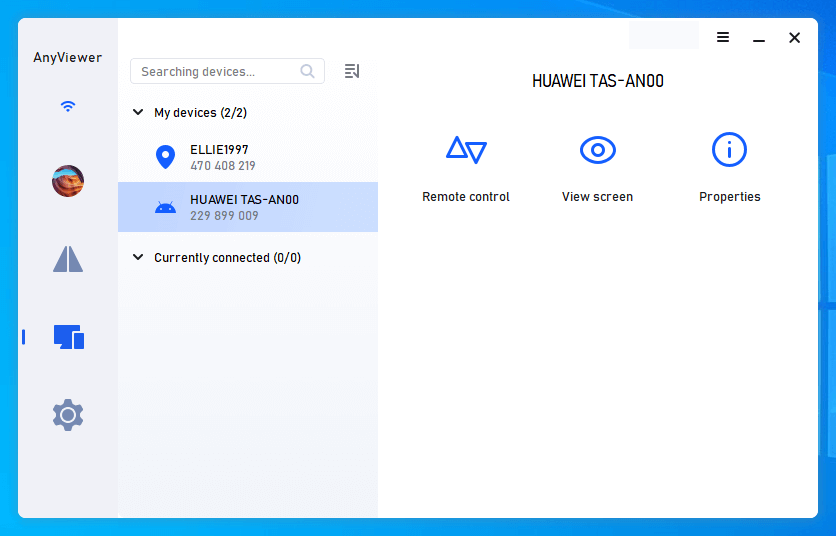
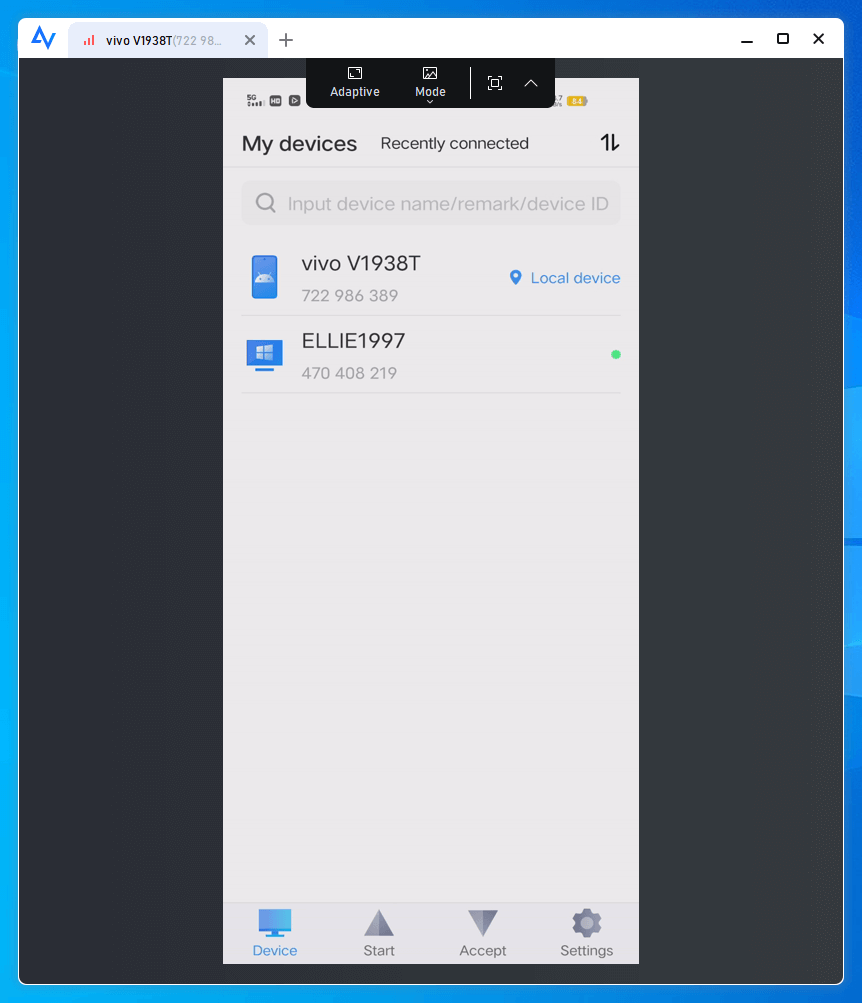
Step 4. On the local Windows, navigate to "Device," select the target device, and click "View screen" to initiate the screen viewing of the remote Windows.
Part 2. Share iPhone screen
Beyond facilitating sharing between computers, AnyViewer further extends its functionality to support sharing an iPhone and Android screen with a Windows device. Because the steps for iPhone and Android are similar. So, the subsequent steps delineate how to share your iPhone screen with a Windows device. The preparation steps remain consistent with those outlined above: create an account and log into the same account on both your Windows computer and your iPhone.
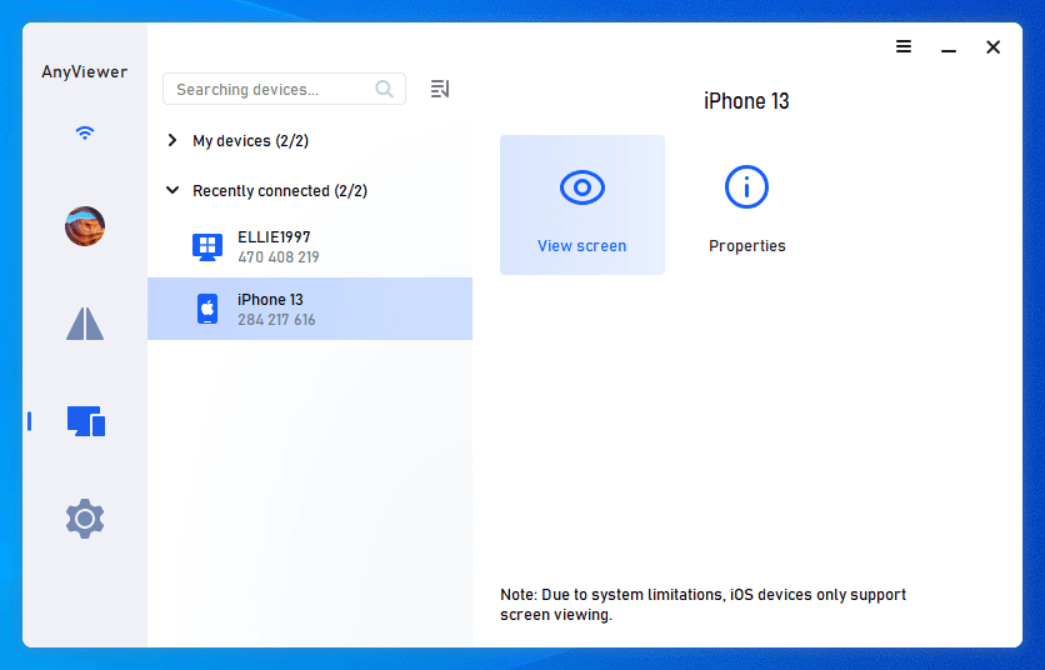
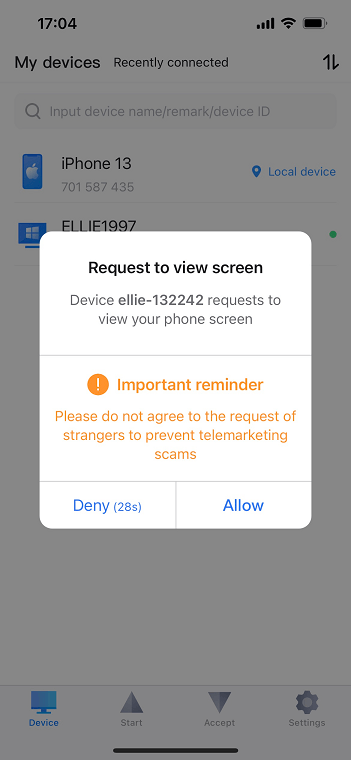
Step 1. Upon successfully logging into your account on your iPhone, on your computer, locate your iPhone in the list, and initiate screen viewing by clicking on "View screen."
Step 2. On your iPhone, grant permission by tapping "Allow" when prompted, enabling the sharing of the screen.
Step 3. Initiate the screen-sharing process on your iPhone by clicking "Start Broadcast."
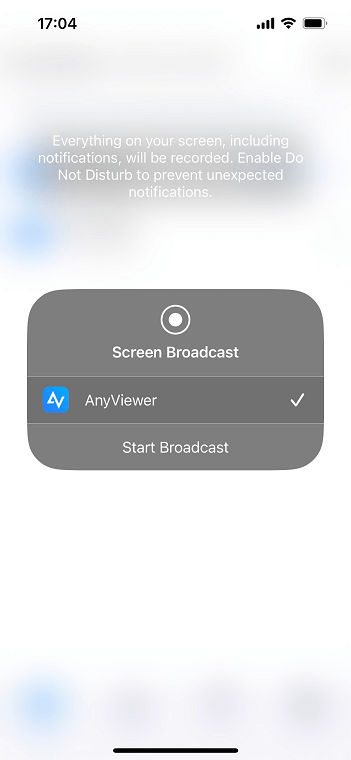
Step 4. Enjoy the convenience of remotely viewing your iPhone screen on your computer. If necessary, adjust the image quality using the toolbar. Explore the simplicity and efficiency of AnyViewer's screen-sharing features.
- ★Tips: To expand your remote screen viewing capabilities and access more iPhone devices, contemplate upgrading your account to a Professional or Enterprise plan.
Part 3. Share Android screen
How to use AnyViewer to share Android screen? The operation is very simple. The preparation to start is the same as before. After logging in to the account on both devices, please follow the steps below.
Step 1. On your computer interface, navigate to the "Device" section. Identify the specific Android device you want to control and select the "View screen" feature.
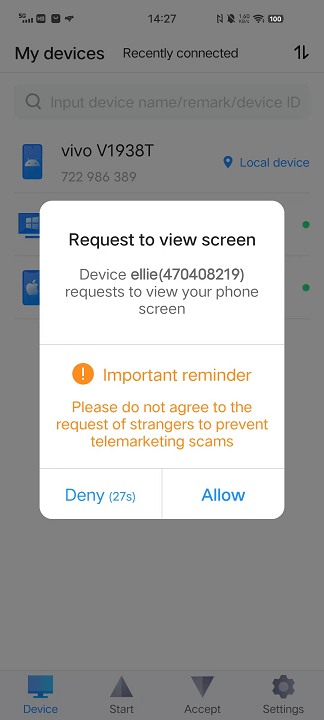
Step 2. On your Android phone, grant authorization for the remote control request to establish the connection.
Step 3. With this configured setup, you now can view your Android device directly from your PC.
Conclusion
Wondering how to use TeamViewer for screen sharing? By adhering to these steps, you can adeptly navigate the screen-sharing process on TeamViewer, bolstering your capacity to collaborate, present, and access remote systems effectively. Whether you're a seasoned professional or new to online collaboration, harnessing TeamViewer's screen-sharing feature unlocks a realm of possibilities for seamless communication and collaboration.
