
How to Configure Remote Desktop Users Group Permissions
This post offers a complete guide on configuring Remote Desktop Users group permissions. If you're looking for an easier method to manage user group permissions for remote access, this post presents a better solution.
By Ellie / Updated on December 13, 2024
What is the Remote Desktop Users group?
The Remote Desktop Users group is a built-in group in Windows operating systems that grants its members the permissions needed to establish remote desktop sessions. By adding users to this group, administrators can control who is allowed to connect to the system remotely.
Group permissions play a pivotal role in ensuring that only authorized individuals have remote access to critical systems. Properly configured permissions help maintain security, preventing unauthorized access, and ensuring that users have the appropriate level of access needed to perform their tasks.
Default Remote Desktop Users group permissions of members
Members of the Remote Desktop Users group typically have the default permissions necessary to remotely connect to a computer via Remote Desktop Protocol (RDP), but they do not have administrative privileges on the system. By default, Remote Desktop Users group permissions of members are listed as follows:
- Remote logon rights: Allows users to log on to the system remotely.
- User profile access: Grants access to their user profiles and home directories.
- Application execution: Enables users to run applications installed on the remote system.
4 ways to configure Remote Desktop Users group
Remote Desktop Users group management can be handled in various ways. The following options outline several common methods for adding a new member to the Remote Desktop Users group:
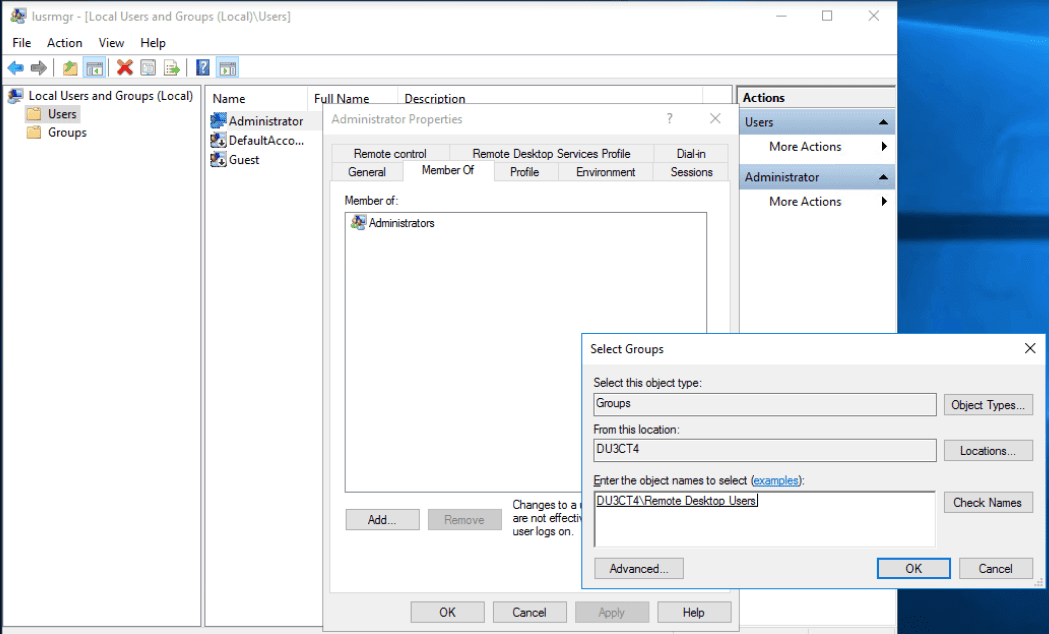
Option 1. Adding a user to Remote Desktop Users group via Users folder
Step 1. Open the “Local Users and Groups” interface by clicking on the “Start” menu> typing "lusrmgr.msc" in the search bar > pressing “Enter”. In the left pane, select "Users."
Step 2. Double-click on the user you want to add to the Remote Desktop Users group.
Step 3. In the User's Properties window, go to the "Member Of" tab.
Step 4. Click the "Add..." button, then enter the user name into the provided text box, and finally confirm the action by selecting "OK".
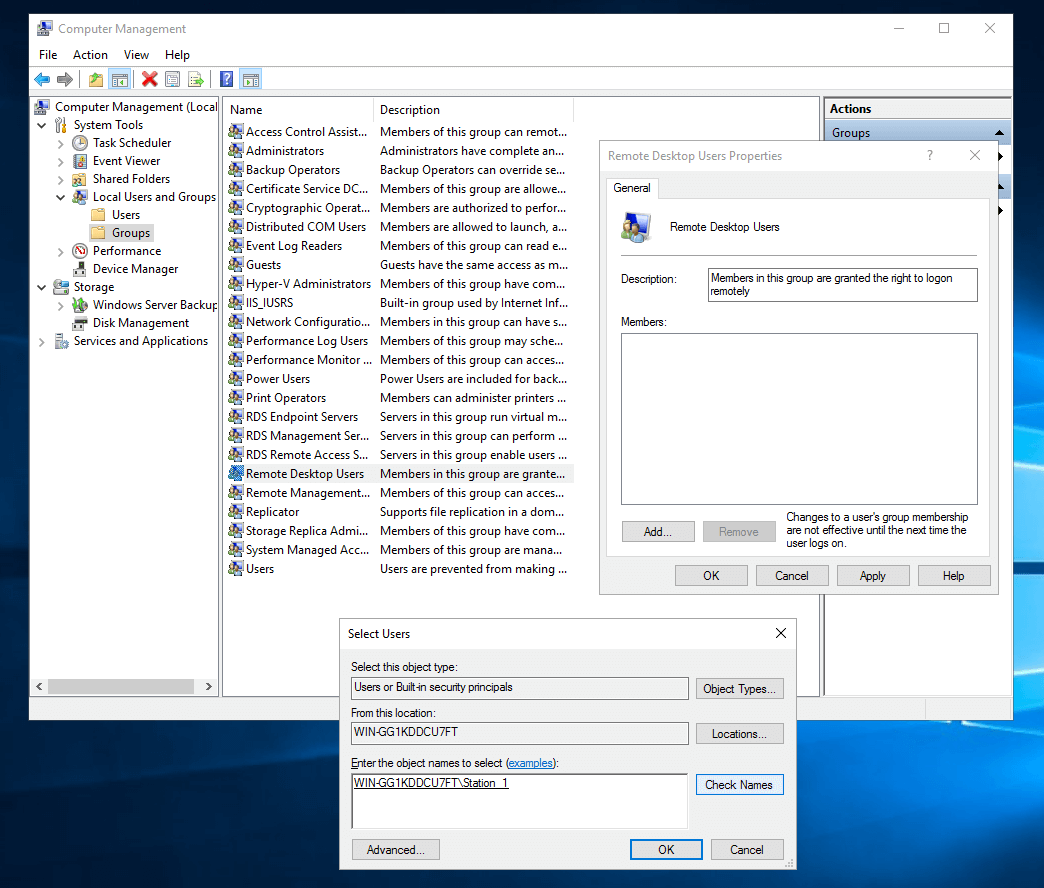
Option 2. Adding a user to Remote Desktop Users group via Groups folder
Step 1. Right-click the “Start” menu and choose “Computer Management”.
Step 2. In the Computer Management window click on "Local Users and Groups" right-click the "Groups" folder and double-click “Remote Desktop Users Group”.
Step 3. Click on the "Add..." button.
Step 4. Following that, within the Select Users window, you'll input the name of the session you've recently established into the designated field. Proceed by clicking "Check Names" adjacent to it, whereby the name will be underscored to denote successful identification and acceptance of the user.
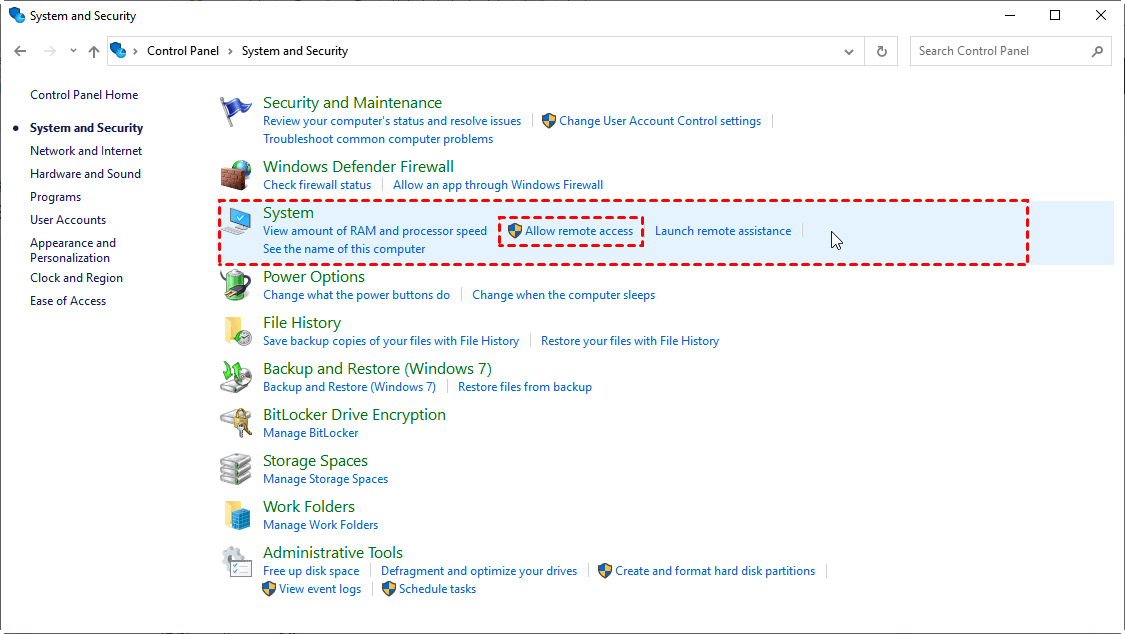
Option 3. Adding a user to Remote Desktop Users group via system settings
Step 1. To configure Remote Desktop Users group permissions on Windows 10 and 11, click the “Start” menu from your desktop, and then click “Control Panel”.
Step 2. Click “System and Security” once the Control Panel opens.
Step 3. Click “Allow remote access”, located under the “System” tab.
Step 4. Navigate to the "Remote" tab and locate the "Remote Desktop" section. Within this section, click on "Select Users".
Step 5. Click “Add” from the System Properties box.
Step 6. Input the user's name into the provided text box, then proceed by clicking "OK".

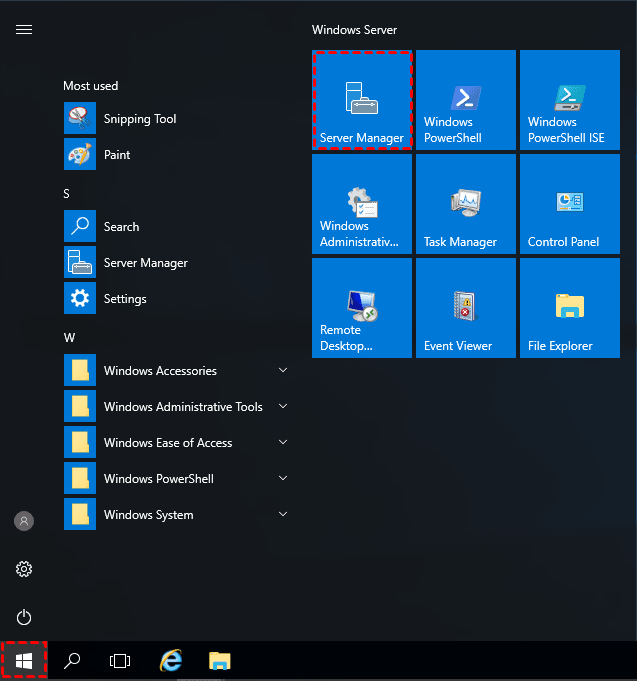
Option 4. Adding a user to Remote Desktop Users group via Server Manager
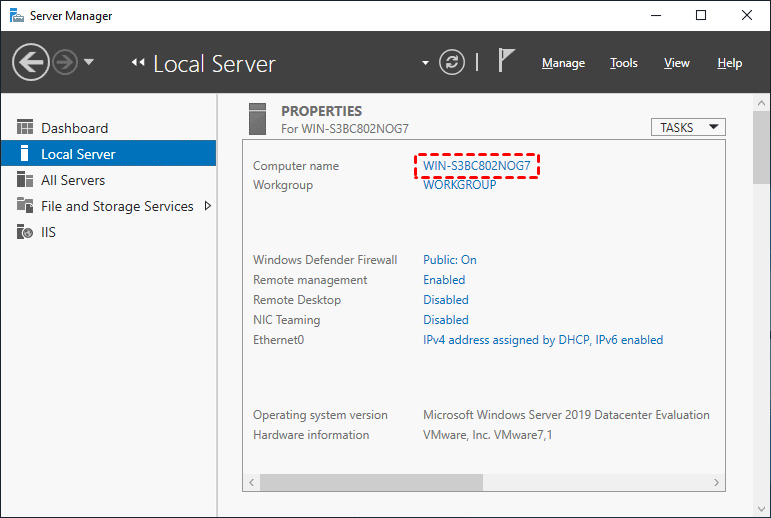
Step 1. To configure Remote Desktop Users group permissions on Windows Server 2019 and 2022, click on the "Start" menu. Search for "Server Manager" and open it.
Step 2. Select "Local Server" from the left pane.
Step 3. Click the blue text next to "Computer Name."
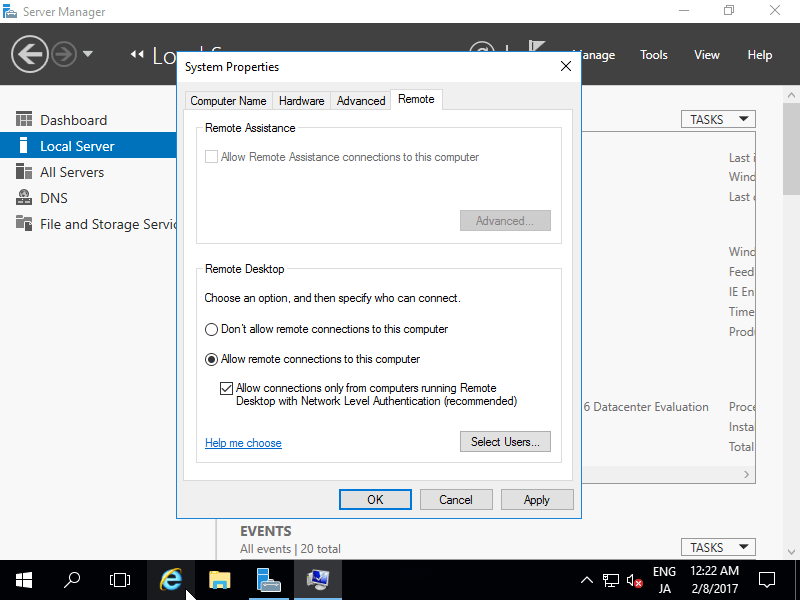
Step 4. Access the "Remote" tab, and then select the "Select Users..." button.
Step 5. Click the "Add" button.
Step 6. Enter the user's name in the text box and click "OK".
Bonus tip: Better way to manage remote desktop users group permissions
AnyViewer is a comprehensive remote access and remote control software that allows users to connect to and control computers and devices from anywhere in the world. It is widely used for a variety of purposes, including technical support, remote administration, and collaborative work.
AnyViewer allows you to group users and assign role permission with ease. Administrators can create sub-account role groups for employees at various levels and assign specific permissions to each group. This feature is particularly useful in scenarios where you need to restrict sub-accounts under different roles to access and operate only certain functions, thereby preventing unauthorized access and potential data breaches.
Here are the steps to go:
Step 1. Start by downloading and installing AnyViewer on your main computer and sign up for an account.

Step 2. The role permission management feature is exclusive to AnyViewer Enterprise Edition, please upgrade your account after registering.
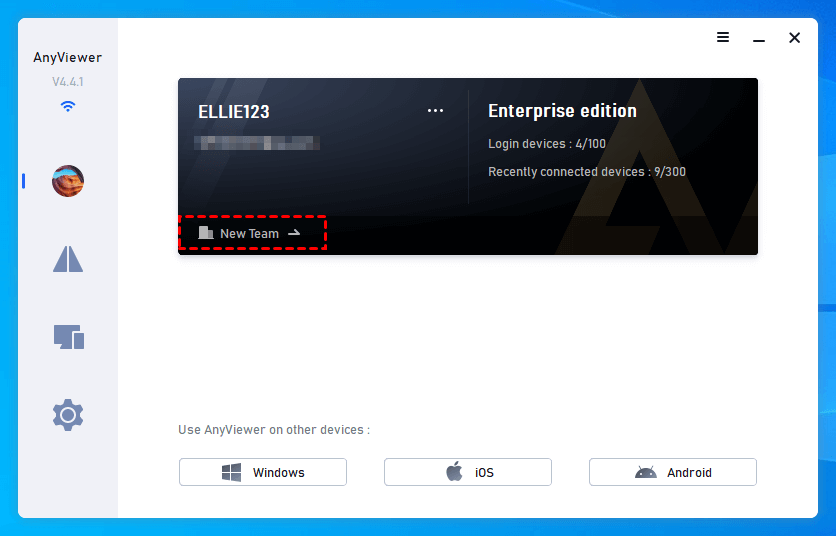
Step 3. On your main computer, click "New Team".
Step 4. Click “Role Permission” > “Create new role”.
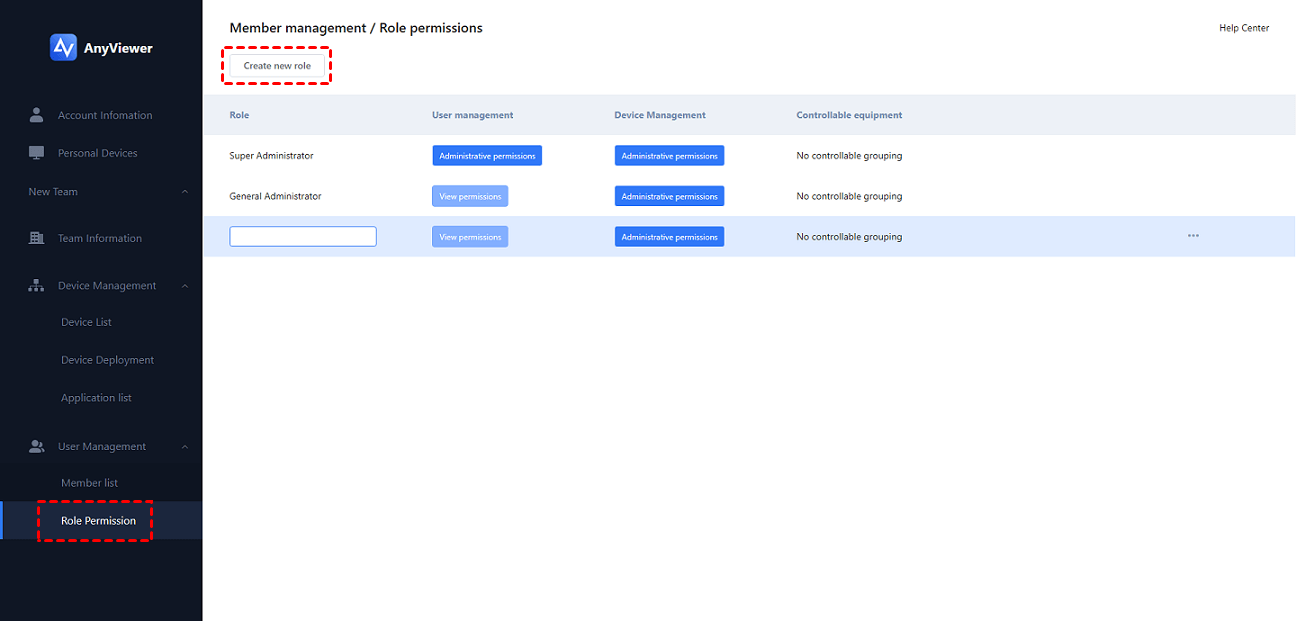
Step 5. After creating the new role, choose “Edit permission settings”.
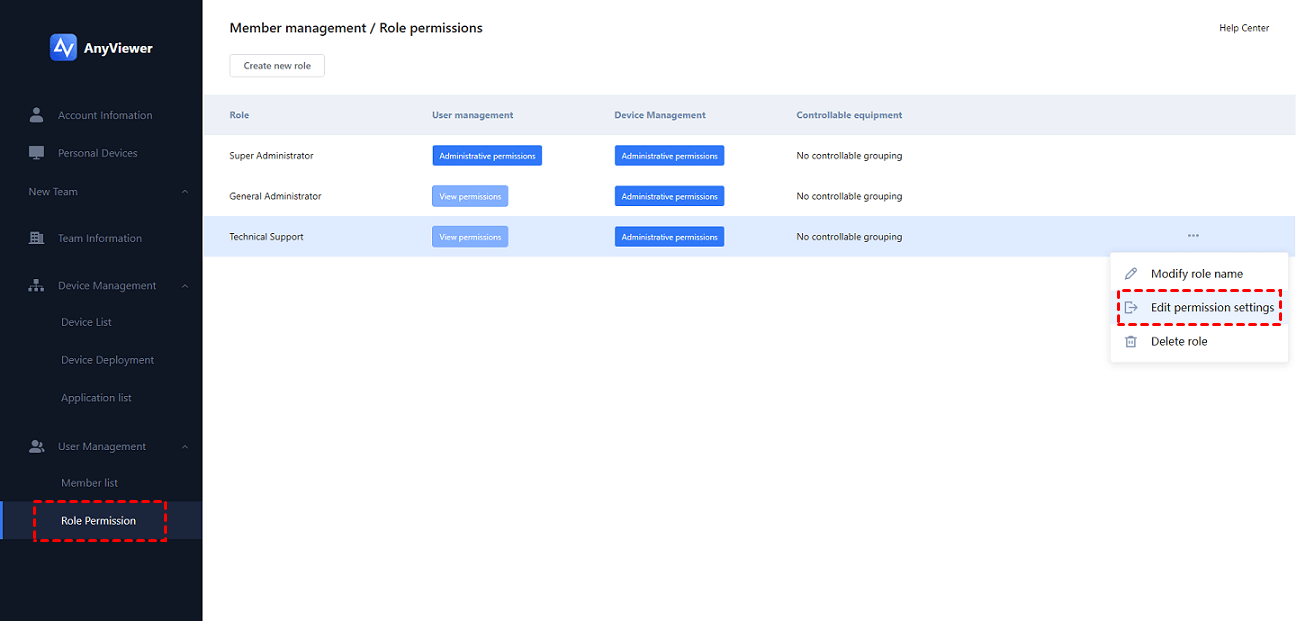
Step 6. You can assign permissions for the role you create.
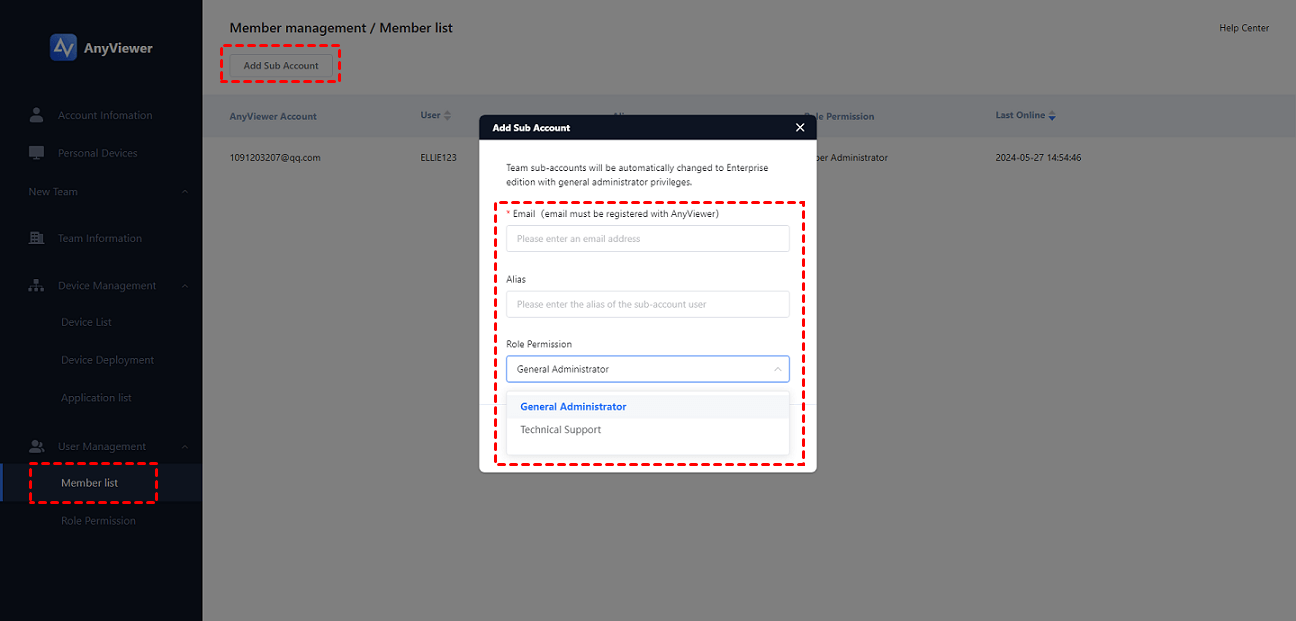
Step 7. Go to “Member list” > “Add Sub Account” > fill in the information needed. This is how you configure different role permissions for sub-accounts.
- ★Tips:
- The AnyViewer Enterprise Edition offers more features such as unlimited concurrent remote sessions, Mass Deployment (MSI), creating groups for computers, etc.
The bottom line
In conclusion, mastering the configuration of Remote Desktop Users group permissions is essential for effective remote access management. This guide has outlined multiple methods for adding users to this group, empowering administrators to control access with precision.
Additionally, leveraging tools like AnyViewer streamlines the process, offering advanced features for role-based permission management. By implementing these strategies, organizations can enhance security, streamline administration, and ensure that remote users have the necessary access tailored to their roles, ultimately facilitating seamless and secure remote connections.
