
Easily Fixed: Remote Desktop Options Greyed Out [2 Solutions]
This post explains why Remote Desktop options greyed out on Windows 10/8/7 and the latest Windows 11 and also shows how to solve the issue.
By Ellie / Updated on December 26, 2025
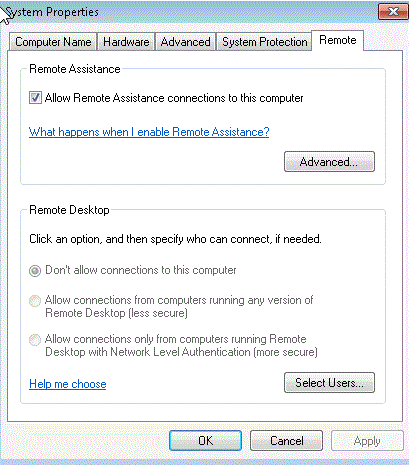
Remote Desktop options greyed out in Windows 10
I have my computer to Windows 10 recently. But something went wrong. When I try to change the settings to allow remote connections on Remote Desktop, both options are greyed out. I can't change the RDP settings. What can I do to allow connections to the Windows computer? "
- Question from a user
Why are the Remote Desktop options greyed out?
Many users know it's necessary to enable Remote Desktop before accessing the computer using the Remote Desktop client application. However, sometimes, just like the scenario described, you find Remote Desktop Settings greyed out. The “Allow remote connections to this computer” option is invariable and by default, and the“Don’t allow remote connections to this computer” option is invariable and checked. This almost probably happens due to the Policy settings.
How to fix Remote Desktop greyed out [2 solutions]
To fix the Remote Desktop options greyed out issue on Windows 10/8.1/8/7 and Windows 11 for remote connection successfully, two solutions are posted below.
Solution 1. Enable Remote Desktop greyed out group policy
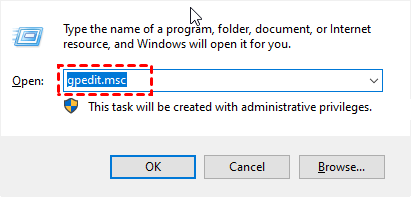
Step 1. Press Win + R and then type in “gpedit.msc” to open the Local Group Policy Editor.
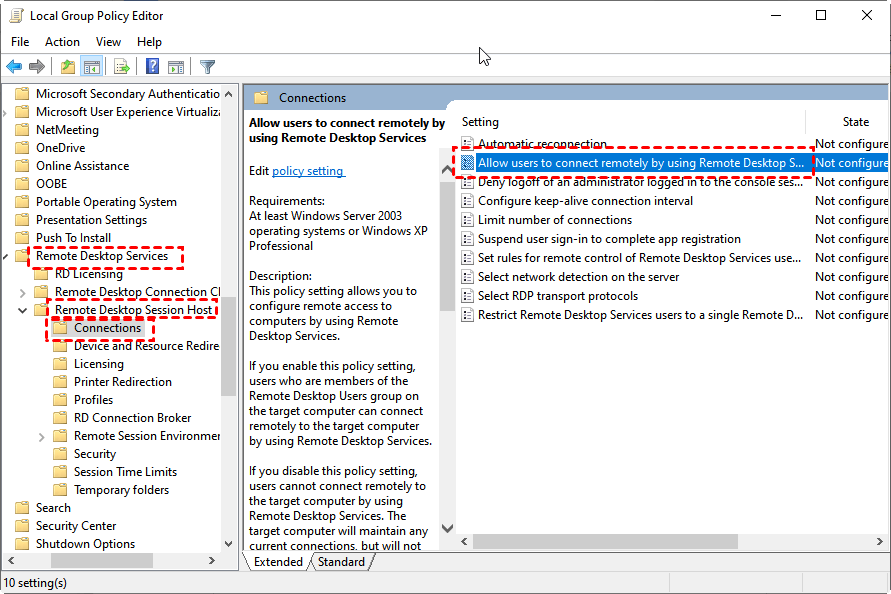
Step 2. Navigate here: Computer configuration > Administrative Templates > Windows Components > Remote Desktop Services > Remote Desktop Session Host > Connections. Locate and double-click Allow users to connect remotely using Terminal Services.
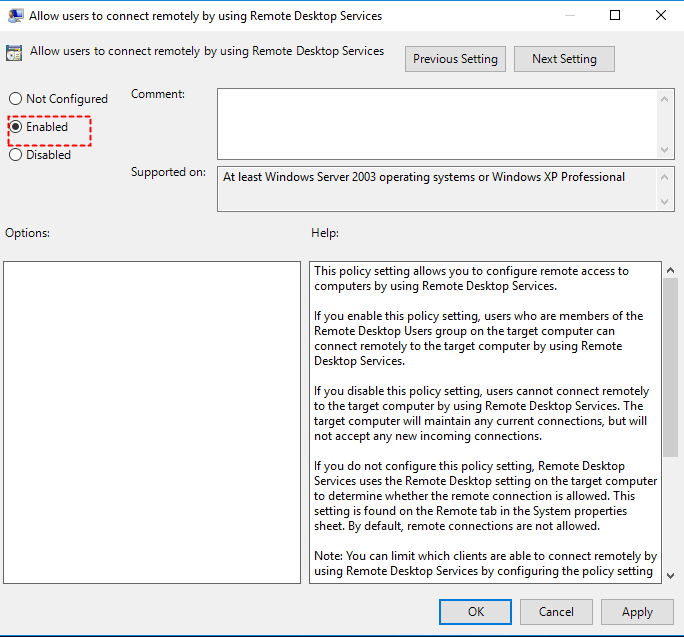
Step 3. Set it to Enabled. Then click OK.
Solution 2. Enable Remote Desktop greyed out via Resgistry
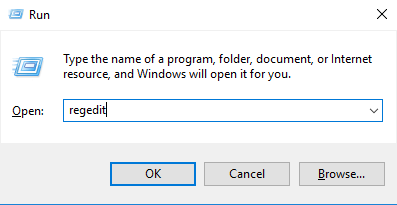
Step 1. Press Win + R to invoke the Run dialog box. Type in “regedit” and hit OK to open Registry Editor.
Step 2. Navigate here: Computer > HKEY_LOCAL_MACHINE > SYSTEM > CurrentControlSet > Control > Terminal Server.
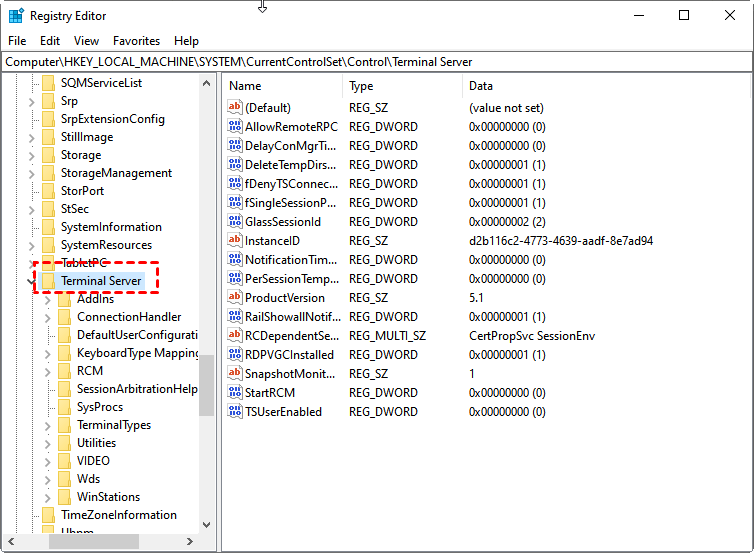
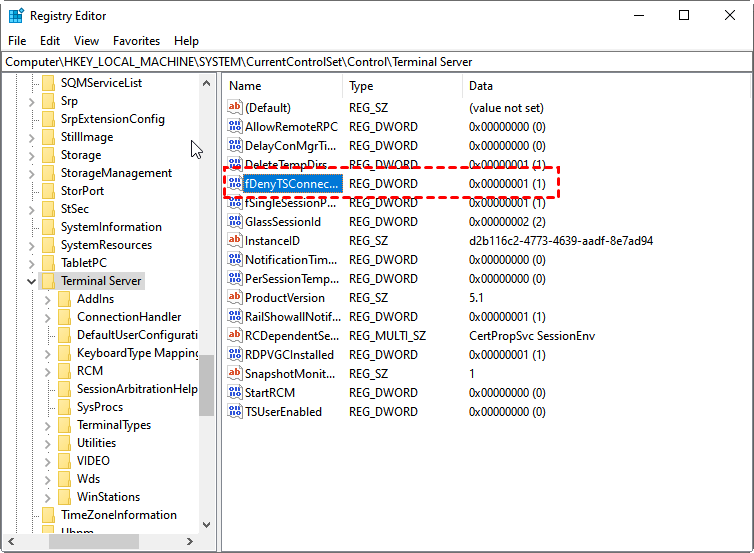
Step 3. On the right pane, double-click the fDenyTSConnections entry to edit its properties.
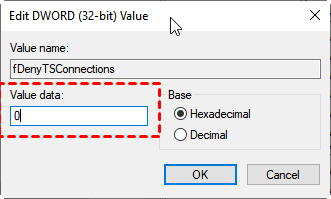
Step 4. In the properties window, input 0 in the Value data field. The meanings of 0 and 1 are put below. Then click OK to save changes.
0 = Allow users to connect remotely using Terminal Services / Remote Desktop
1 = Disallow users to connect remotely using Terminal Services / Remote Desktop
Step 5. Reboot your computer and check to see if Remote Dekstop options are workable.
Free Remote Desktop alternative: AnyViewer
When you can't change RDP settings for remote connection even after changing policy settings, it's time to seek out a Remote Desktop alternative. AnyViewer is my first choice. Compared with Remote Desktop, it has many advantages:
- Remote Desktop requires an IP address or computer name to achieve remote connection, while AnyViewer doesn’t.
- Remote Desktop requires the two devices to be under the same network, otherwise, you'll need to set up port forwarding, while AnyViewer doesn't have any limitations on the device location.
- Remote Desktop can’t be used to connect to Windows 10 Home edition (some other editions as well), while AnyViewer supports any devices running iOS 10.0 or later and multiple Windows versions on PCs.
- Text communicate is not available during Remote Desktop sessions while AnyViewer has featured with chat function in a remote session.
Option 1. For unattended remote access with one-click
If you are trying to remotely access your own remote devices, then you can sign up for AnyViewer to achieve unattended remote access.
Step 1. Download, install, and launch AnyViewer on both computers.
Step 2. Go to Log in, and then click Sign up. (If you already have signed up on its official website, you can log in directly.)

Step 3. Fill in the signup information.

Step 4. Then you can see you successfully logged in to AnyViewer. Your device will automatically be assigned to the account you've logged in to.

Step 5. Log in to the same AnyViewer account on the two devices, then click One-click control to achieve unattended remote access.

Note: If you want to assign more devices to achieve unattended remote access, then you can upgrade your account to a Professional or Enterprise plan. Also, you can connect to another computer in privacy mode, which means you can black the screen and block the mouse and keyboard of the remote computer.
Option 2. Two more connection methods of AnyViewer
If you're trying to provide remote support to others, then you can try to use the following two connection methods.
Connection method 1. Send a control request
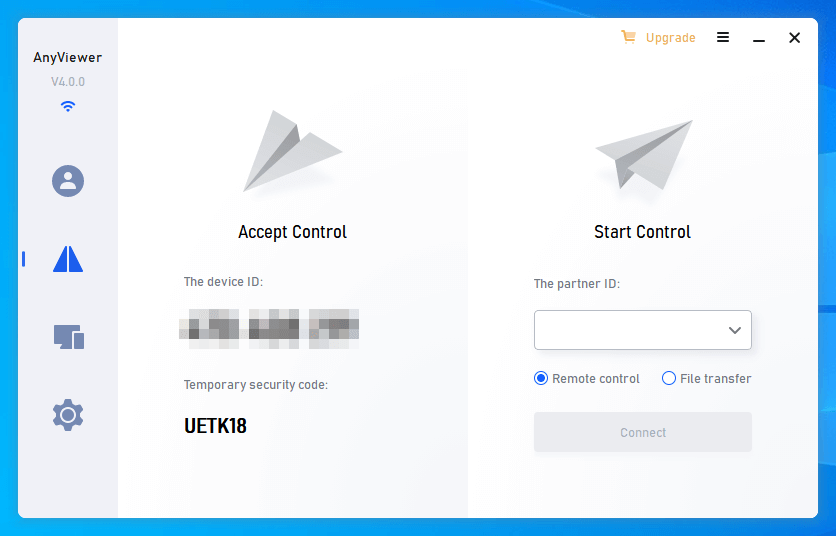
Step 1. On the client computer, input the device ID of the host computer and then click Connect.
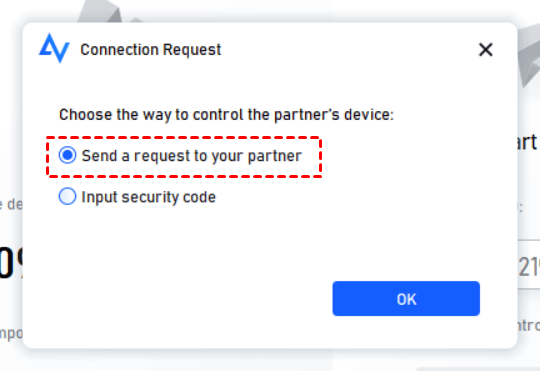
Step 2. Click Send a control request to your partner.
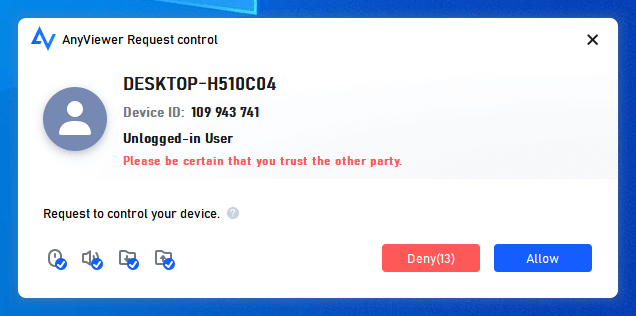
Step 3. On the host computer, click Allow to make the connection successful.
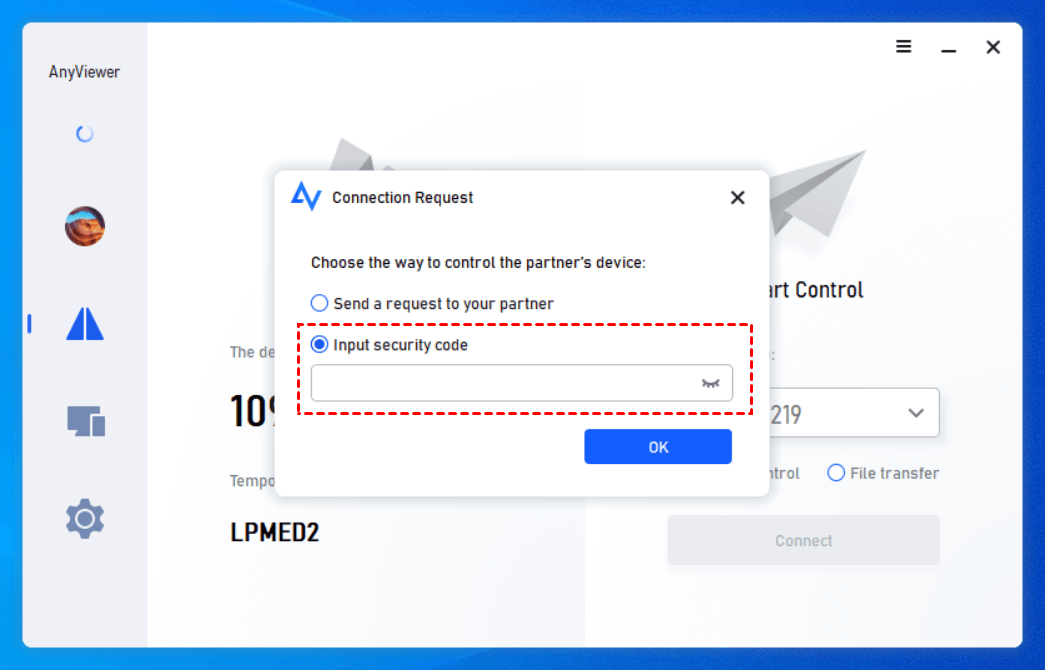
Connection method 2. Input security code
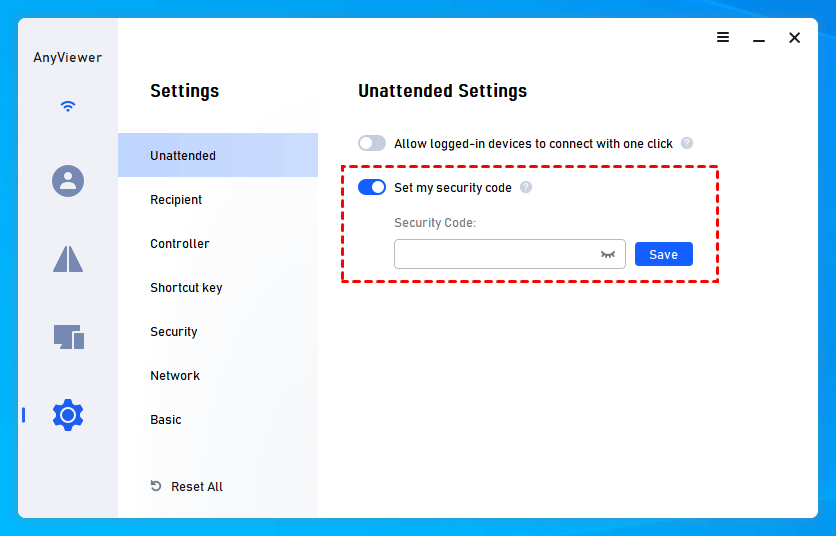
Step 1. On the host computer, go to Settings > Recipient. Tick the third option and then set the permanent security code.
Step 2. On the client computer, input the device ID of the host computer and then click Connect. Choose Input security code and enter the code. Click OK to achieve remote access.
▶ Note: If you need to start a remote session from iPhone or iPad, you need to download the AnyViewer iOS app from Apple Store on your iOS device.
Conclusion
This post mainly introduces two solutions to help resolve the Remote Desktop options greyed out problem. If you're facing this problem right now, try them and see if they can help. Besides, we also provide you with another option, you can use AnyViewer, a great Remote Desktop alternative. If you're trying to find a free and easy remote desktop tool, you can try it.
