
6 Tested Ways to Fix RDP Works with IP but Not Name
Here in this post, we will introduce how to fix RDP works with IP but not name.You will get six easy solutions to solve your problem. Please keep reading to get the instructions!
By Hester / Updated on December 13, 2024
The issue: I can RDP with IP address but not computer name
I can RPD with IP address but not computer name. I have a work computer that I can only connect to remotely when using the computer's IP address and not when using the computer's name. When randomly connecting to the computer using the hostname, it will report ‘Credentials did not work’. How can I fix RDP works with IP but not name?”
- Question from a user

How to fix RDP works with IP but not name [6 solutions]
Remote Desktop Connection is a convenient tool for users to remote access PC on the same network. However, some users cannot RDP by hostname but can RDP with the IP address. If you are facing the same problem, try the following solutions.
Solution 1. Check your hostname
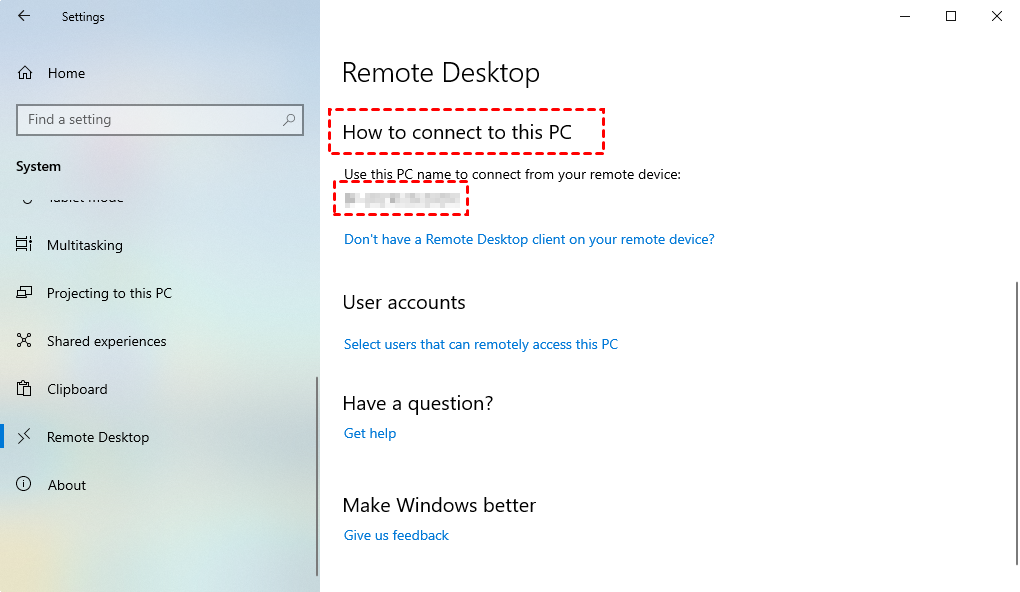
You need to ensure you get the right PC name for Remote Desktop.
Go to Settings > System > Remote Desktop, and you can find the PC name under How to connect to this PC.
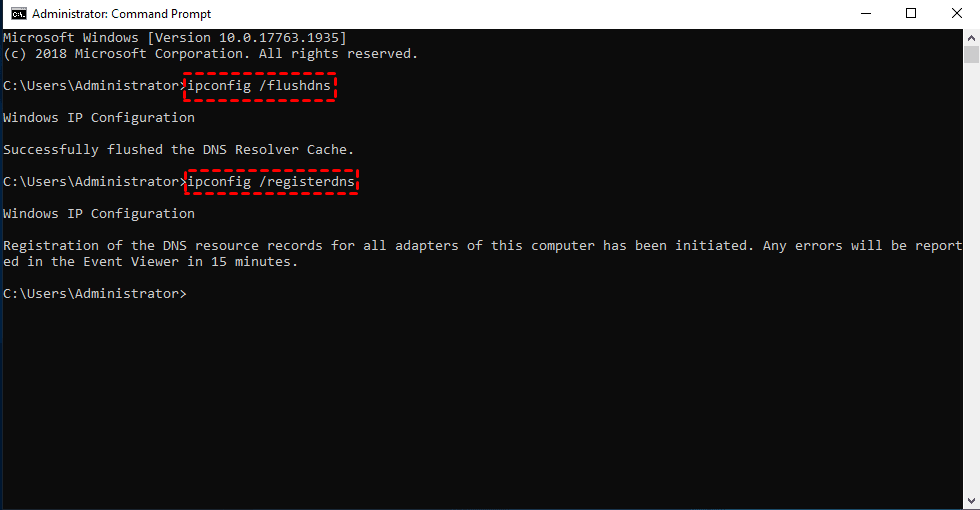
Solution 2. Flush and register DNS
RDP works with IP but not name may occur if your DNS server is not updated with the resource of your PC. You can fix the DNS issue with the below steps.
Step 1. Press Win + R, enter “cmd” and press OK.

Step 2. Enter the commands one by oneand wait for about 15 minutes to register the computer resource records with DNS.
- ipconfig/flushdns
- ipconfig/registerdns
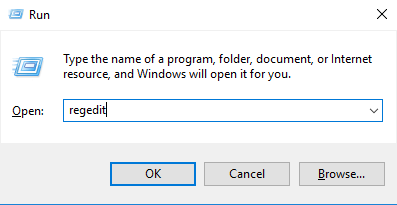
Solution 3. Clear RDP cache
You may have RDP cached credentials saved for the hostname and need to clear the RDP cache manually.
Step 1. Press Win + R, enter “regedit”and press OK.
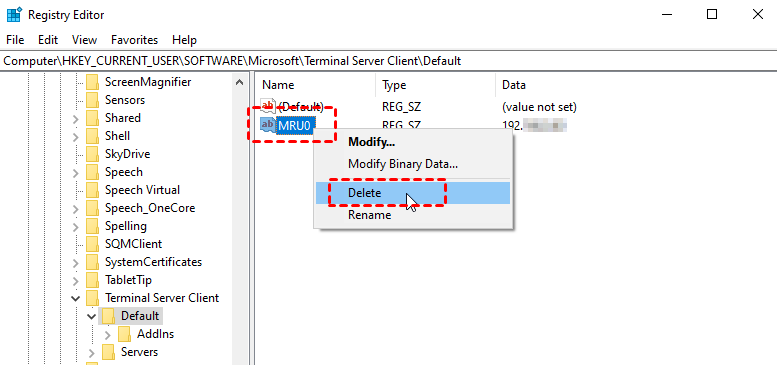
Step 2. Navigate to: HKEY_CURRENT_USER > Software > Microsoft > Terminal Server Client.
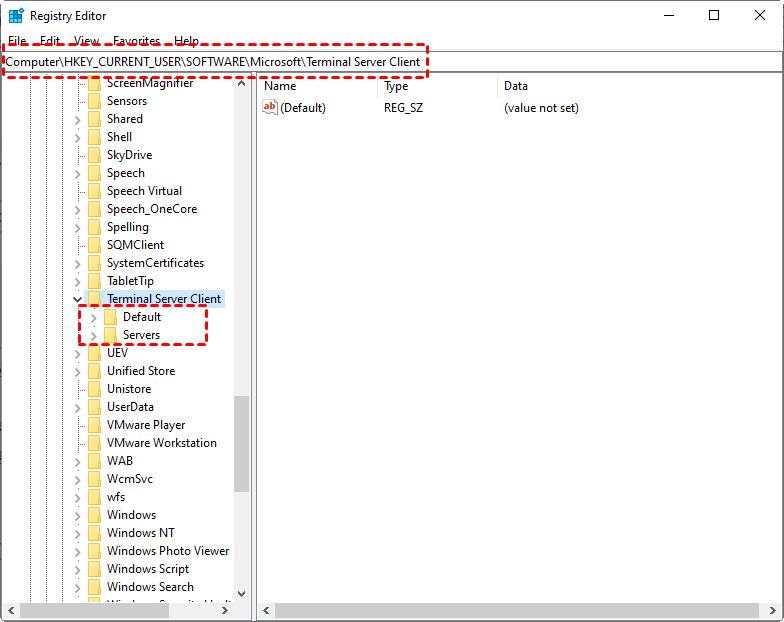
Step 3. Expand the Default key that contains the most recently used connections, right-click the entry, and click Delete. Repeat the process to delete other entries.
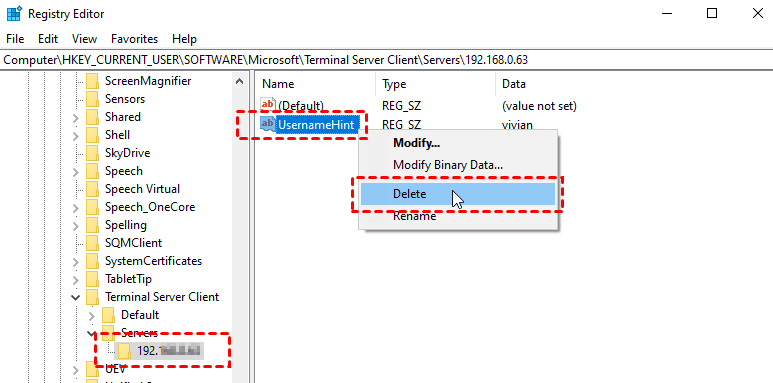
Step 4. Expand the Servers key that contains the details of all the RDP connections, select the user you want to delete, and right-click UsernameHint > Delete.
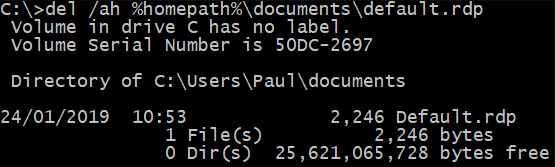
Step 5. There is a default.rdp file that will not show or delete by default. You can delete it by entering the command in Command Prompt.
- del /ah %homepath%\documents\default.rdp
Solution 4. Rejoin the local administrators group
RDP allows remote connections over LAN between computers that are in the local group. If you fail to Remote Desktop with the hostname, try to rejoin the local group.
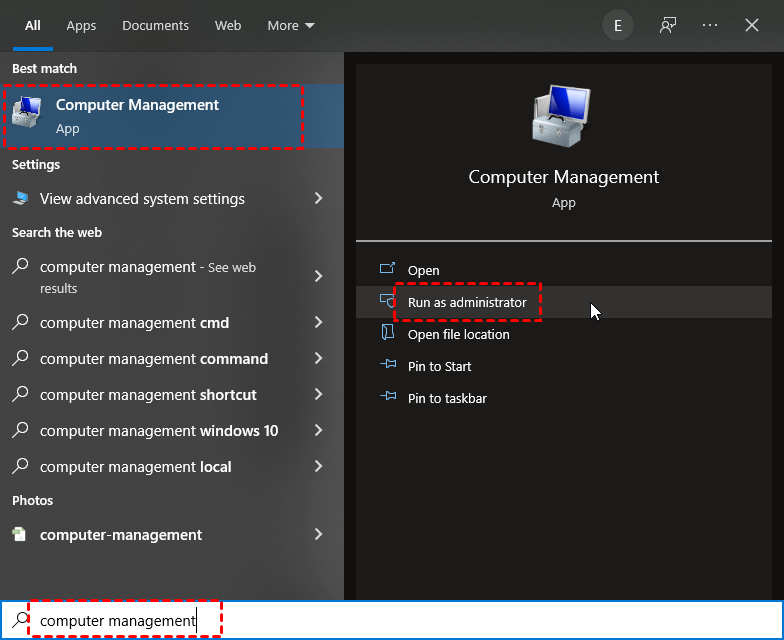
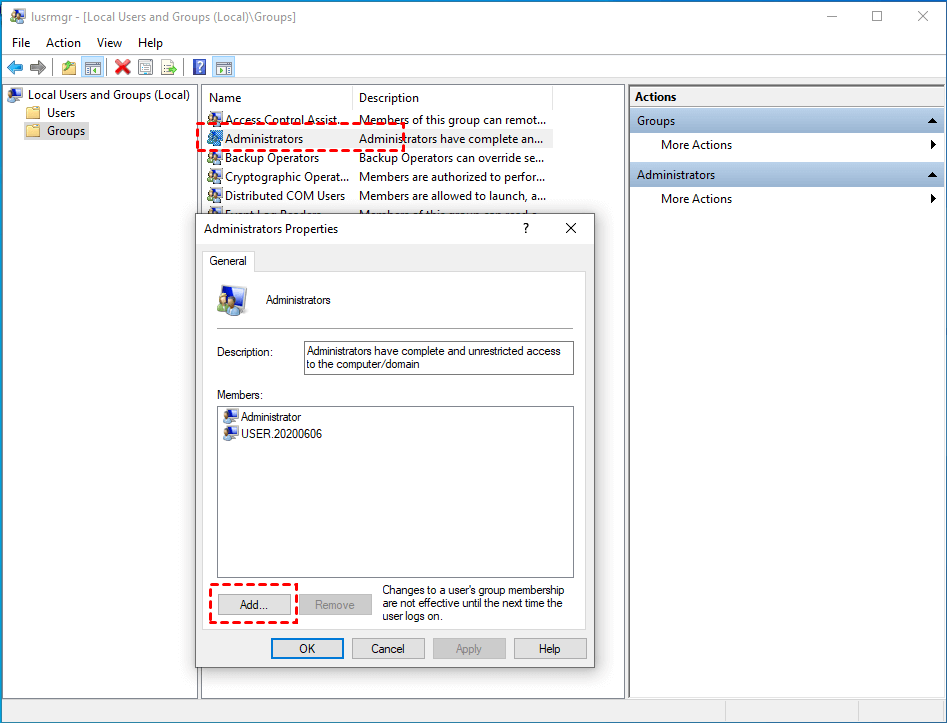
Step 1. Search "Computer Management” in the start menu and click Run as administrator.
Step 2. Click Local Users and Groups (Local) > Groups > Administrators. Select the hostname and click Remove. Then click Add to rejoin the hostname to the group.
Solution 5. Change the network settings
If you can successfully ping the remote computer but cannot remote into it via its PC name, you may connect to the wrong network that will give a reply to make the pinging look successful but indeed unsuccessful. In this case, you need to reorganize the network connection priority.
Step 1. Search for “View Network Connections” in the start menu and open it.
Step 2. Click Advanced > Advanced Settings.
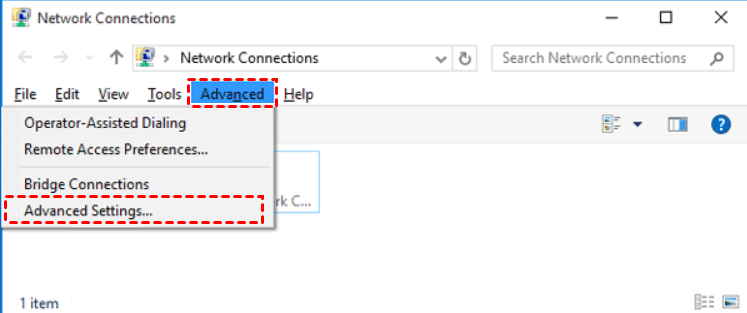
Step 3. Select the network connection and click the up/down arrow to change the network connection priority. Click OK when you have organized the priority.

Solution 6. Switch to an RDP alternative that supports one-click remote control
Suppose you still have trouble using Remote Desktop Connection with the hostname. In that case, we recommend you use the professional RDP alternative AnyViewer, which allows one-click remote control without entering the IP address or username.
Besides, AnyViewer has the following benefits over RDP:
- Compatible. AnyViewer supports Windows OS and Windows Server OS, while RDP does not support Windows Home/Standard edition.
- File transfer. AnyViewer supports flexible file transfer between devices with or without remote control.
- Multiple session. AnyViewer allows simultaneous multiple sessions.
- Instant chat. AnyViewer has a chat box for users to exchange messages during the remote session.
Download AnyViewer on your computers to enjoy the unattended remote access!
Step 1. On the host computer, click Sign up for registration.

Step 2. Enter the information and click Sign up.

Step 3. Log in to the account you registered before on the client computer, and the device will automatically assign when you log in.

Step 4. Go to Device. Click the computer you want to take control of and click One-click control.

- Notes:✎... AnyViewer offers budget-friendly plans for business use. You can subscribe to the Professional or Enterprise plan to gain more rights!
- More concurrent channels for connections.
- More simultaneous connections. (the Enterprise plan supports 10 simultaneous sessions)
- More assigned devices for unattended remote access. (the Enterprise plan can assign 100 computers)
- Connect in privacy mode to well-enough protect your data and privacy.
- Best performance with high-image quality.
Conclusion
That’s all for resolving RDP works with IP but not name. In this post, we mentioned many solutions: flush and register DNS, clear the RDP cache, use the reliable RDP alternative AnyViewer, etc. Get the best solution based on your needs!
