
How to Use PowerShell to Enable Remote Desktopon Windows 10, 11
This post is a step-by-step tutorial on how to use PowerShell to enable Remote Desktop on Windows 10, 11. If you are going to perform remote access via RDP, this post can help you a lot.
By Hester / Updated on December 13, 2024
How do I enable Remote Desktop in PowerShell?
Hi. I want to use Remote Desktop Connection to connect remotely to my work PC. How can I use PowerShell to enable Remote Desktop? The computer is running Windows 10 Pro. Thanks in advance.”
- Question from a user

How to use PowerShell to enable Remote Desktop on Windows 10, 11
RDP is a built-in Windows tool that allows you to connect to a remote computer and obtain access to its programs and files as if you were physically logged in. On Windows systems, the Remote Desktop optionis not enabled by default. You can use PowerShell to enable Remote Desktop quickly with the following steps.
Note: The Remote Desktop server is not available on Windows Home/Standard. If you want to access Windows Home/Standard computers remotely, it is recommended switching to other RDP alternatives.
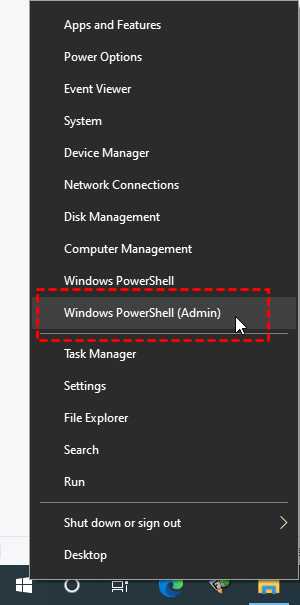
Step 1. Press Win + X, and click Windows PowerShell (Admin).
Step 2. Enter the command below to enable RDP PowerShell:
- Set-ItemProperty -Path 'HKLM:\System\CurrentControlSet\Control\Terminal Server' -name "fDenyTSConnections" -value 0
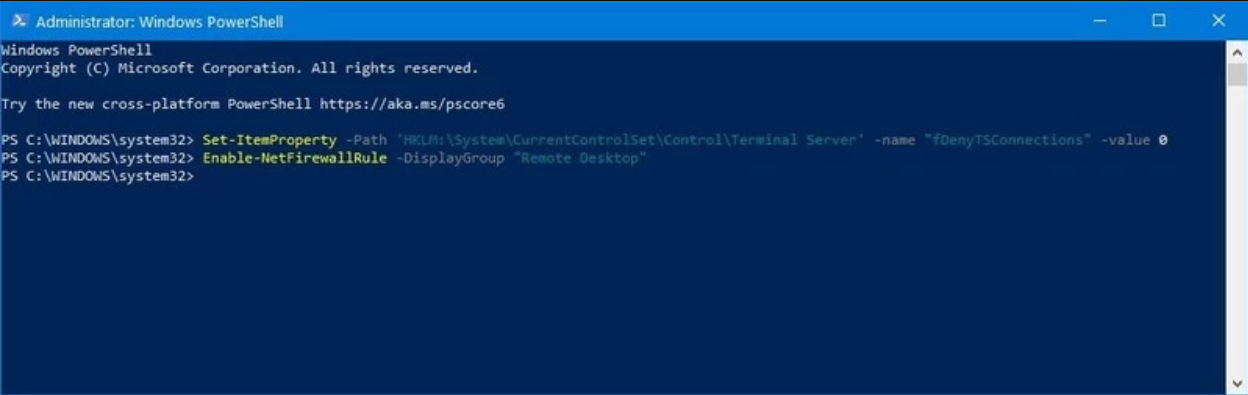
Step 3. Sometimes the RDP connection may be blocked by Windows Firewall, you can enter the following command to enable it through Firewall.
- Enable-NetFirewallRule -DisplayGroup "Remote Desktop"
Now you can start a Remote Desktop Connection between PCs.
Furthermore, if you want to disable Remote Desktop via PowerShell, perform the following command:
- Set-ItemProperty -Path 'HKLM:\System\CurrentControlSet\Control\Terminal Server' -name "fDenyTSConnections" -value 1
Then enter the following command to disable Remote Desktop through the Firewall.
- Disable-NetFirewallRule -DisplayGroup "Remote Desktop"
Other ways to enable RDP on Windows 10, 11 [2 ways]
If you are not familiar with using PowerShell, you can enable RDP on Windows 10, 11 with the following methods.
Way 1. Enable RDP via System Properties
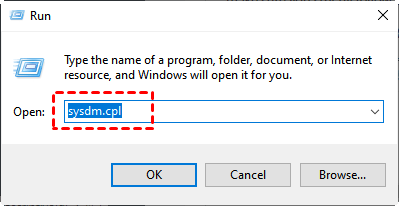
Step 1. Press Win + R to open the Run dialog box. Type in “sysdm.cpl” and hit OK to launch System Properties.
Step 2. Tick Allow remote connections to this computer and click OK.

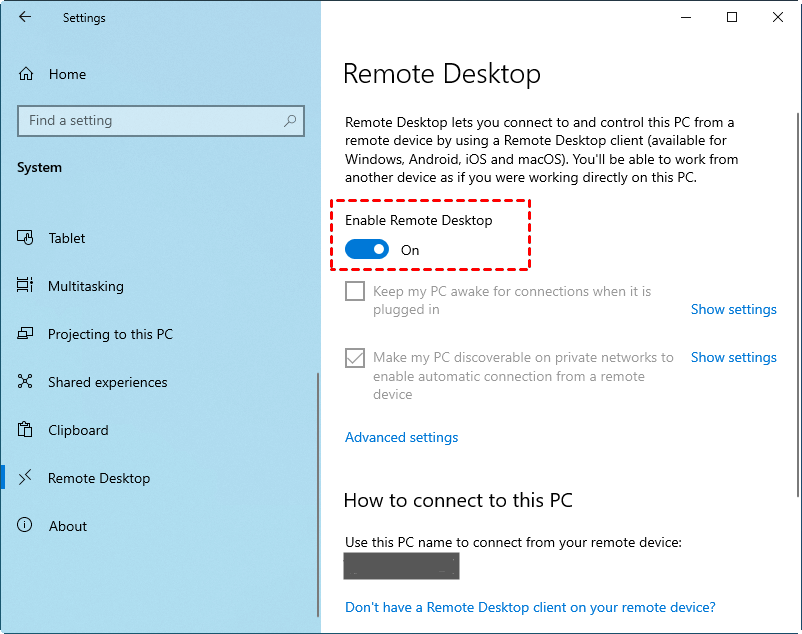
Way 2. Enable RDP through Windows Settings
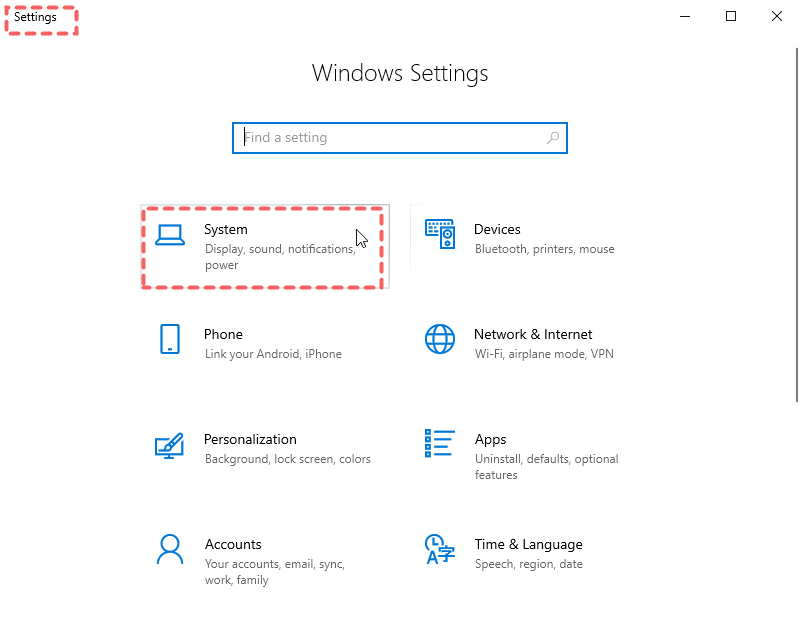
Step 1. Open Settings from the start menu, then select System.
Step 2. Go to the Remote Desktop section, and turn on Enable Remote Desktop.
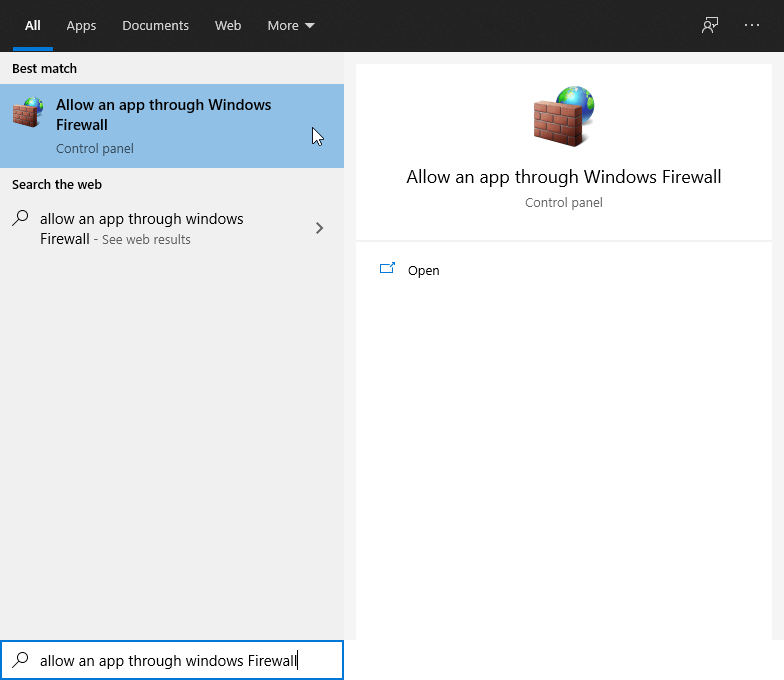
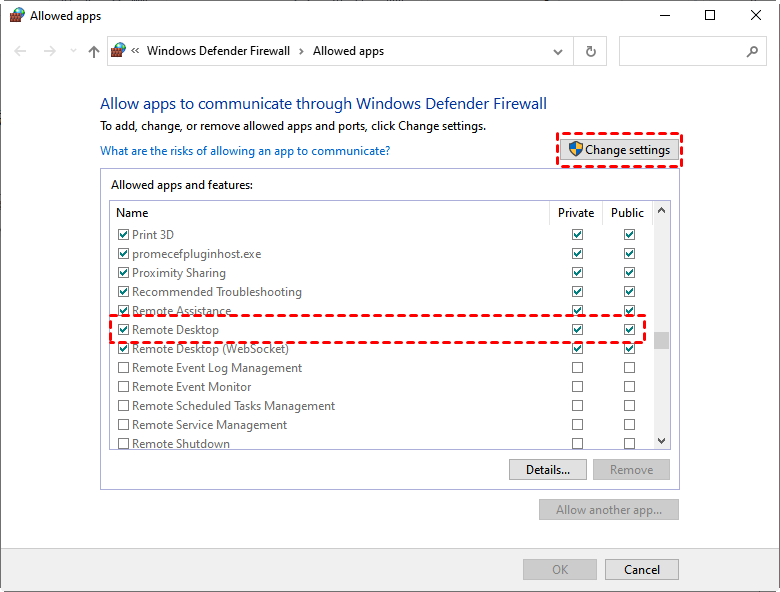
When you enabled Remote Desktop on your computer, don’t forget to enable it through Firewall to make it work properly.
Step 1. Search for Allow an app through Windows Firewall in the search bar and click Open.
Step 2. Click Change settings and check Remote Desktop under private or public network or both.
AnyViewer: An easier way to access your remote computer from anywhere
Though you can use Remote Desktop without extra downloading, it has many limitations. For example, you can not access Windows Home or Standard systems via RDP, and you need to forward the RDP port or use a VPN to connect to other devices outside the network. Besides, it lacks the features like instant chat and multiple sessions.
In this case, why not use the professional Remote Desktop alternative AnyViewer that has easier operations and offers several advanced features for free?
Compared to Remote Desktop Connection, AnyViewer has the following advantages you can’t miss:
- Compatible. AnyViewer server side supports Windows 11/10/8.1/8/7 all editions and Windows Server 2019/2016/2012 R2/2022. AnyViewer client side supports Windows, iOS, and Android devices.
- Easy-to-use. AnyViewer has intuitive interface and easy operations. You only need to create an account, and then you can perform remote tasks between computers with one click.
- Over-Internet connections. AnyViewer supports remote connections both in the same LAN or in different networks without port port forwarding and VPN.
- Multiple sessions. AnyViewer supports remote control multiple sessions simultaneously, while RDP on Windows does not support it.
- Instant chat. AnyViewer allows you to exchange message with your partners during the remote session without making a call, which is significantly convenient for team work.
You can download AnyViewer from here and see how easy it is to use.
Step 1. Start AnyViewer on the host device, click Sign up to create a new account, then log in.

Step 2. Start AnyViewer on the client device, sign in using the same account you used on the host device.

Step 3. Go to the Device interface to view the list of your assigned devices. Choose the device you want to connect to and click One-click control to perform unattended remote access.

Conclusion
After reading this post, you must have grasped how to use PowerShell to enable Remote Desktop. Now you can start controlling your remote device via RDP. Additionally, if you are looking for an alternative, try AnyViewer, that has easier setup and allows connections over the Internet.
