
Easy Fix: L2TP Connection Attempt Failed Because the Security Layer
This post offers several solutions to fix L2TP connection attempt failed because the security layer. You are going to the right place if you encounter the same problem. Please keep reading!
By Hester / Updated on December 13, 2024
How do I fix the L2TP connection attempt failed because the security layer encountered?
Today, I want to remote into another computer over the Internet to access some files. But my computer can’t connect to VPN because of the error ‘L2TP connection attempt failed because the security layer encountered a processing error during initial negotiations with the remote computer’ How can I fix this problem? Thanks.”
- Question from Windows Forum

How to resolve the L2TP connection attempt failed error [7 solutions]
VPN is necessary these days, as it makes it possible to safely transfer data over the Internet without disclosing your IP and location. Some users also establish a VPN connection to connect to Remote Desktop via the Internet. But occasionally, the VPN connection may fail with the error message “the L2TP connection attempt failed”. The good news is that we can resolve this issue in several ways. Let’s move on to the solutions.
Solution 1. Use local IP address
To fix L2TP connection attempt failed, you can try connecting to the network with the Local IP address rather than the public IP.
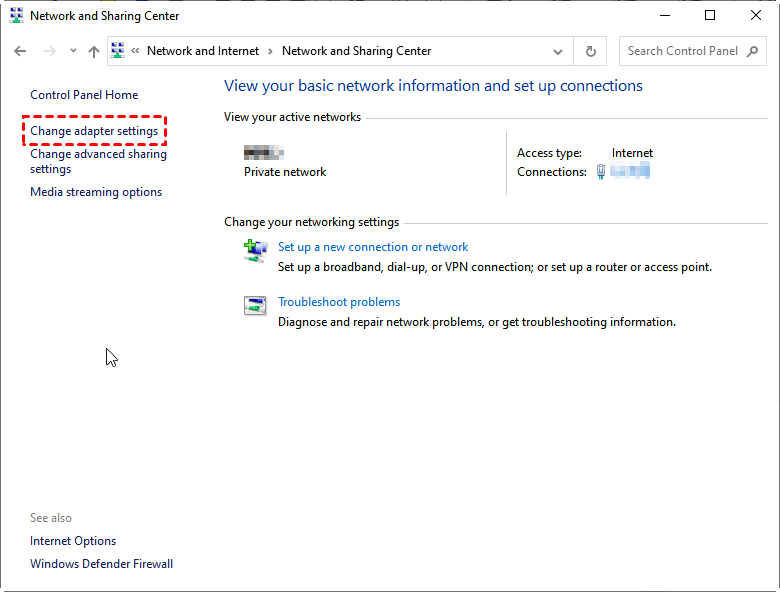
Step 1. Open Control Panel, click View network status and tasks, and click Change adapter settings.
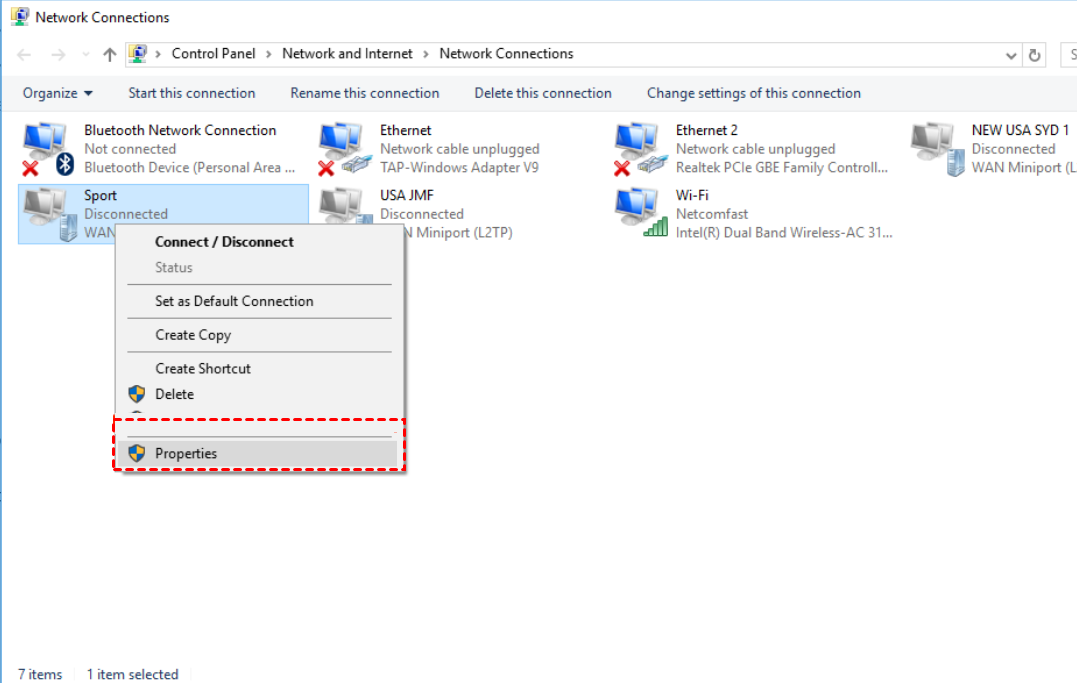
Step 2. Right-click the VPN connection and select Properties.
Step 3. Go to the Security tab, select L2TP/IPSec as the type of VPN, and click Advanced Settings.

Step 4. Tick Use preshared key for authentication and click OK.

Solution 2. Install the necessary Windows update
The error “L2TP connection attempt failed because the security layer” might be because of the Windows update KB5009543. So, you need to manually uninstall the latest update and install the necessary Windows update on your system.
Part 1. Uninstall the faulty update
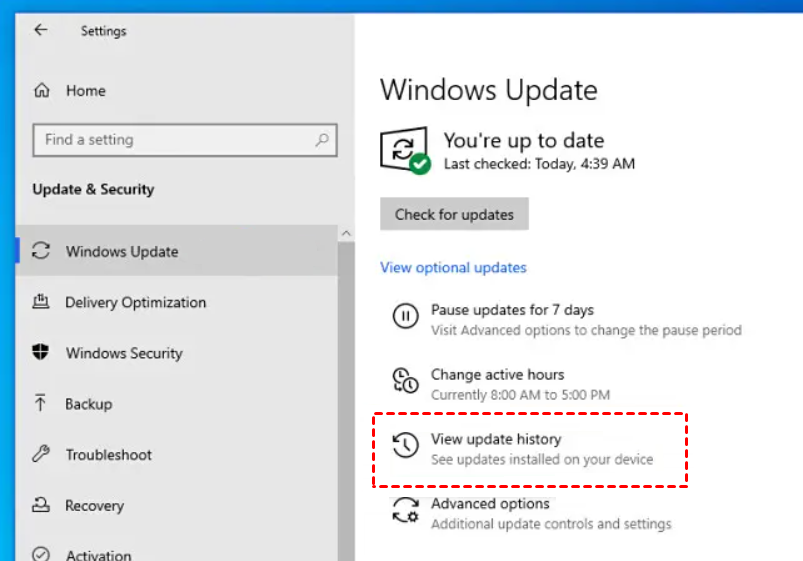
Step 1. Navigate to Settings > Windows Update > View update history.
Step 2. Click Uninstall updates.

Step 3. Find update KB5009543 and click Uninstall.

Part 2. Disable automatic updates
Disable the automatic updates to prevent Windows download and install the fault update again.
Step 1. Press Win + R, enter “gpedit.msc”, and click OK.

Step 2. Navigate to Computer Configuration > Administrative Templates > Windows Components > Windows Update > Manage end user experience, and click Configure Automatic Updates.

Step 3. Tick Enabled, choose Notify for download and auto install, and click OK.

Then Windows will notify you before downloading and installing updates.
Part 3. Install the necessary update
Step 1. Go to Windows Update and click View optional updates.

Step 2. Download and install the available update.
Solution 3. Turn on the Microsoft CHAP Version 2 protocol and the LCP extensions
When using VPN, Microsoft CHAP Version 2 protocol and LCP protocol extensions help configure and establish the Internet connection. You need to enable these protocols to fix the error.
Step 1. Open Control Panel, click View network status and tasks, and click Change adapter settings.
Step 2. Right-click the VPN connection and select Properties.
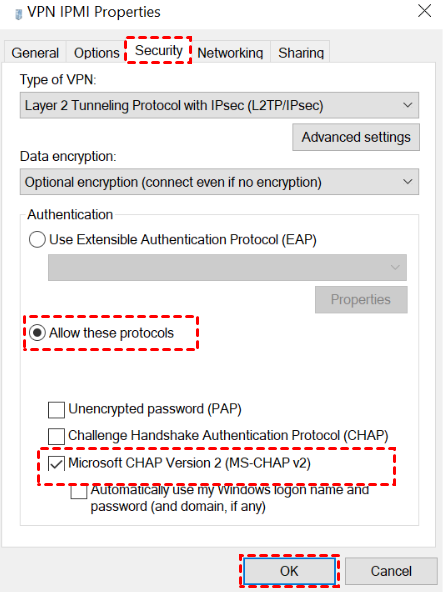
Step 3. Go to the Security tab, enable Allow these protocols, and check Microsoft CHAP version 2. Finally, click OK to save the changes.
Step 4. Go to the Options tab, click PPP Settings, check Enable LCP Extensions and click OK > OK.

Solution 4. Restart IPSec services
The IPSec services are essential for secure Internet data transfer in VPN tunneling. You can restart these services to solve the problem.
Step 1. Press Win + R, type “services.msc”, and hit OK.

Step 2. Find IPSec Policy Agent, right-click it, and select Restart.

Step 3. Then double-click the service, select the Startup type to Automatic, and click OK.

Step 4. Repeat the same steps for IKE and AuthIP IPsec Keying Modules.

Solution 5. Reinstall the network adapters
When you can not connect to the VPN successfully, sometimes the problem might lie in the VPN network adapter itself. You can reinstall the network adapters with the following steps.
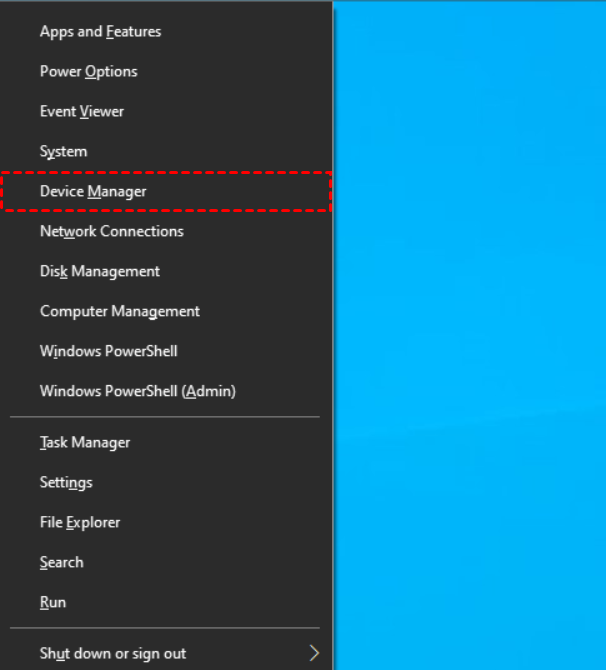
Step 1. Press Win + X and click Device Manager.
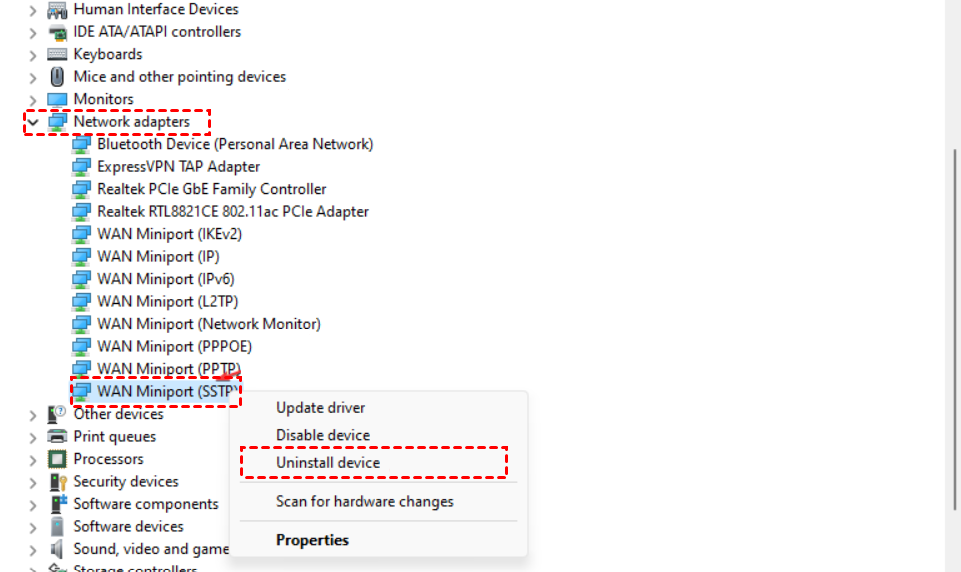
Step 2. Expand Network adapters, right-click the VPN adapter, and click Uninstall device.
Step 3. Click Uninstall in the prompt window.
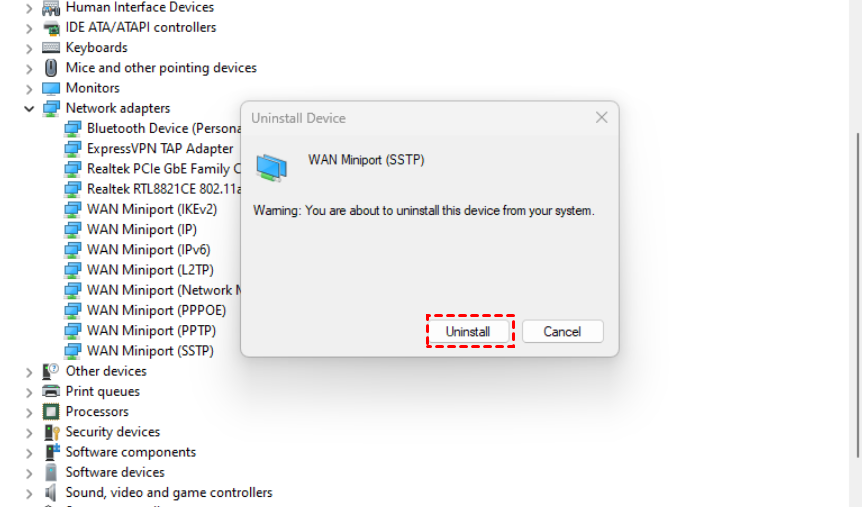
Step 4. Repeat the same steps to uninstall all the VPN adapters.
Step 5. Install the new VPN again.
Solution 6. Check UDP Ports 500 and 4500
If you want a VPN connection, you should make the UDP Ports 500 and 4500 accessible to Windows Firewall.
Step 1. Press Win + R, enter "cmd”, and click OK.

Step 2. Run the command “netstat -ano”.

Step 3. Check if the UDP Ports 500 and 4500 are on the list. If not, you need to make the Ports available from Windows Firewall.

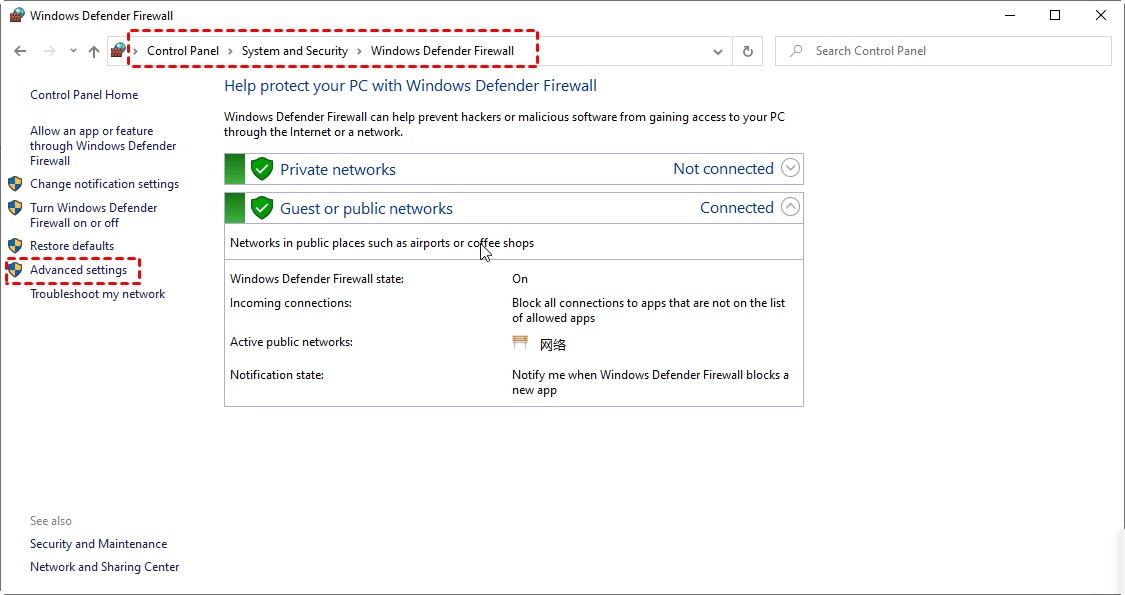
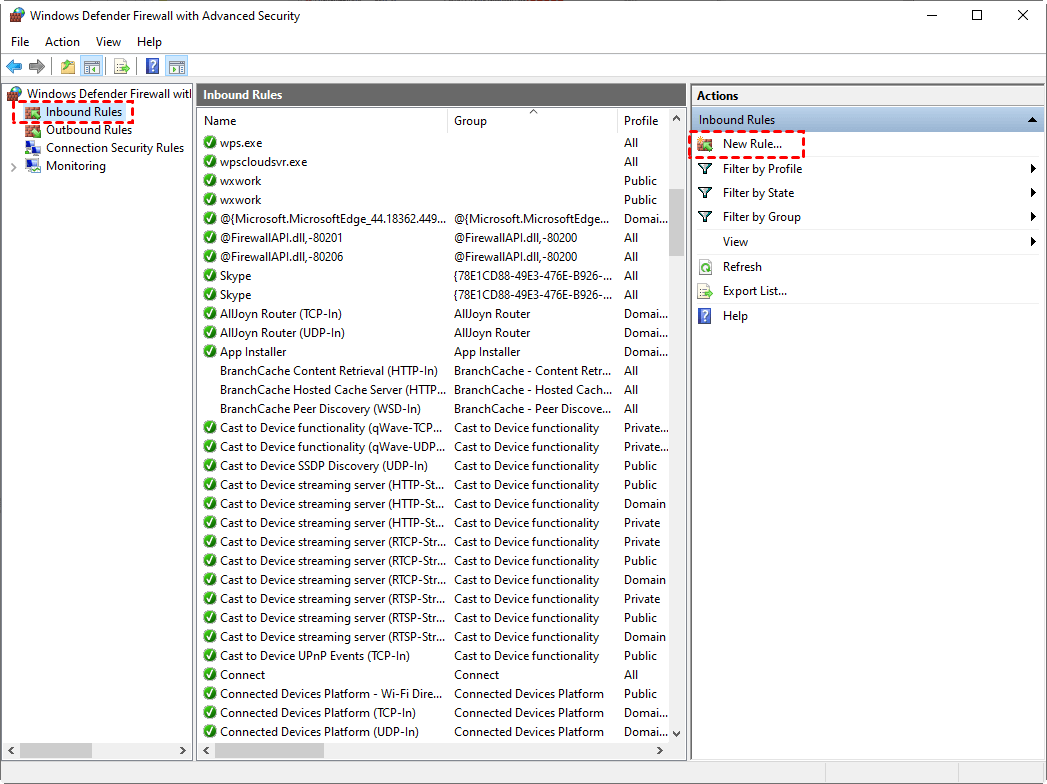
Step 4. Search and open Windows Defender Firewall in the start menu. Click Advanced settings.
Step 5. Click Inbound Rules and click New Rule.
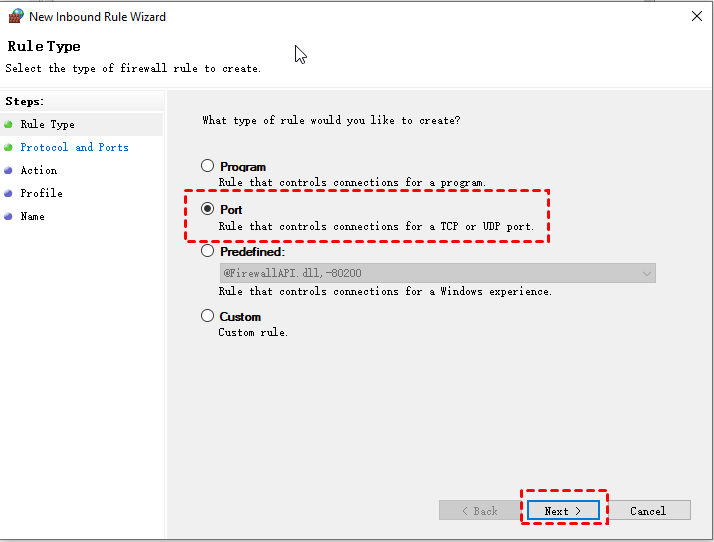
Step 6. Tick Port and click Next.
Step 7. Tick UDP and type 500 on Specific local ports.

Step 8. Tick Allow the connection and click Next.

Step 9. Check Domain, Private and Public options. Click Next.

Step 10. Name it 500 and click Finish.

Step 11. Repeat the same steps for UDP Port 4500.
Solution 7. Create a registry key
If you want to use a VPN, creating a registry key on the client PC is necessary.
Step 1. Press Win + R, enter “regedit”, and click OK.

Step 2. Navigate to HKEY_LOCAL_MACHINE > SYSTEM > CurrentControlSet > Services > PolicyAgent. Right-click the empty area, and click New > DWORD (32-bit) value. Name it AssumeUDPEncapsulationContextOnSendRule.

Step 3. Double-click the created value, set the Value data to 2, and click OK.

Bonus tip: How to remote access data over the Internet without a VPN
If none of the above methods have resolved the issue, we recommend using AnyViewer to remotely access data from another computer via the Internet without a VPN connection.
Why do you need AnyViewer? As professional yet powerful remote desktop software, AnyViewer offers simple ways to perform remote control or file transfer between devicesin different locations. It is beneficial for individuals or businesses to give remote technical support, access files from a work computer, manage remote personal computers, play PC games on another device, etc.
Besides, AnyViewer is secured by ECC encryption and devotes to protecting your data from leakage.
Download AnyViewer on your devices to enjoy its advanced features!
Step 1. Open AnyViewer on the host computer, and click Sign up for a new account registration.

Step 2. Type in the information and click Sign up.

Step 3. Start AnyViewer on the client computer and log in to the same account. The device will automatically assign to the account when you successfully log in.

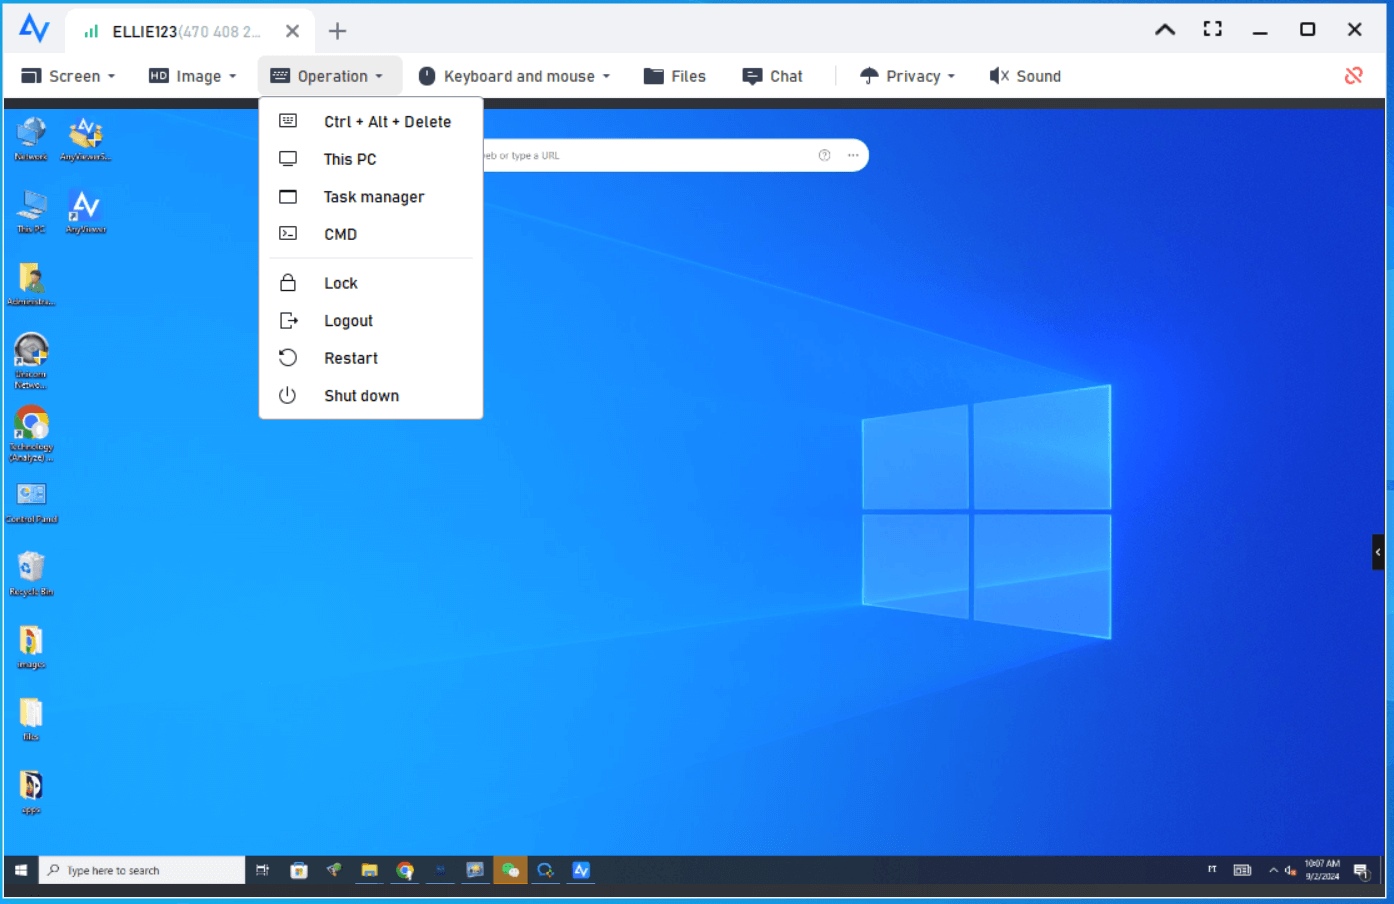
Step 4. Go to Device, click the computer you want to connect to, and click One-click control.

There are several considerate options you can use during the remote session. For example, instant chat, remote lock/shut down, change screen resolution, etc.
- Notes:✎...AnyViewer also has specified plans for businesses. You can select Professional or Enterprise plan to enjoy more rights!
- More concurrent channels.
- More simultaneous sessions.
- More assigned devices to an account.
- Privacy mode.
- Unlimited file transfer at high speed.
- Mass Deployment(MSI).
Conclusion
That’s all the solutions for the error “L2TP connection attempt failed because the security layer”. I hope they are helpful to you! If you think setting a VPN connection to access resources remotely is complicated, we recommend you use AnyViewer instead.
