
Tutorial: How to Transfer Files from Laptop to MacBook Air
This article provides a detailed guide on how to transfer files from laptop to MacBook Air. It covers methods of transferring files, steps, various methods including external drives, cloud services, and recommendations for the best way to transfer files from laptop to laptop.
By Ellie / Updated on April 1, 2025
How to transfer data from laptop to MacBook Air?
Transferring files from one device to another has become a common task in our tech-centric lives. Transferring files from a laptop to a MacBook Air might seem like a daunting task, especially for those who are new to the Apple ecosystem or are switching from a Windows-based laptop. Knowing how to transfer files from laptop to MacBook Air is essential. Whether you're upgrading to a new device, sharing work files, or moving personal data, understanding the various methods can save you time and frustration.
However, with the right tools and methods, the process can be straightforward and efficient. This guide will walk you through various methods to transfer files between your devices, ensuring your data is moved safely and quickly.
How to transfer files from laptop to MacBook Air [7 options]
There are multiple ways to solve how to transfer date from laptop to MacBook Air, each with its advantages and limitations. Understanding these methods allows users to choose the most appropriate option for their specific needs.
Option 1. AnyViewer [Recommended]
AnyViewer is one of the best remote desktop solutions that lets you remotely transfer files between Mac and Windows devices. It allows you to control your Mac from a Windows laptop and move files easily, no matter where you are. Whether you’re at home, in the office, or traveling, you can access your Mac and manage your files and apps as if you were sitting right in front of it.
It's easy to use, fast, and reliable. With strong security, including end-to-end encryption, AnyViewer keeps your sessions safe. It’s an excellent choice for remotely managing your Mac and transferring files.
Here’s how to transfer files from laptop to MacBook Air via AnyViewer:
Step 1. Download and install AnyViewer on your Mac, then create an account.
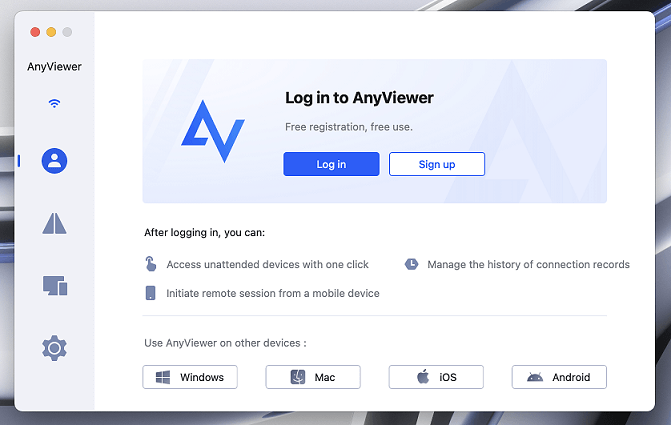
Step 2. Install AnyViewer on the laptop you will use to access your Mac, and log in with the same account.

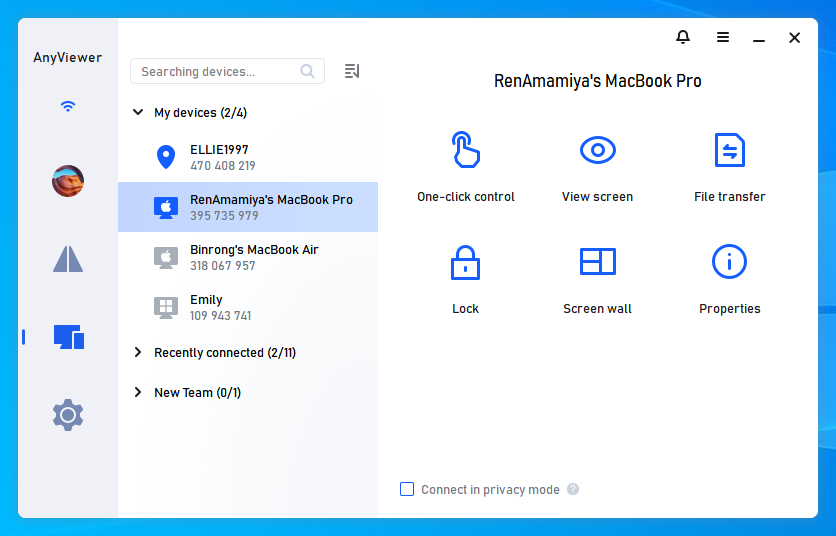
Step 3. From the device list, select your Mac and click "File Transfer" to start transferring files. You can also select "One-click control" to remotely manage your Mac and its files.
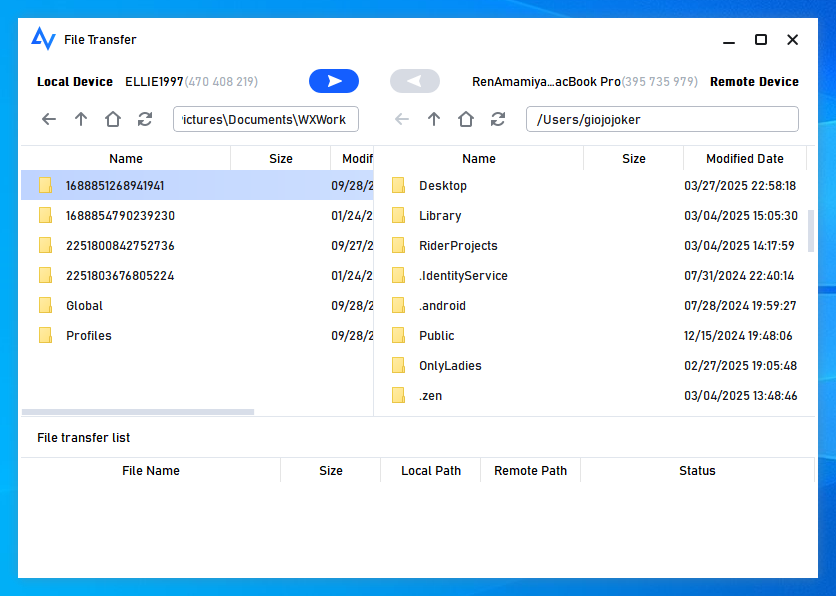
Step 4. In the file transfer manager, choose the file you want to move, then click the arrow to begin the transfer.
- ★Tips: Upgrading to AnyViewer’s Professional or Enterprise plans offers several benefits, including:
- Faster Transfer Speeds: Enjoy speeds of up to 10 MB/s.
- Simultaneous File Transfers: Transfer up to five files at once for greater efficiency.
- Unlimited File Transfers: Move as many files as you need in a single session.
- Large File Support: Transfer individual files as large as 1 TB.
Option 2. Migration Assistant
Migration Assistant, created by Apple Inc., is a utility that streamlines the transfer of files, settings, and applications between computers. This powerful tool simplifies the transfer process, ensuring that your documents, applications, user accounts, and settings migrate smoothly to your new MacBook Air. With Migration Assistant, you can easily move your contacts, calendars, email accounts, and other data from a Windows PC to a Mac. Additionally, it supports file transfers between Macs. Here’s everything you need to know to make your transition as smooth as possible using Migration Assistant.
To set up Migration Assistant on your laptop, follow these steps:
- Make sure that the most recent Windows updates are installed on your laptop.
- Download and install the appropriate version of Migration Assistant for your Mac's macOS version.
- Temporarily disable any antivirus, firewall, or VPN software until the transfer is complete.
- Connect both your Mac and laptop to the same network, either via home Wi-Fi or by using an Ethernet cable for a direct connection.
On your laptop:
Step 1. Start Migration Assistant, which you recently installed on your laptop. Close any other open applications if prompted.
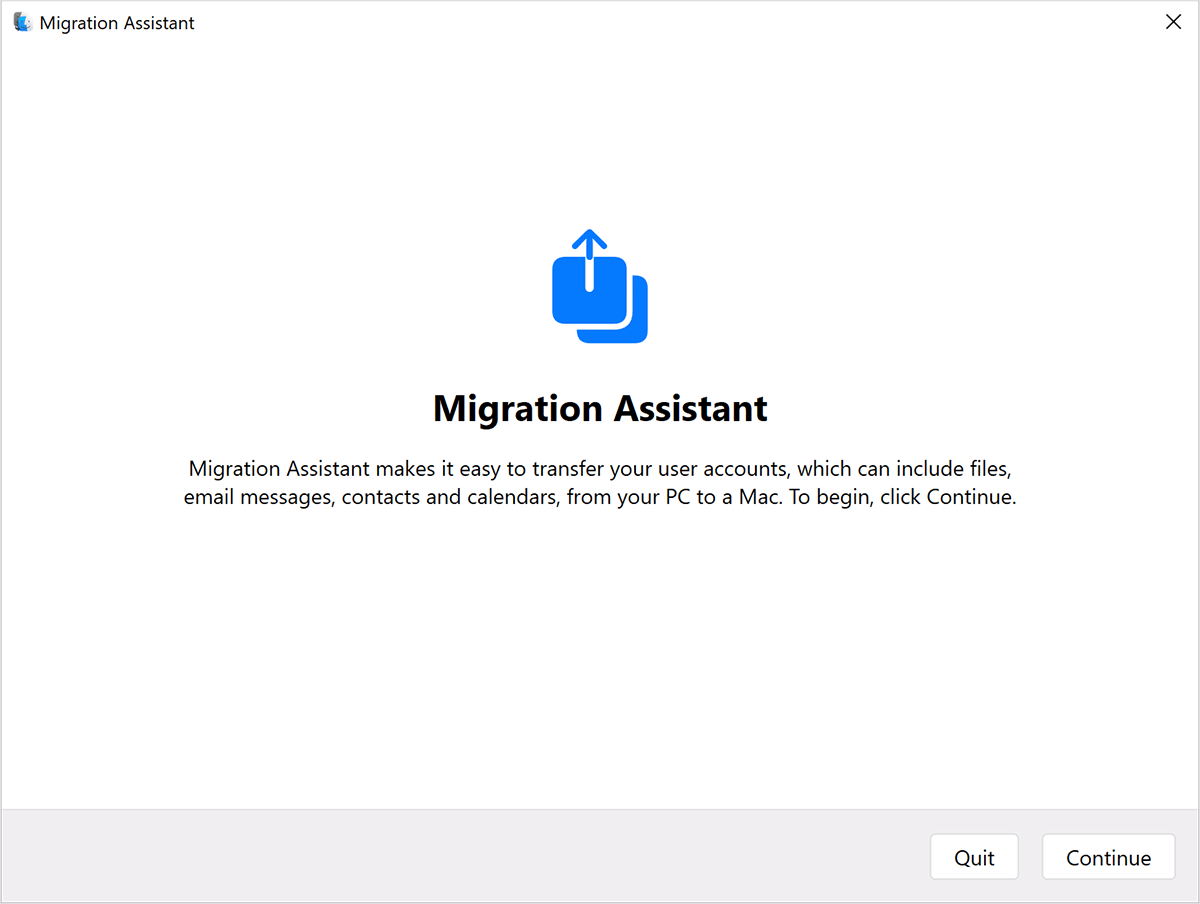
Step 2. Migration Assistant will alert you if it detects any of the following conditions:
- Your laptop is set to automatically install Windows updates.
- Your laptop's network firewall might interfere with connecting to your Mac.
- Your laptop is running on battery power.
Step 3. When prompted to send app usage data to Apple, choose either "Automatically Send" or "Don't Send."
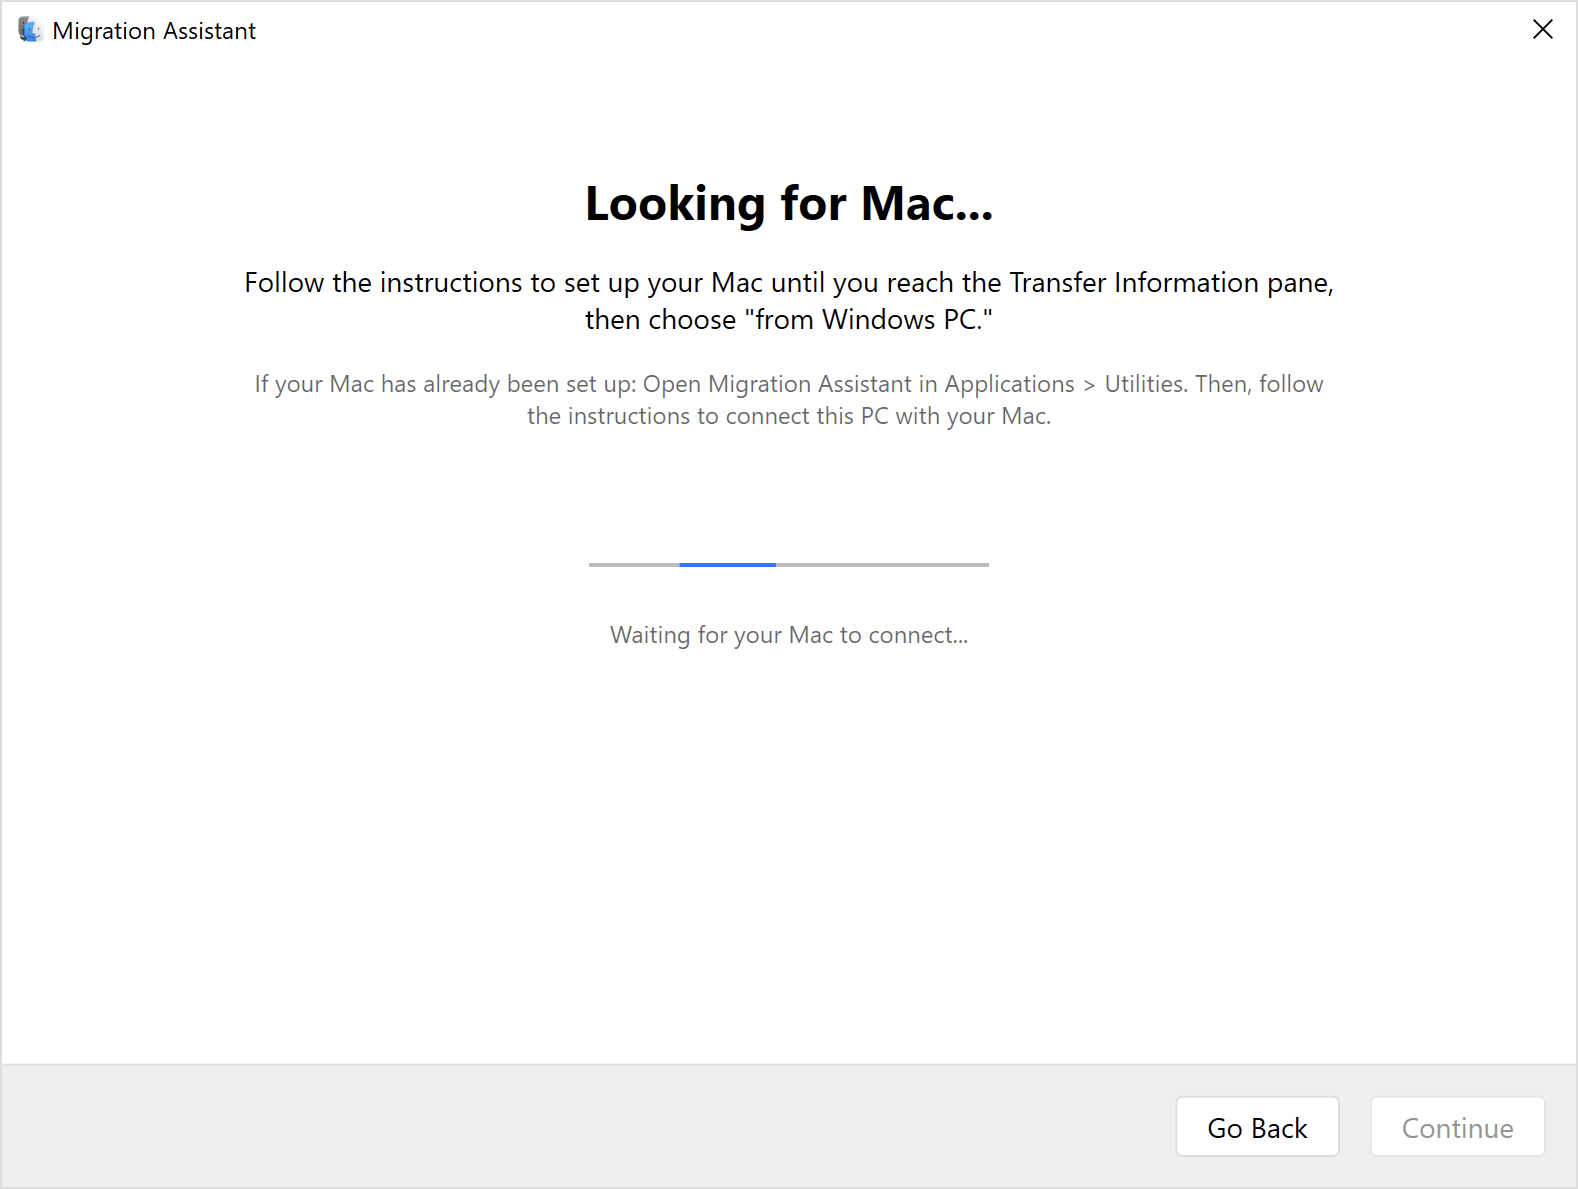
Step 4. While Migration Assistant searches for your Mac and waits for its connection, proceed with the subsequent steps on your Mac.
On your MacBook Air:
Step 1. Access Migration Assistant by navigating to the Utilities folder within your Applications folder. To find it, go to Finder, and select Go> Utilities from the menu bar. Alternatively, use Spotlight to search directly for Migration Assistant.
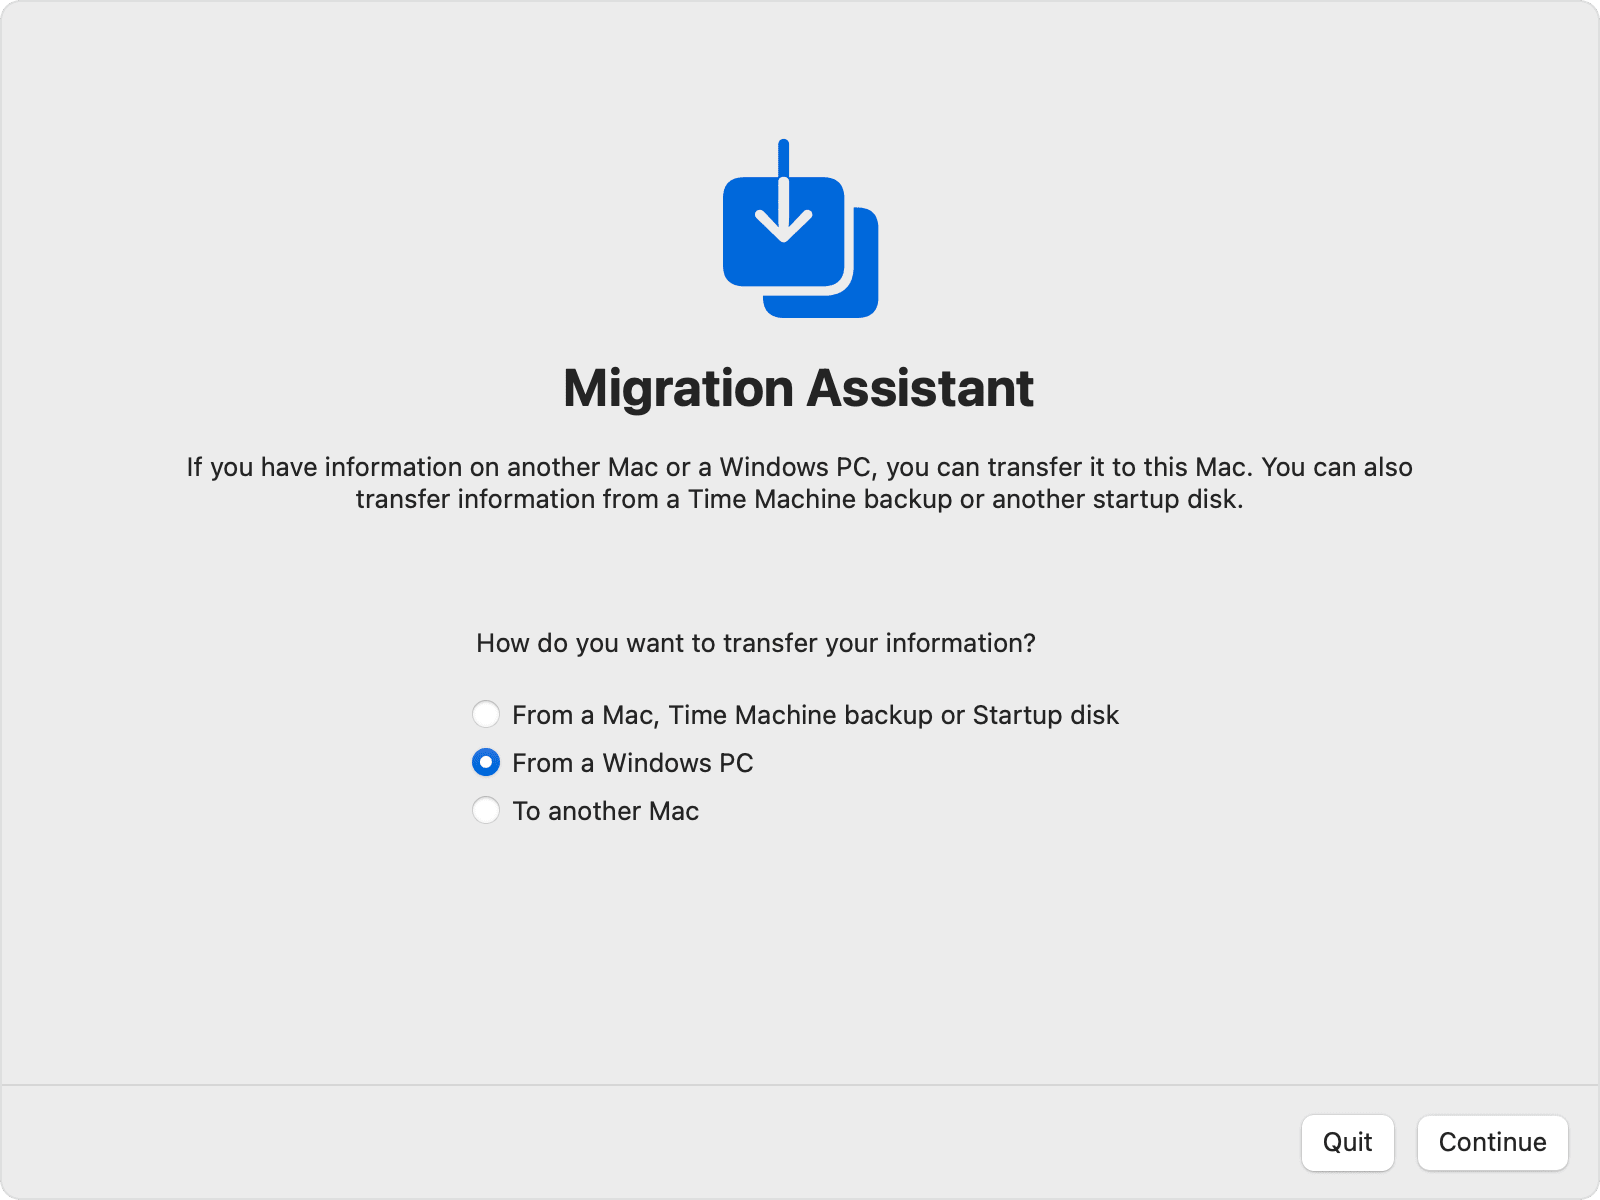
Step 2. Follow the onscreen instructions until you reach the point where you need to select how you want to transfer your information. Choose the option to transfer from a Windows PC and click “Continue” to proceed.
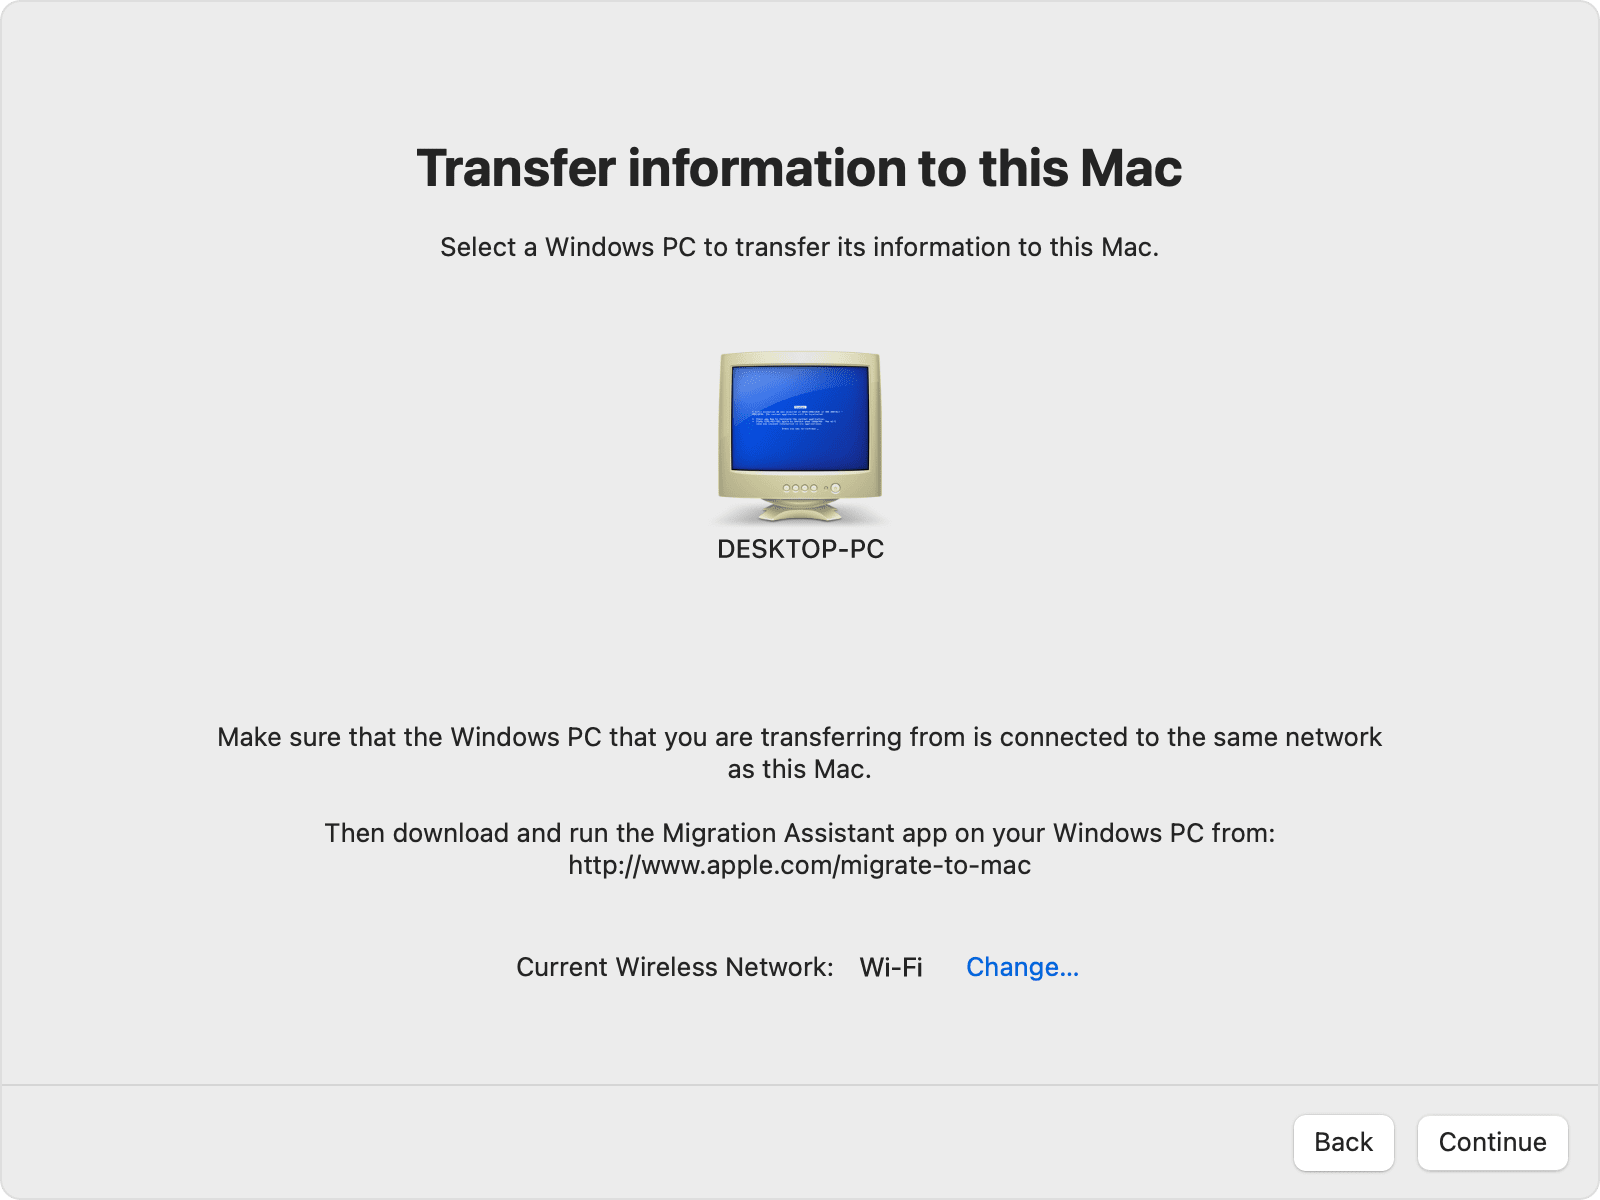
Step 3. From the list, select the icon that represents your laptop, then click “Continue” to start the transfer process.
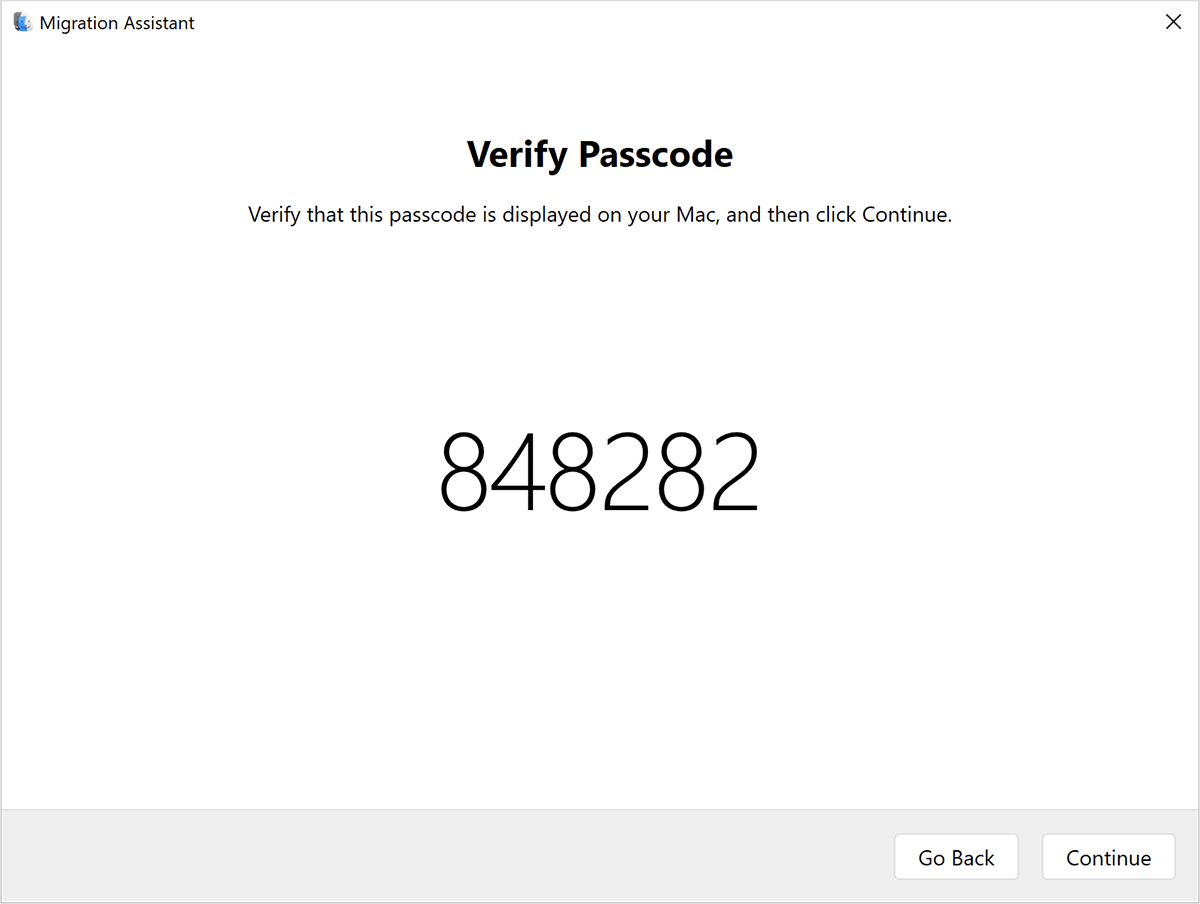
On your laptop:
Make sure that both your PC and Mac are showing the same passcode, then click “Continue” to proceed.
On your MacBook Air:
Step 1. Migration Assistant will now catalog the contents of your laptop and calculate the storage space used by each category of files. This process may take a few minutes. Once done, choose the data you want to transfer. Scrolling down might be necessary to see the complete list.
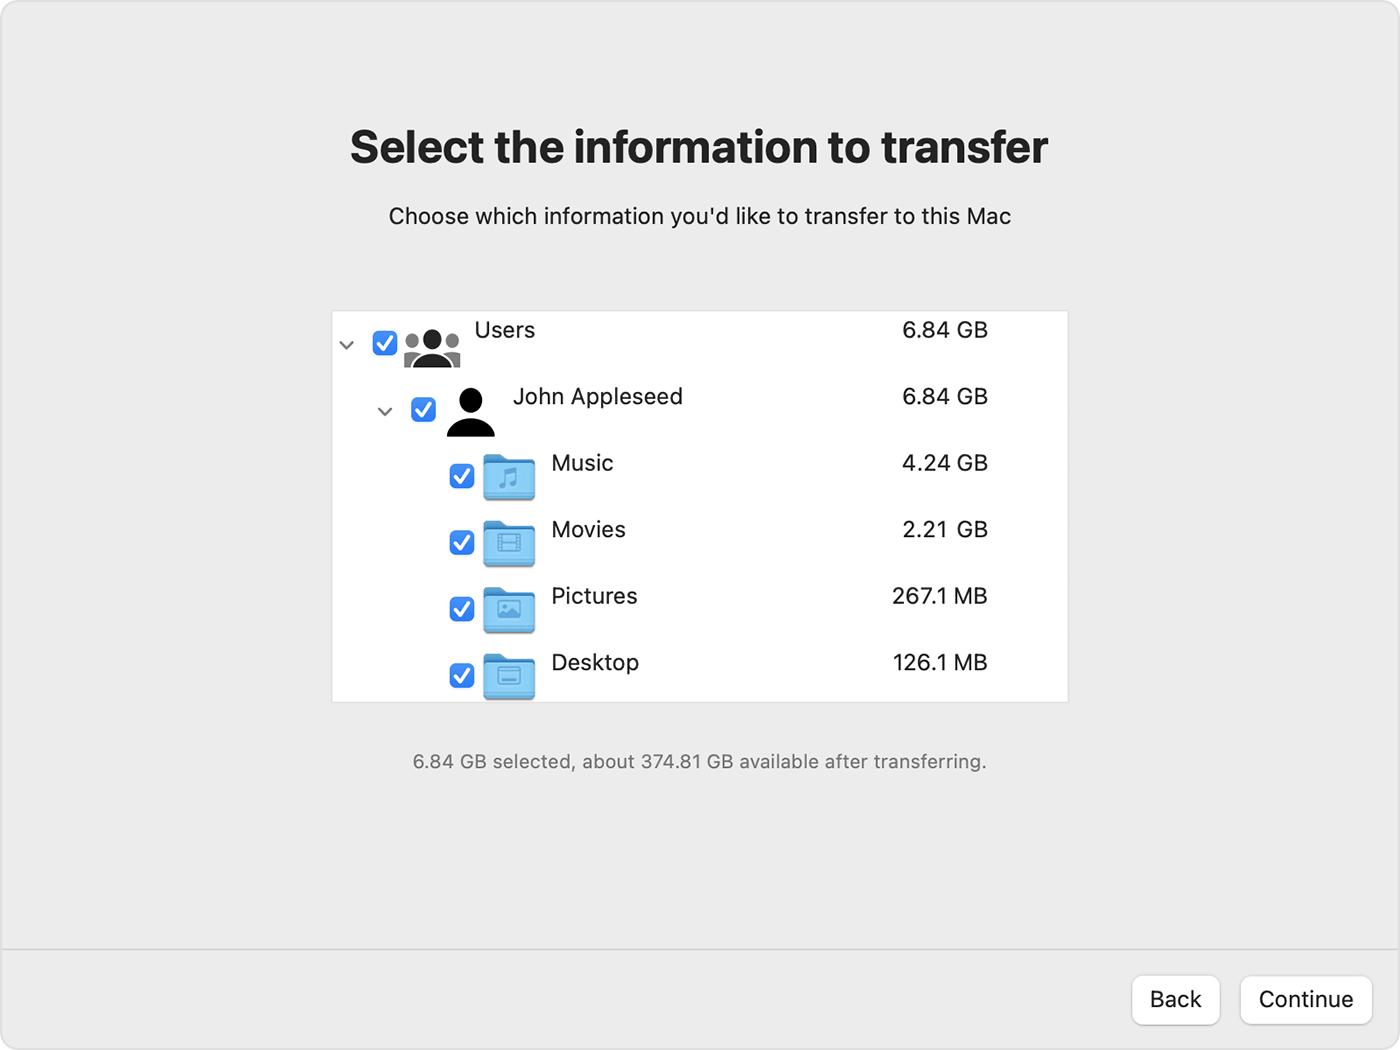
Step 2. Click “Continue” to begin the transfer. Larger transfers may take several hours and might appear to pause occasionally. It's recommended to start the process in the evening and let it run overnight. Click “Continue” again to start the transfer.
Step 3. After the Migration Assistant completes the transfer, close it on both computers. Then, log in to the migrated account on your Mac to access its files. The account will use the same username and password as on your laptop.
Option 3. File Sharing
When it comes to transferring files between devices, having a reliable and straightforward method can make all the difference. File Sharing is an efficient software solution that facilitates seamless file transfers from a laptop to a MacBook Air. File Sharing is a built-in feature in macOS that allows users to share files and folders between Mac computers and other devices on the same network. It utilizes the SMB (Server Message Block) protocol to enable file sharing over local networks, ensuring secure and efficient data transfer.
Setting up and using file sharing on macOS is simple when both your laptop and Mac are connected to the same network. Below, we'll break down the process into two sections, one for each operating system.
On your MacBook Air:
Before you can access Mac files from your laptop, you'll need to set up file sharing on your Mac. Here's how to do it:
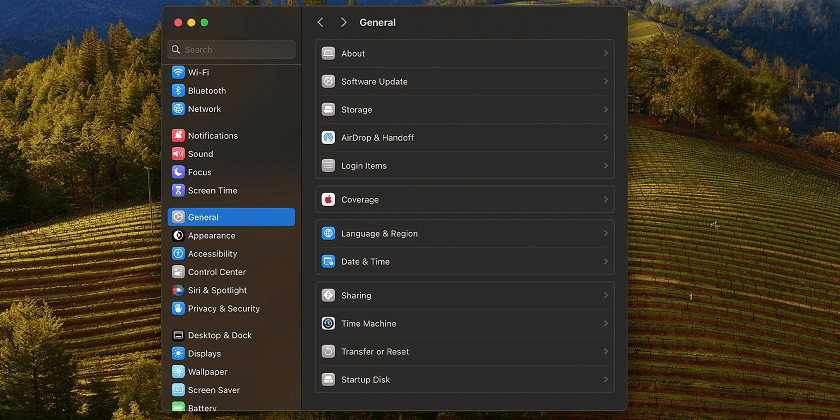
Step 1. Open “System Preferences” on your Mac and go to General > Sharing.
Step 2. Turn on File Sharing by toggling the switch. Toggle the File Sharing toggle by clicking the Information (i) symbol.
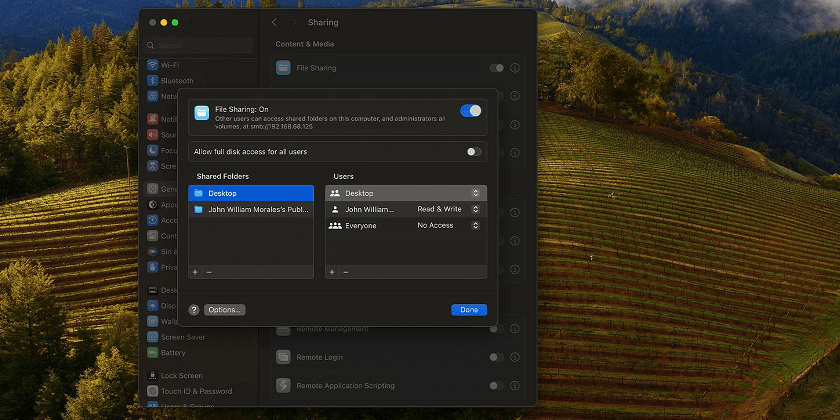
Step 3. Click Options to open the SMB File Sharing window. Check the box for "Share files and folders using SMB."
Step 4. Under Windows File Sharing, select the checkbox next to the account name whose files you want to access from Windows. After entering the user's password, select "OK."
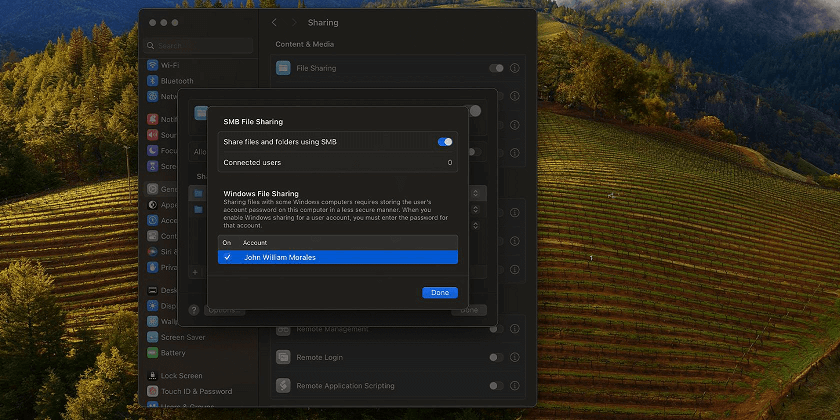
Step 5. Click “Done” to close the SMB File Sharing window.
Step 6. Note down the IP Address shown under the "File Sharing: On" status near the top of the window.
Once you've completed these steps to configure file sharing on your Mac, you can proceed with accessing files from your laptop.
On your laptop:
Here are the instructions for transferring files from your laptop to your Mac:
Step 1. Open File Explorer on your laptop.
Step 2. Enter your Mac's IP address by clicking within the address bar. Ignore the SMB:// prefix; the IP address should appear as "\192.168.x.x".
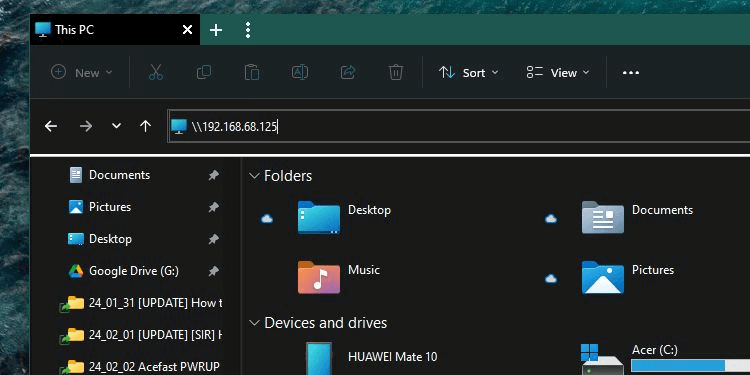
Step 3. Your laptop will prompt you to enter the username and password for the Mac user whose files you're accessing. Ensure you input them exactly as set on your Mac.
Step 4. You will now have access to the shared folders on your Mac. Simply copy files as you would from any other folder on your laptop.
Option 4. AirDroid Personal
When it comes to transferring files between devices, finding a reliable and user-friendly solution is key. AirDroid Personal emerges as a versatile software option that simplifies the process of transferring files from a laptop to a MacBook Air.
For local network transfers, make sure both devices are connected to the same Wi-Fi network. If you're conducting remote file transfers, activate the remote features on the receiving device. During the setup process, sign in to the same AirDroid account on both devices to avoid interruptions. Once the initial setup is finished, proceed with the following instructions.
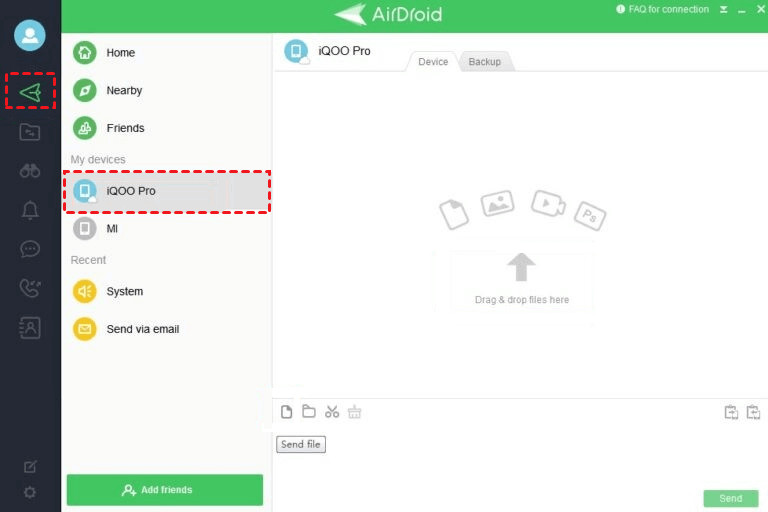
Step 1. Open the AirDroid Personal Desktop client app on your laptop and log in to your AirDroid account. Open the dashboard and select the "File Transfer" option from the menu on the left.
![]()
Step 2. From the list under the My Devices section, choose the name of your MacBook Air.
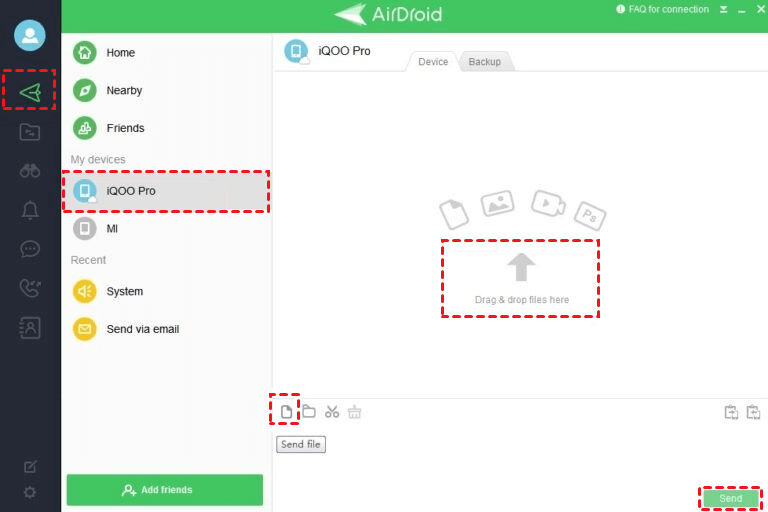
Step 3. Browse through the folders to locate the files you want to transfer. Place them by dragging and dropping them onto the AirDroid Personal interface's right side. Then, click the Send button to start the file-sharing process.
Option 5. Cloud Service
Cloud services are crucial for storage and file-sharing operations, providing virtual space that ensures files remain secure and accessible for decades. On the Android platform, Google Drive is a popular choice for cloud storage. Alternatively, users can opt for third-party apps like Dropbox based on their needs. Despite potential security concerns, cloud services offer excellent access control features. They support cross-platform operations, allowing seamless data flow across different devices. Simply install and configure these services on each device to enable automatic file syncing.
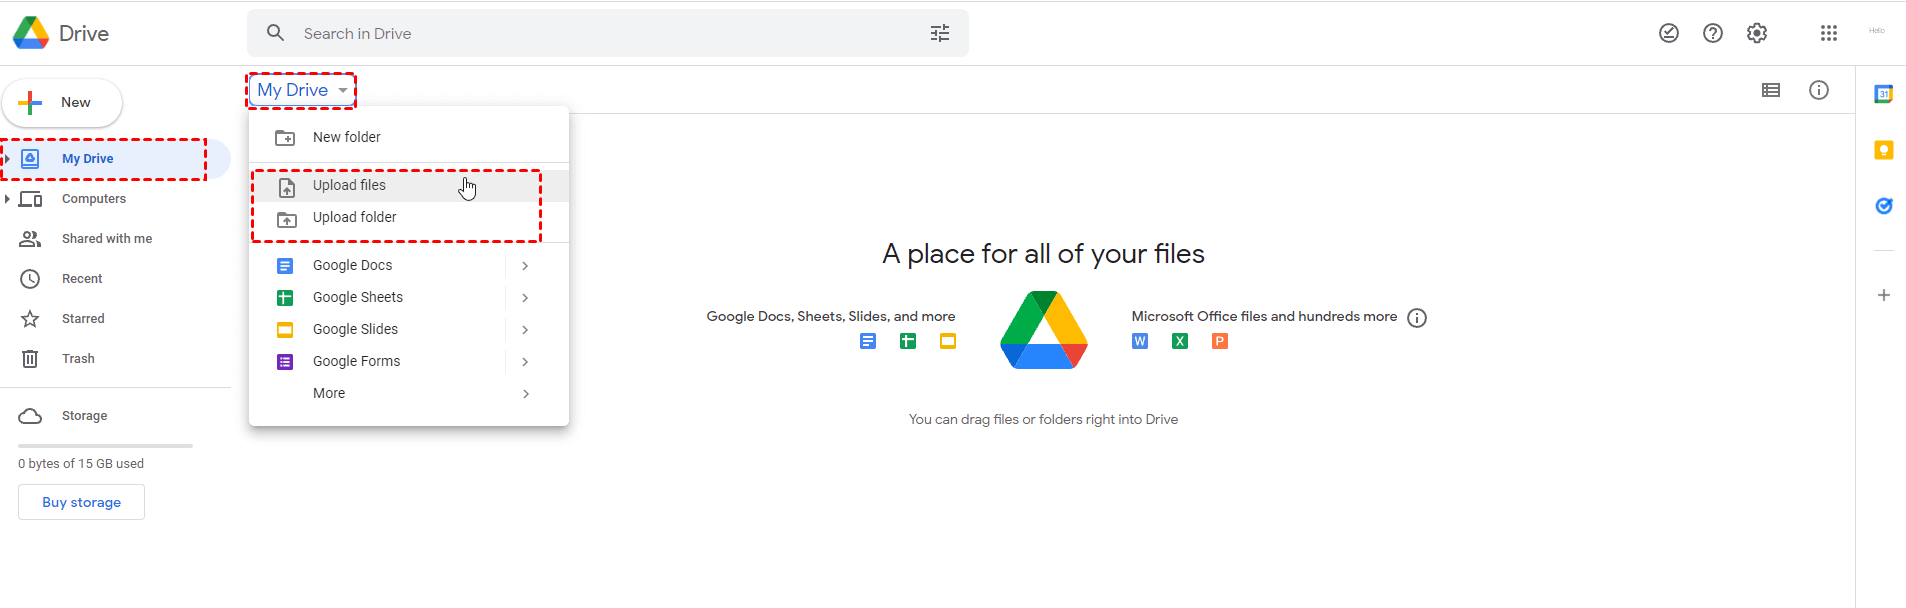
To ensure your files stay updated, maintain an active internet connection. If you exceed the free storage limits, consider subscribing to a paid plan for additional space. Remember, using cloud storage involves waiting twice: once for files to upload from the source device and again for them to download on the target device.
Option 6. Email
Another widely used storage option with convenient accessibility features is email. You can send files to your email and organize them into folders for easier access. By structuring your email with folders, you can quickly find the data you need. The email platform allows users to efficiently organize and connect to their data with a simple login process.
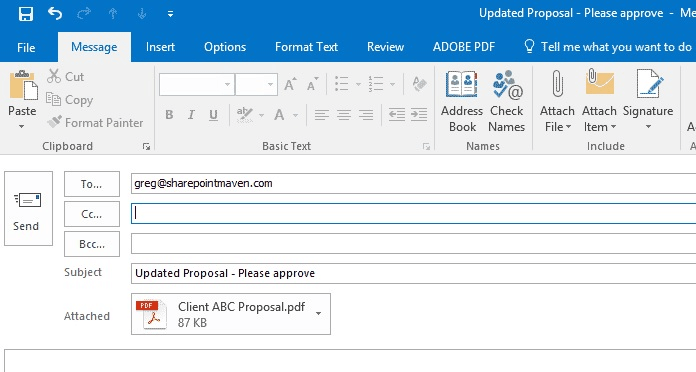
However, one major drawback of using email for storage is its limited memory space allocation. You can only store and access a limited number of files and data due to these space constraints.
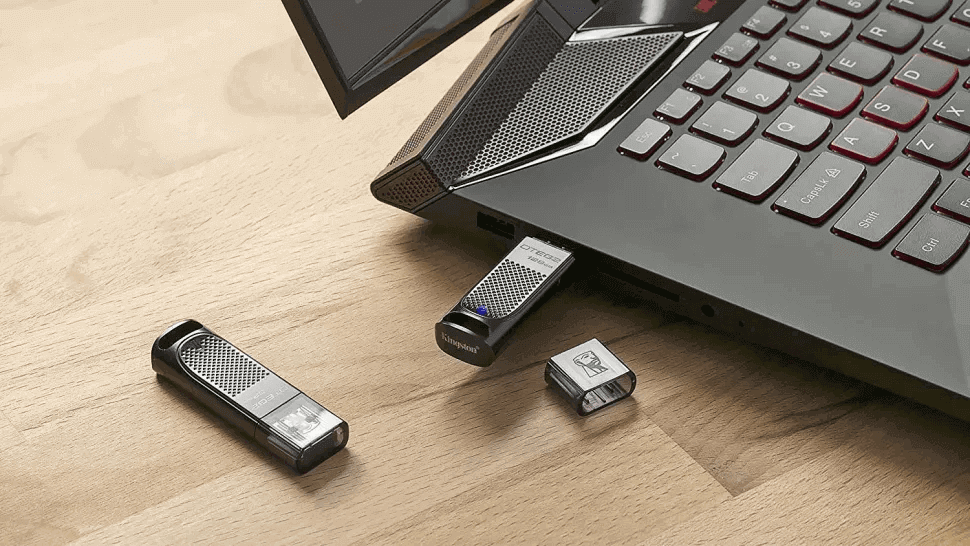
Option 7. Removable Storage Device
This is often the simplest method for transferring files between a laptop and a MacBook. All you need to copy files to and from your devices is a USB stick or external hard disk.
USB Stick:
Insert the USB device into a port on your laptop and transfer the files to this external storage. Once done, disconnect it from the laptop and connect it to your MacBook. Then, transfer the files from the USB to the MacBook. Allow all files to finish copying to the desired storage drives on the Mac, and safely eject the USB from the MacBook.
External Hard Drive:
To transfer files from laptop to Mac, use an external hard drive. Connect the drive to your laptop, navigate to the folders containing the files, and copy them to the hard drive. After copying, disconnect the hard drive from the laptop and connect it to your MacBook to access the copied files on the system.

Conclusion
Mastering how to transfer files from laptop to MacBook Air is essential for seamless device integration and efficient data management. Whether you choose the simplicity of USB cables, the convenience of cloud services, or the reliability of apps like AnyViewer, each method offers unique advantages tailored to different user needs. Understanding these methods empowers you to select the most suitable option for your specific requirements, ensuring safe and swift data transfer. With this comprehensive guide, navigating the transfer process becomes straightforward, allowing you to focus more on your work and less on technical challenges related to file management between devices.
