
Stepwise Tutorial: Bomgar Unattended Remote Access
Bomgar, now called BeyondTrust, is one of the best remote access software. This post goes through the detailed steps to perform Bomgar unattended remote access. Keep reading if you’re interested.
By Ellie / Updated on December 13, 2024
Bomgar unattended remote access
Bomgar, called BeyondTrust now, provides secure remote support for any device, including desktops, laptops, mobile devices, and even POS systems. Can Bomgar unattended remote access another computer? YES! Bomgar's Jump technology enables unattended remote access. Installing a Jump Client on each system, you need to access allows you to control it wherever it goes.

How to perform Bomgar unattended remote access
The detailed steps to use Bomgar Jump Client unattended remote access are divided into three parts:
- Part 1. Add new Jumpoint
- Part 2. Install Jumpoint
- Part 3. Start unattended remote sessions via Jumpoint
Part 1. Add new Jumpoint
Step 1. To configure Jumpoints, go to your Bomgar Appliance /login interface. Click on the Jump tab, go to the Jumpoint page, and click Add New Jumpoint.
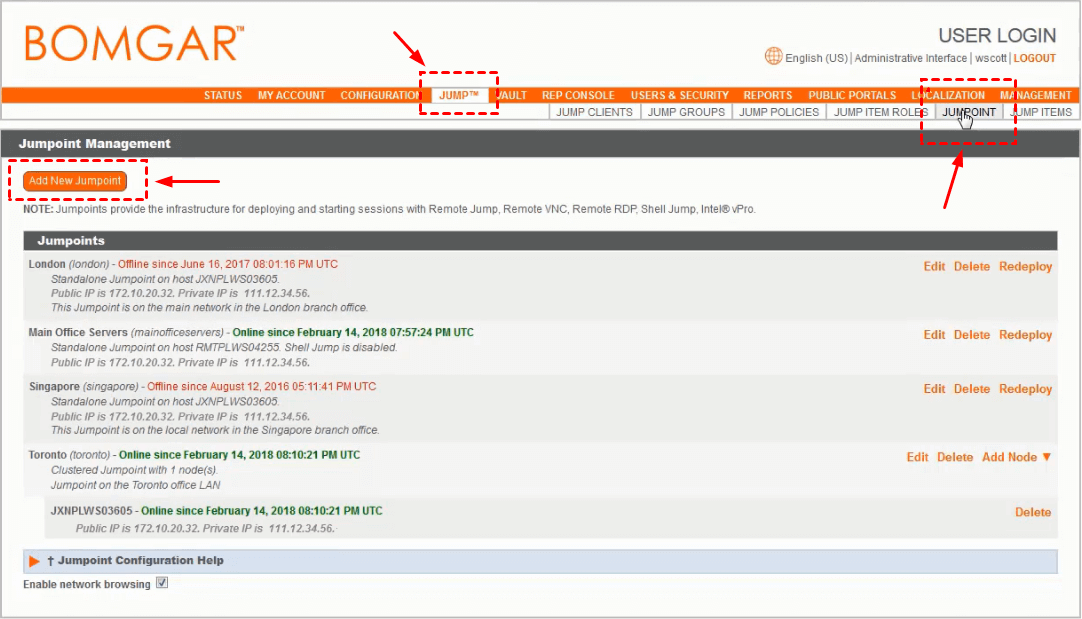
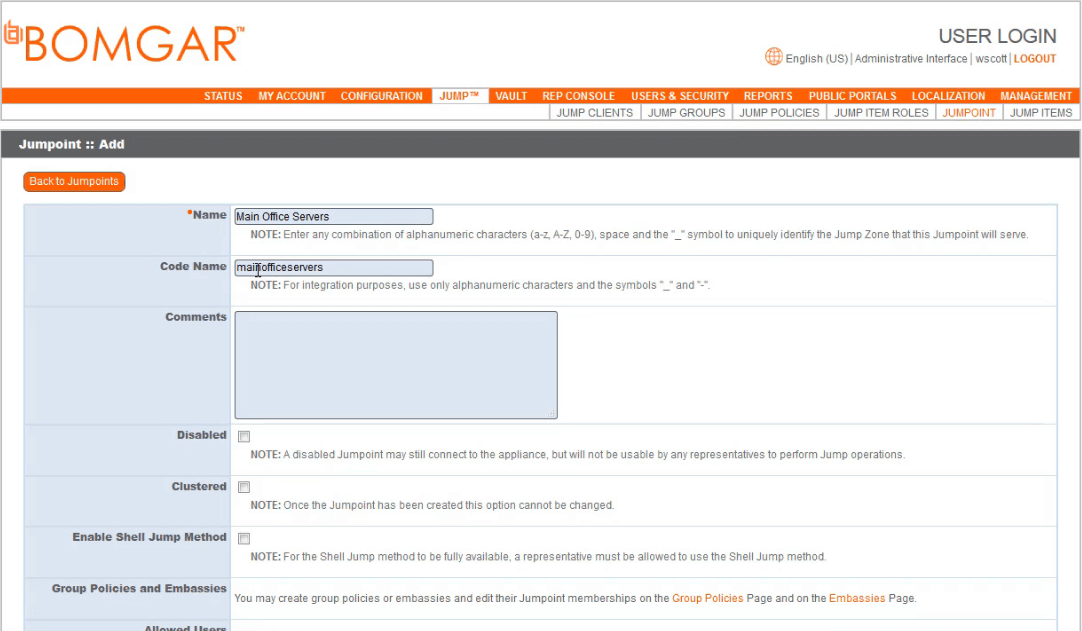
Step 2. Enter an identifying name.
Step 3. Click the User field under Allowed Users to add users from the dropdown menu. These are the people who will be able to utilize this Jumpoint.
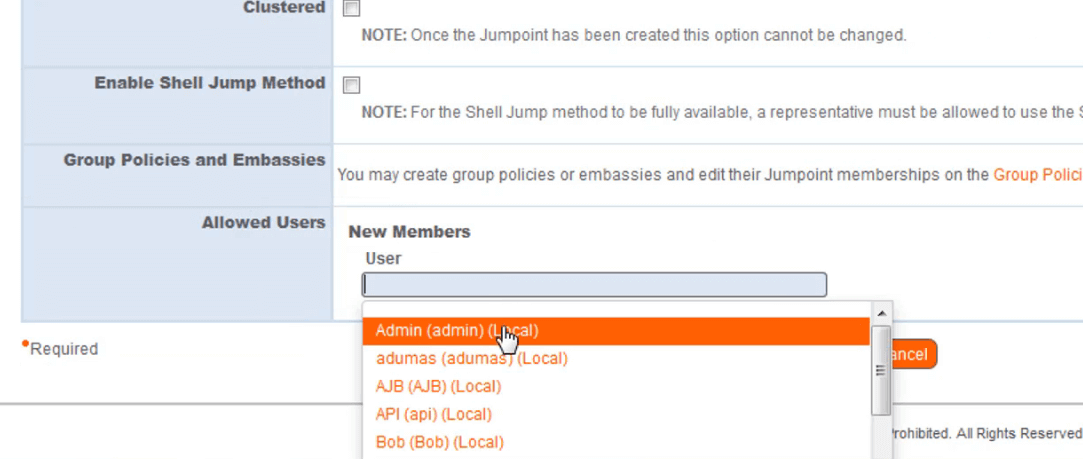
Step 4. Click Add after you have chosen the user. Finally, click Add Jumpoint.

Part 2. Install Jumpoint
Step 1. Find your new Jumpoint in the list of Jumpoints and download the necessary 32 or 64-bit installer to a PC on the remote network you want to access. This mechanism will be used to initiate Jump sessions with other machines on the network.

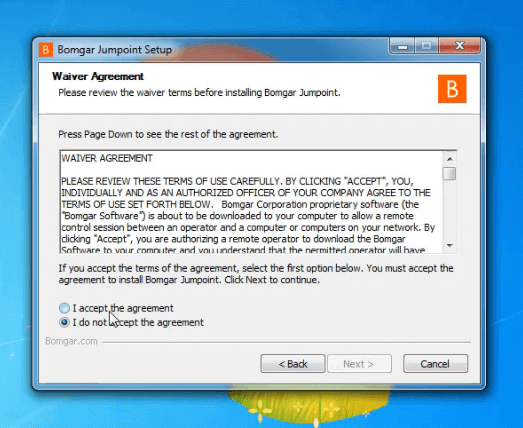
Step 2. The installation wizard will guide you through the first setup steps.
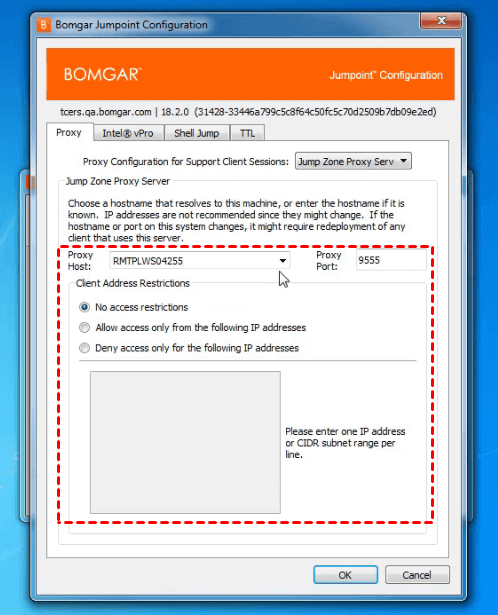
Step 3. Choose Jump Zone Proxy Server to allow this Jumpoint to be used to proxy connections for clients on the network who do not have a native internet connection when deploying a Jumpoint on a distant LAN behind a proxy. Specify the DNS or IP address of the listening interface, as well as the port number. Then press the OK button.
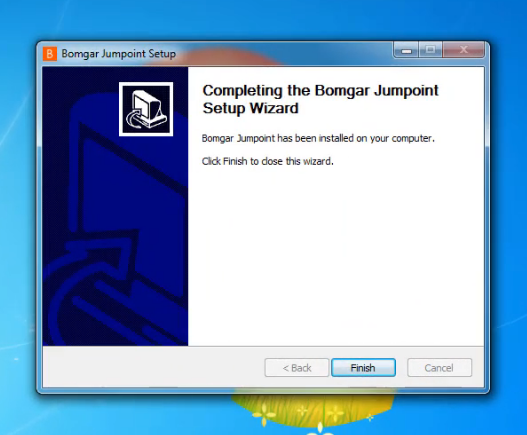
Step 4. Click Finish to complete the Bomgar Jumpoint setup.
Part 3. Starting unattended remote sessions via Jumpoint
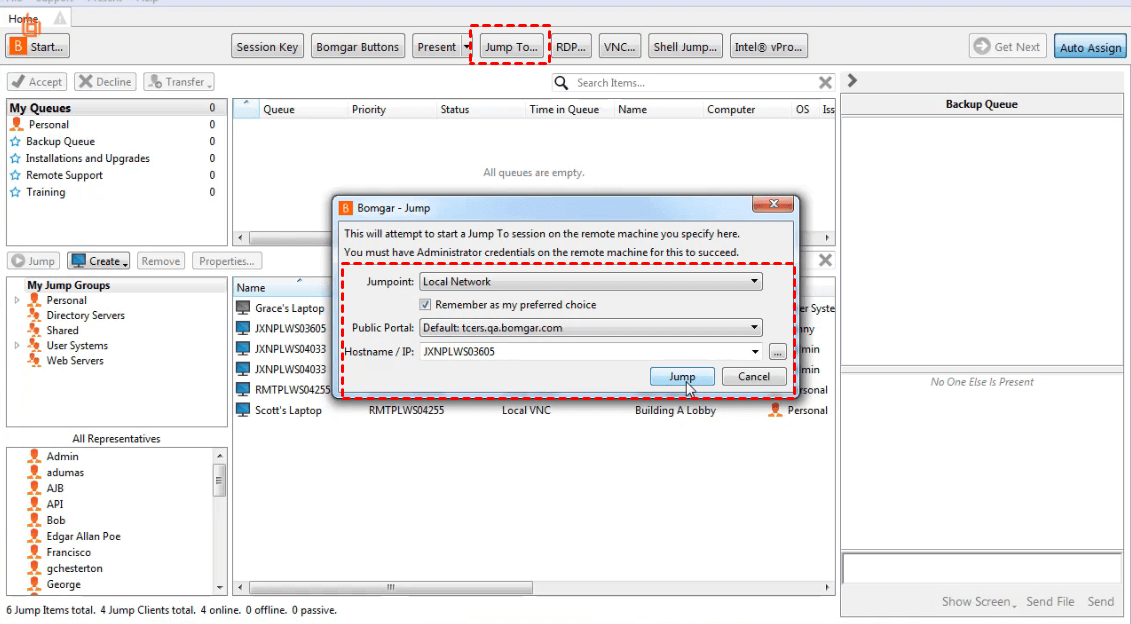
Step 1. Click the Jump To button above the Jump interface to connect to a distant computer using Jumpoint. Choose the network you want to connect to from the dropdown menu. Enter the hostname or IP address of the remote system to be accessed. Then press the Jump button.
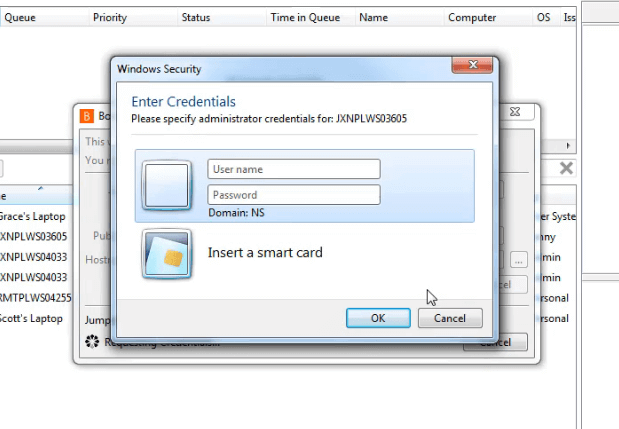
Step 2. You will be prompted for credentials to the remote system. Once valid credentials are supplied, the customer client will install it on the remote system, and a support session will begin.
Bonus tip: Best Bomgar alternative
If you want an easier way to achieve unattended remote access to another computer, try an alternative to Bomgar remote support unattended access. The best Bomgar unattended remote access alternative is AnyViewer. It is a free remote desktop application that is simple to set up and use, providing users the easiest way to access an unattended computer.
Besides, AnyViewer also has the following impressive features:
✍
▪ Quick installation.
▪ Fast connection speed.
▪ One-click for unattended remote access.
▪ Chat available in the remote session.
▪ File transfer support.
▪ Shortcuts of essential apps like Task Manager.
▪ Support controlling multiple computers at the same time.
▪ Multi-monitor and monitor switch supported.
▪ Mobile support is for both iOS and Android devices.
Step 1. Install and launch AnyViewer on both computers. Go to Log in, and then click Sign up. (If you already have signed up on its official website, you can log in directly.)

Step 2. Fill in the signup information and click Sign up to create an AnyViewer account.

Step 3. Then you can see you successfully logged in to AnyViewer. Your device will automatically be assigned to the account you've logged in to.

Step 4. Log in to the same AnyViewer account on the two computers. Then you can achieve a one-click connection by clicking One-click control after going to Device and clicking the computer that you want to access.

Step 5. During the remote session, you are able to change the resolution by clicking Screen. If you don't know the appropriate screen resolution, you can also click Adaptive to adapt automatically.

Step 6. You can also click Mode to change the image qualities.

- Notes:✎...
- It is recommended to upgrade your account to a Professional or Enterprise plan. What can a professional or enterprise plan brings to you:
- More devices will be allowed to assign to the same account for unattended access.
- More connection channels for more devices to be able to start remote connection at the same time.
- One device can connect to more devices simultaneously.
- Black the remote PC screen and disable the remote keyboard & mouse click to protect privacy.
- Transfer 1TB files at 10 MB/s.
The bottom line
This post primarily introduces the detailed steps to perform Bomgar unattended remote access. To make you better understand, we divide the whole process into three parts, add a new Jumpoint, install Jumpoint, and start unattended remote sessions via Jumpoint. Besides, we also introduce a Bomgar alternative to help you efficiently access an unattended computer.
