
2025 Top 4 Best Remote Desktop Software for High Resolution
Finding remote desktop software for high resolution is crucial for professionals needing clarity and detail. This article explores what makes remote desktop software effective for high resolution, criteria for selection, top features to consider, and a comparison of leading options to help you make an informed choice.
By Carolyn / Updated on December 13, 2024
How can I improve my Remote Desktop connection quality?
Remote desktop software has become indispensable in today's digital landscape, enabling seamless access to computers and networks from anywhere. For professionals and businesses, especially those requiring high-resolution displays, choosing the right software can significantly impact productivity and user experience. Whether you're a professional needing seamless access to detailed designs, a gamer wanting to play from afar with no compromise on graphics, or a teacher delivering crystal-clear presentations, choosing the right remote desktop software can significantly enhance your workflow and experience.
This article delves into the realm of remote desktop solutions, focusing on the best remote desktop software for high resolution Windows 11/10.
Best remote desktop software for high resolution [4 options]
For tasks that demand high visual clarity and precision, such as design work and technical support, choosing the best remote desktop software for high resolution images is paramount. In this article, we will introduce you to the top 4 best remote desktop software for high resolution Windows 11/10, and make the right choice for you after a deeper understanding.
Option 1. AnyViewer
AnyViewer stands out as premier remote desktop software designed for high-resolution Windows 11/10 environments, specializing in remote access. It features Ultra HD mode, up to 60 FPS, and 4:4:4 True Color mode to deliver exceptional resolution and precise color accuracy. This capability is crucial for tasks demanding accurate color rendering, such as modeling, digital illustration, and photo editing.
Moreover, AnyViewer supports connecting to remote computers with multiple monitors, offering users the flexibility to display all monitors or select specific ones. This feature is particularly advantageous for designers accustomed to working with multiple screens, mimicking the flexibility of a local workstation setup.
The software also excels with comprehensive features including screen sharing, file transfer, remote sound, text chat, and multi-session support, catering to diverse user needs in a unified platform.
Additionally, AnyViewer is renowned for its award-winning performance optimized for minimal latency. This ensures smooth operation even when handling resource-intensive applications like 3D modeling and video editing suites. Such optimization is pivotal for maintaining a seamless creative workflow and meeting project deadlines effectively.
Step 1. Start by downloading and installing AnyViewer on both your local and remote devices. Create an AnyViewer account and ensure you log in with the same account on both devices.

Step 2. On your local device, choose the remote computer you want to access. Enable unattended remote access by clicking on "One-click control."

Step 3. After completing the setup, gain control of the remote device's mouse and keyboard. During a remote session, locate the toolbar at the top center of the window. Navigate to Image > Image Quality > Ultra HD Mode to connect to UHD.
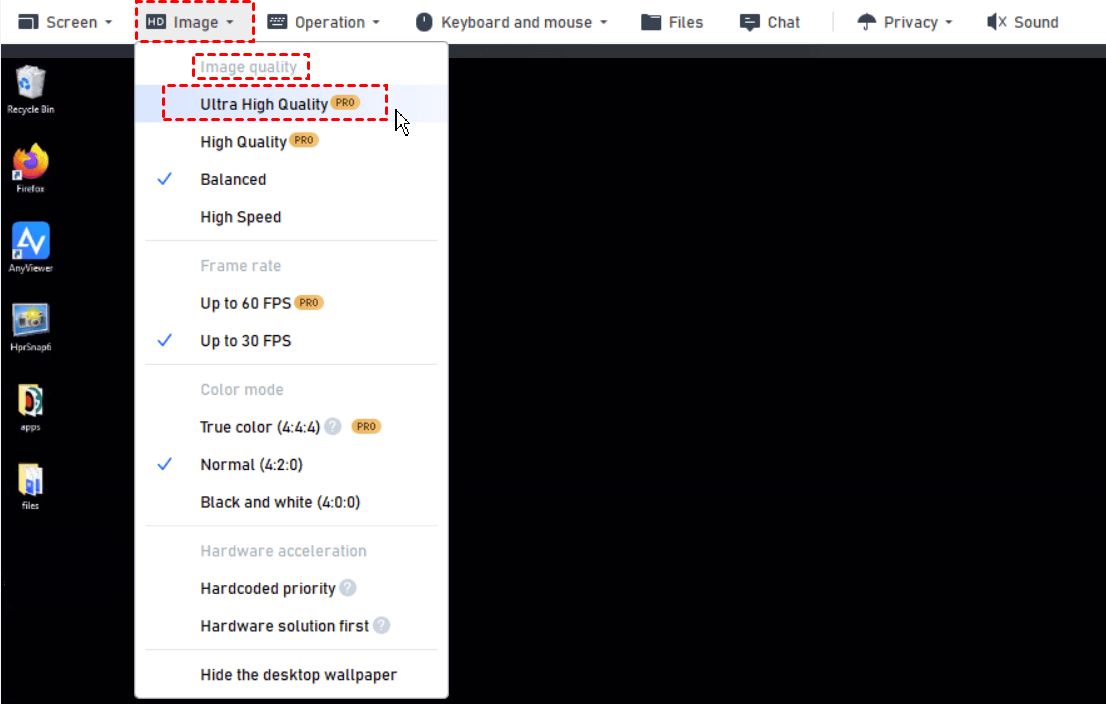
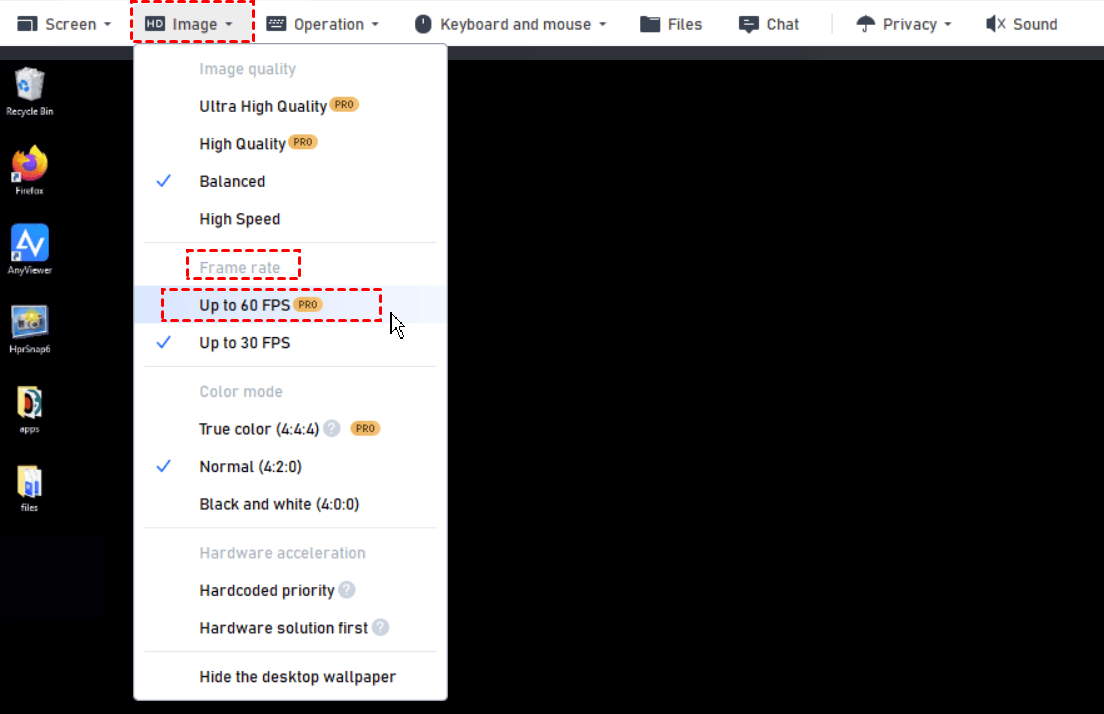
Step 4. Enhance the frame rate for superior high-definition quality by selecting Image > Frame rate > Up to 60 FPS.
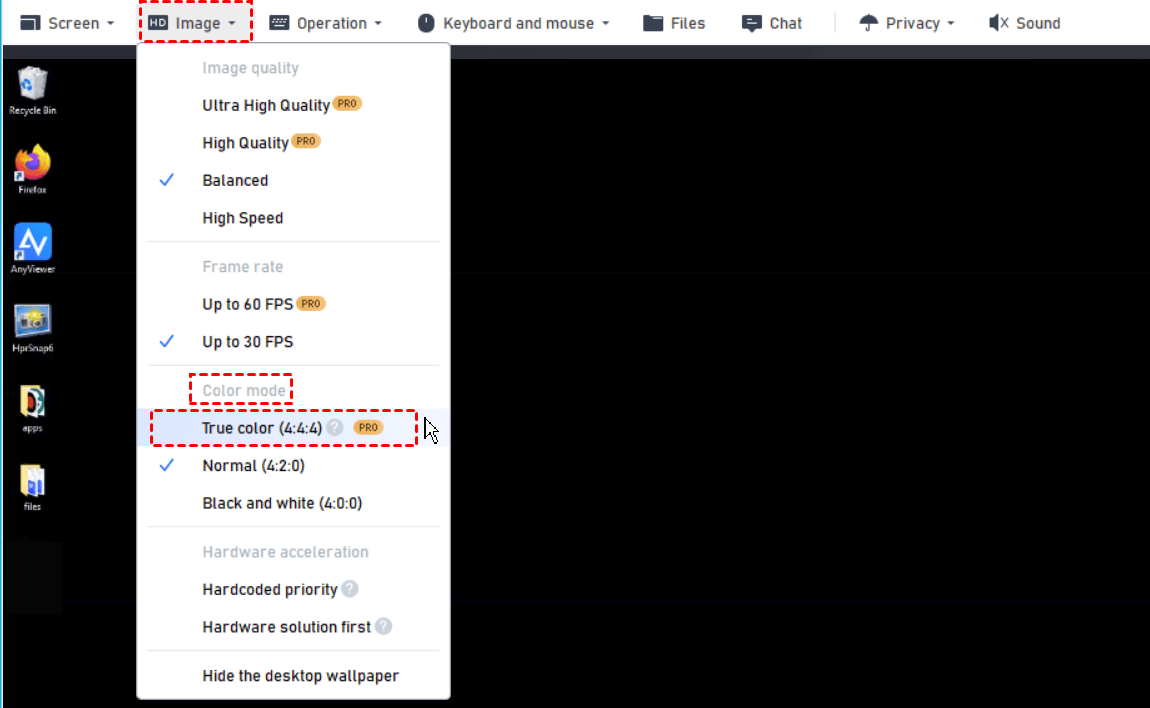
Step 5. Finally, optimize color precision by selecting Image > Color mode > True color, utilizing 4:4:4 chroma sampling for accurate color display. Your high-resolution remote desktop is now successfully configured. Begin enjoying your enhanced remote desktop experience!
Option 2. TeamViewer
TeamViewer is another solution known for its exceptional ability to deliver clear, detailed visuals over a remote connection. Whether you're a professional graphic designer who needs to be pixel-perfect or an IT expert who needs to solve complex system problems, TeamViewer ensures that every detail is faithfully reproduced on the remote device.
However, when it comes to meeting the intricate demands of creative work, such as achieving exact color accuracy and rendering high-resolution images, TeamViewer may not deliver the same level of performance as more specialized tools. Additionally, some users may find the costs associated with its commercial licenses to be prohibitive. Furthermore, the software's performance may experience lag when handling graphics-intensive tasks, which could potentially disrupt the seamless flow of creative workflows.
Step 1. To begin, download and install TeamViewer on your device. During installation, specify whether you intend to use the software for business or personal purposes. For this demonstration, we will focus on using the personal version.

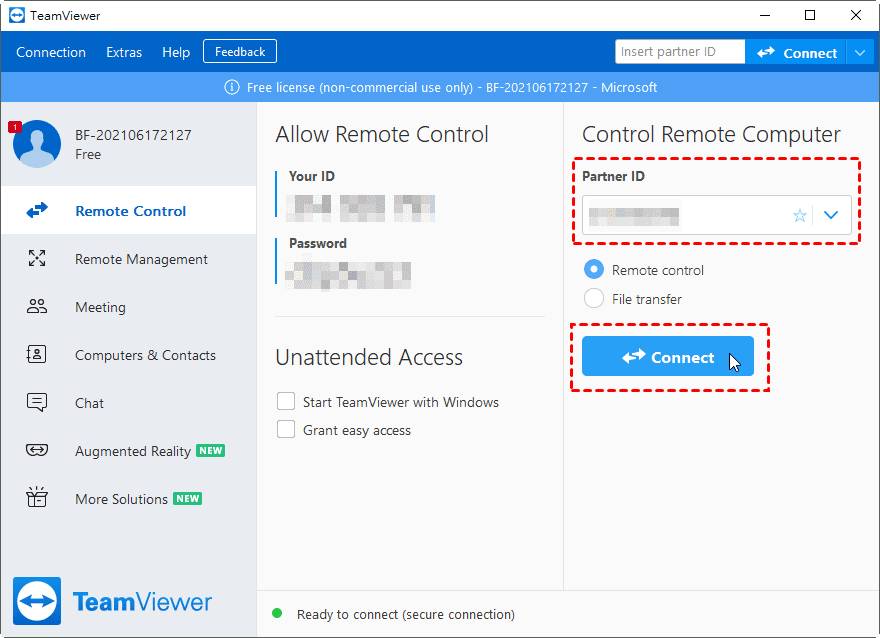
Step 2. Once installation is complete, sign in to your TeamViewer account. Within the TeamViewer interface on your computer, navigate to the "Remote Control" option situated on the left-hand side. Enter the host ID provided by the remote user into the "Partner ID" field, and then click on "Connect" to establish the remote access session.
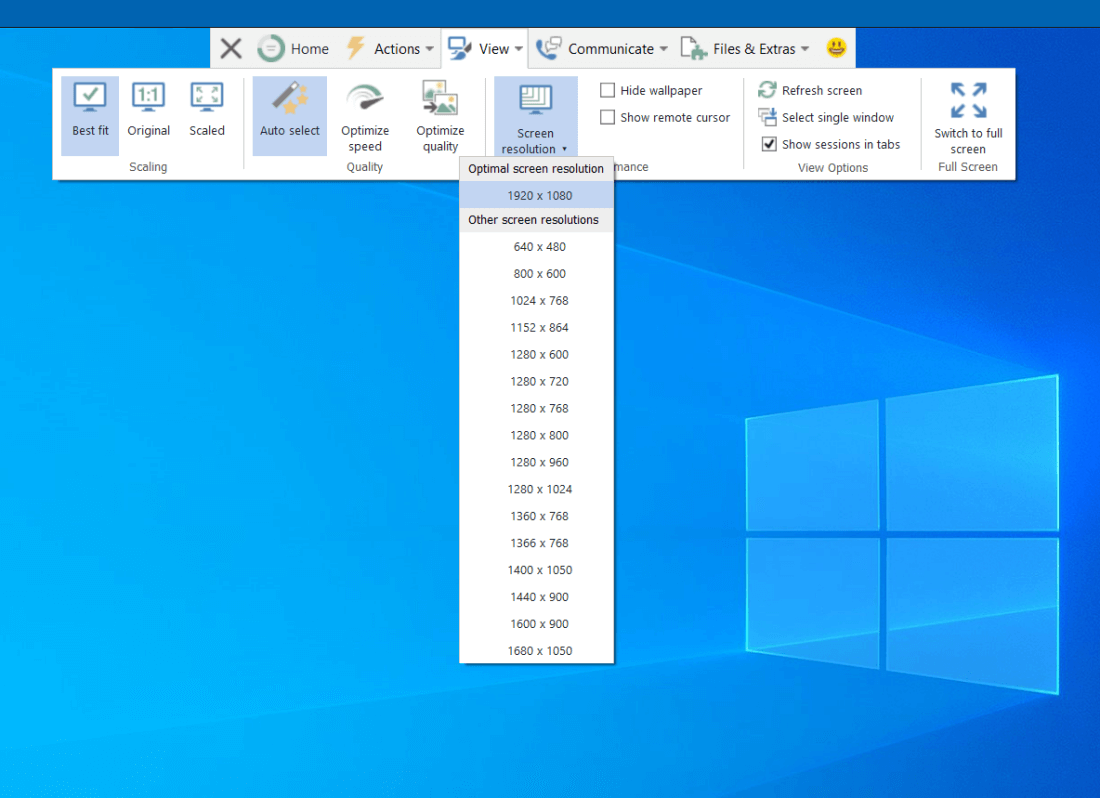
Step 3. Upon successful connection, you can adjust the screen resolution according to your preferences. Simply choose your desired resolution from the "Screen Resolution" options located above the remote session window.
Option 3. Microsoft Remote Desktop
Microsoft Remote Desktop excels in providing users with the capability to access and interact with their desktops or applications remotely while maintaining exceptional clarity and fidelity. Whether you're managing intricate design projects, conducting data analysis, or delivering presentations, Microsoft Remote Desktop ensures that every pixel and detail is faithfully reproduced on your remote device.
However, Microsoft Remote Desktop may not meet the performance demands necessary for intricate creative tasks, such as rendering high-resolution images with precise color accuracy. Its functionality is relatively basic, lacking advanced features such as multi-monitor support or seamless integration with specialized peripherals, which are essential for an efficient design workflow. Additionally, its compatibility is primarily geared toward Windows users, which may not suffice for design environments requiring cross-platform capabilities.
On the remote computer:
Step 1. Access "Settings" > "System" > "Remote Desktop" and activate the "Enable Remote Desktop" feature.

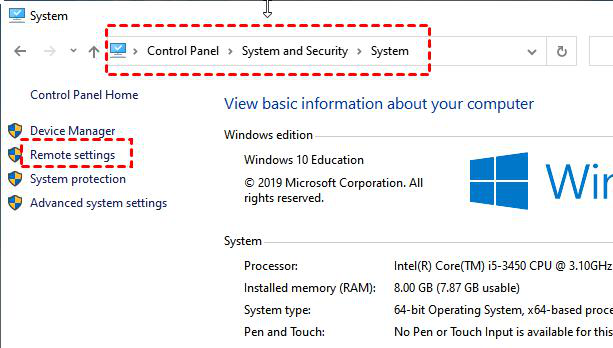
Step 2. Navigate to "Control Panel" > "System and Security" > "System." In the System section, select "Remote Settings."
On the local computer:
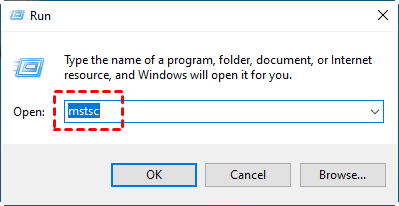
Step 1. Simultaneously press "Win+R," then enter "mstsc" in the Run dialog and press Enter to launch the Remote Desktop connection.
Step 2. Adjust the display settings by clicking on "Display" to optimize image clarity and resolution.

Option 4. Chrome Remote Desktop
Chrome Remote Desktop enables users to access their desktop computers or virtual machines with high-resolution capabilities, providing a clear and detailed view of applications, documents, and multimedia content. Whether you're a professional needing to manage intricate designs, a student accessing educational resources, or an IT specialist supporting remote systems, Chrome Remote Desktop ensures that visual fidelity is maintained without compromise.
However, Chrome Remote Desktop, while adequate for basic access and light tasks, may not fulfill the rigorous demands of professional creative work. The resolutions and color accuracy provided by Chrome Remote Desktop might not meet the high standards required for complex design tasks.
Furthermore, Chrome Remote Desktop lacks advanced features such as dedicated support for design peripherals and customizable settings tailored specifically for creative applications. This deficiency could potentially interrupt the smooth workflow of professionals who rely on specialized tools and configurations.
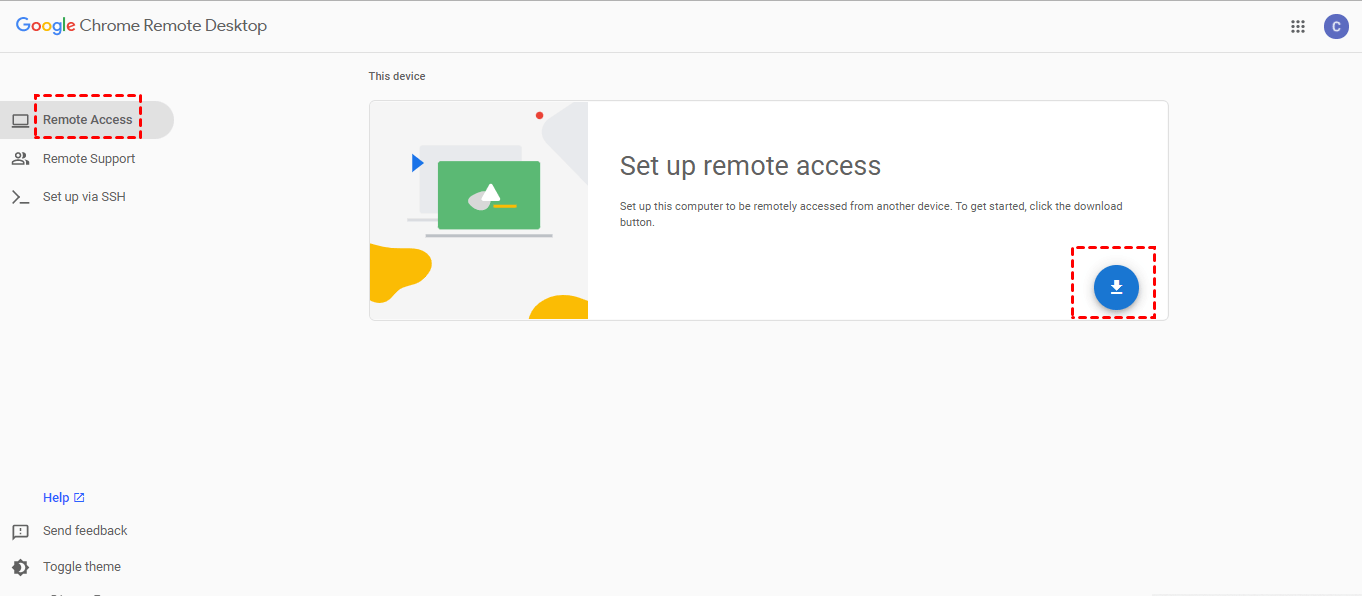
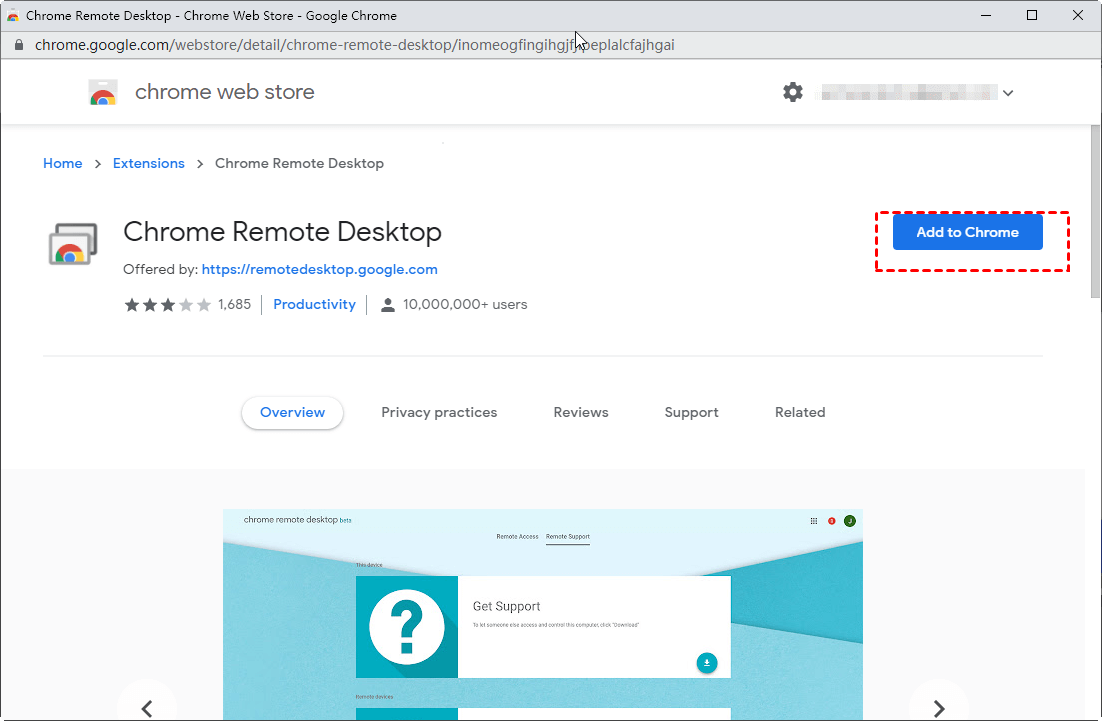
Step 1. Start by opening the Chrome Remote Desktop download page on the host PC. Look for the "Remote Access" option and click the blue download button.
Step 2. You'll be directed to the Chrome Web Store. Click on "Add to Chrome."
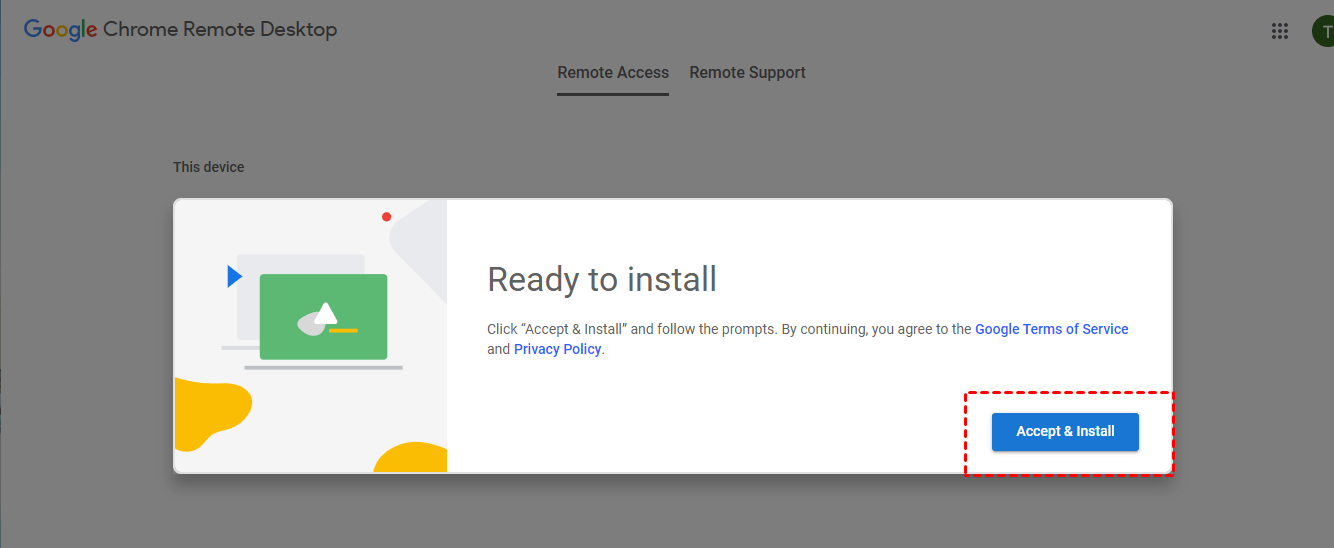
Step 3. Proceed by clicking "Accept & Install" to finalize the installation.
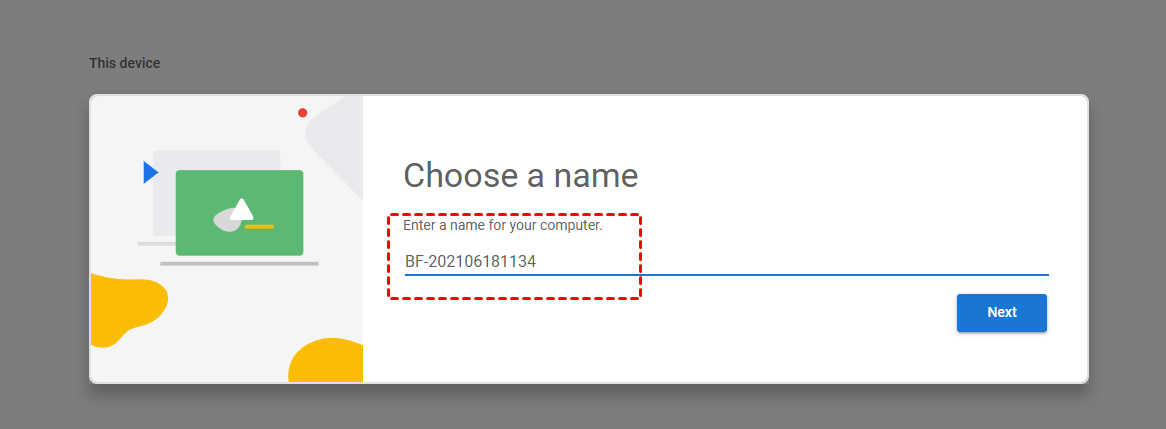
Step 4. Enter a name for your device and click "Next."
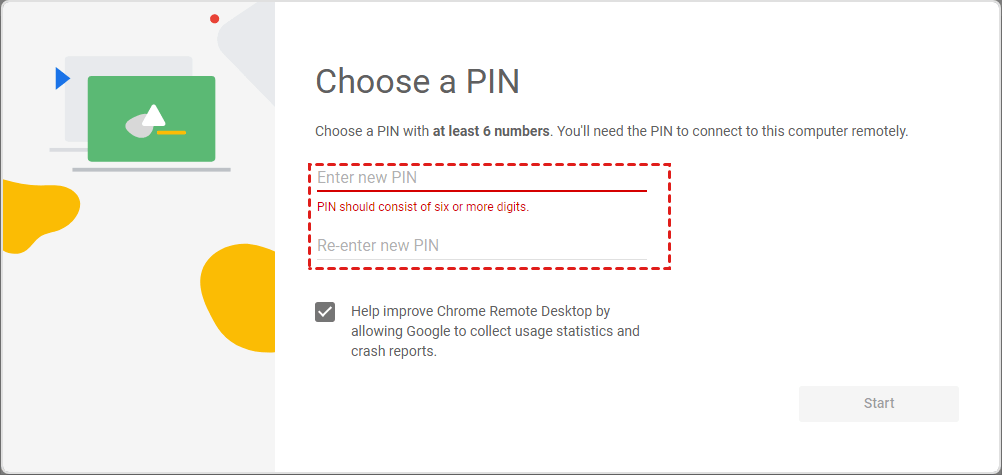
Step 5. Create a PIN with at least six digits, confirming it to initialize the program.
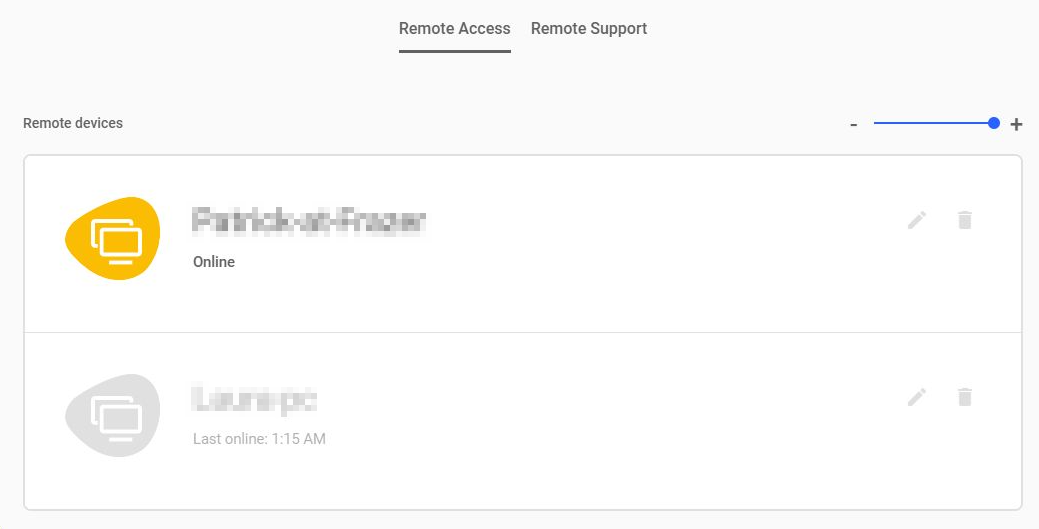
Step 6. On the local PC, launch the Chrome browser and go to the specified page. Log in using your Google account credentials. Once logged in, you'll see a list of available computers.
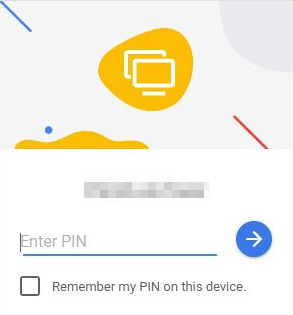
Step 7. Choose the previously configured computer and enter the PIN to start the remote control session.
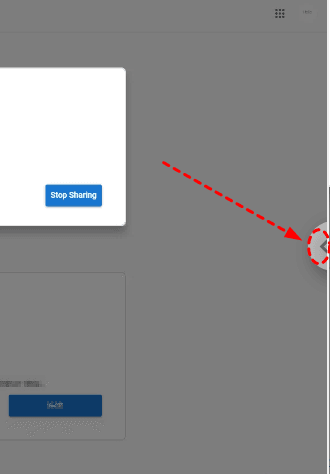
Step 8. After successfully establishing the connection, click the small arrow in the middle right of the screen for additional options.
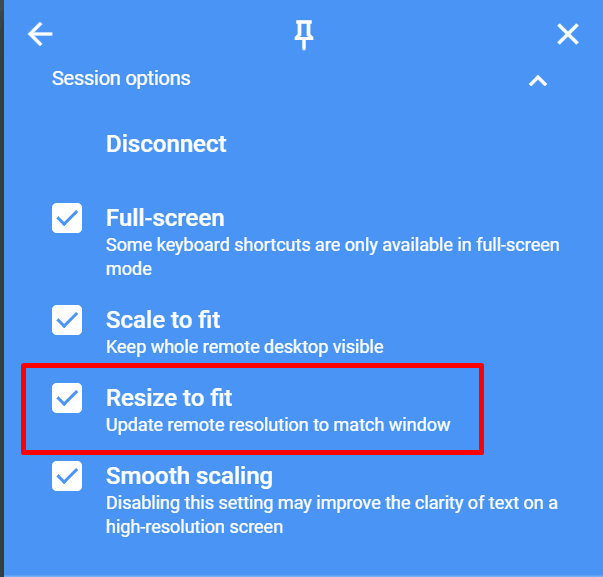
Step 9. In the Session Options section, adjust the Chrome Remote Desktop resolution settings according to your preferences. Make sure "Scale to fit" is unchecked. Optionally, select "Resize to fit" to match your device's screen size.
Conclusion
In the ever-evolving landscape of remote desktop solutions, choosing the best remote desktop software for high resolution needs is paramount for professionals across various industries. Whether you're a graphic designer needing pixel-perfect clarity, a gamer seeking flawless graphics, or an educator delivering crystal-clear presentations, the right software can transform your remote experience. Each option—like AnyViewer with its Ultra HD mode and TeamViewer's reliability—offers unique strengths tailored to different user requirements. By considering factors such as resolution support, latency, and interface usability, you can enhance productivity and workflow efficiency significantly. Make an informed choice to elevate your remote desktop experience to new heights of clarity and performance.
