
How Does Android Remote Desktop Windows 8? [Full Tutorial]
Can I remote into Windows 8 from an Android device? YES! This post provides a full tutorial on how to Android Remote Desktop Windows 8. Besides, it also introduces an easier Microsoft Remote Desktop alternative.
By Ellie / Updated on December 13, 2024
Does Windows 8 allow Remote Desktop?
Remote Desktop allows seamless connections between Windows computers within the same network or over the Internet. It is a native feature integrated into the Windows operating system and offers extensive compatibility. Windows 8 Professional and Enterprise is among the supported operating systems, along with:
- Windows 11/10/7 Professional
- Windows 11/10/7 Enterprise
- Windows 7 Ultimate
- Windows Server 2022/2019/2016/2012 R2/2012/2008 R2/2008
- Windows Multipoint Server 2012/2011
- Windows Small Business Server 2011/2008
Previously, Remote Desktop functionality was exclusive to Windows computers. However, with the growing prominence of smartphones and tablets, it is now possible to remotely access Windows from these mobile devices. This expanded accessibility has broadened the usability of Remote Desktop, catering to the evolving needs of users in today's technology-driven era.
How to use Android Remote Desktop Windows 8
To utilize Android Remote Desktop Windows 8, the process can be divided into two parts. The initial step involves setting up Remote Desktop on Windows 8, followed by the subsequent step of initiating a Remote Desktop connection from your Android device to Windows 8. To acquire a comprehensive understanding of the procedure, please refer to the sequential instructions provided below for how to set up Remote Desktop to Windows 8 from Android.
Part 1. Configure Remote Desktop on Windows 8
To establish Remote Desktop on your Windows 8 system, follow these steps to enable remote connections and locate the IP address and user name.
Enabling remote control connections on Windows 8
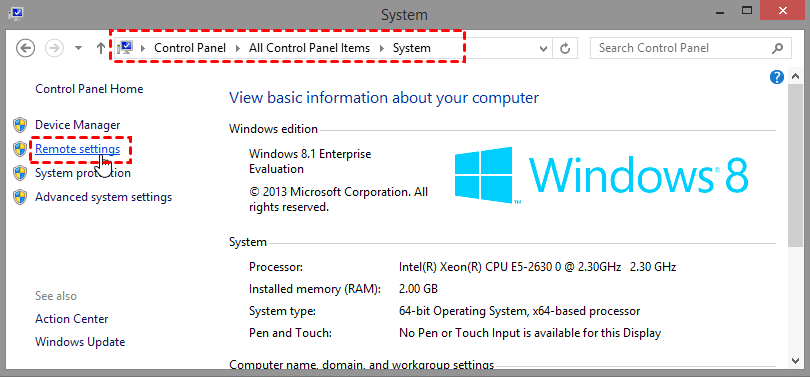
Step 1. Go to Control Panel > All Control Panel Items > System > Remote settings.
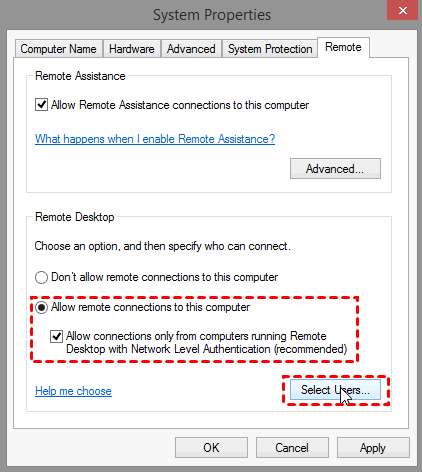
Step 2. On the Remote tab, click Add to add users who are allowed to access this computer. Then click Select Users.
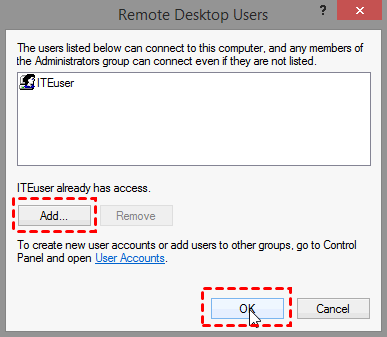
Step 3. In the resulting pop-up window, click Add and enter the usernames of the users you wish to grant access to this computer (ensure the user account already exists for remote desktop operation). Finally, click OK.
Finding the IP address and user name of Windows 8
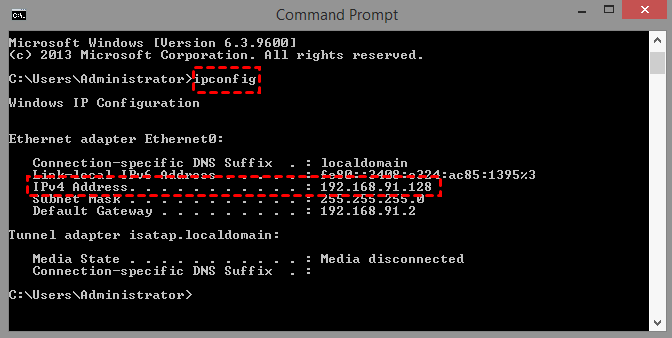
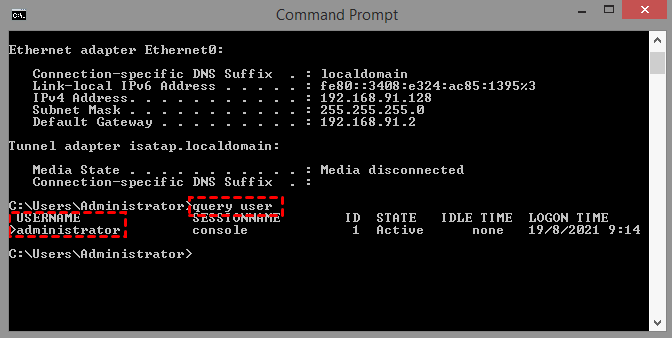
Step 1. Press the Win + R keys to open the Run dialog box. Type "cmd" and click OK. Next, enter "ipconfig" and press Enter. A set of IP addresses will be displayed, with the IPv4 address being the relevant one.
Step 2. To determine the PC name, type "query user" in the command prompt and observe the displayed information.
By completing these steps, you will have successfully configured Remote Desktop on your Windows 8 system, allowing for remote connections. The next section will cover how to initiate a Remote Desktop session from your Android device.
Part 2. Remote Desktop into Windows 8 from Android
Once you have successfully configured Windows 8, you can proceed to utilize the Android Microsoft Remote Desktop to control your Windows 8 system. Follow the steps below:
Step 1. Download Microsoft Remote Desktop from the Android app store. Install the application and launch it. Tap the "+" symbol to create a new connection. Wait for the app to search your local network for connected PCs. You must manually add the one you want to connect to if it does not appear automatically.
Step 2. In the "PC name" field, input either your PC name or local IP address.
- If your PC and phone are connected to the same network, you can find the local IP address in your PC's network settings.
- If they are on different networks, enter the port forwarding address in the format "Your IP address:3389" (where 3389 represents the port number).
Click on "Save" to register your PC, which will then be displayed in the main interface.

Step 3. A security dialog will appear when you establish a connection with a remote server for the first time. Before tapping "Connect", make sure to select the "Never ask for connections to this PC" checkbox. Enter your Windows login credentials to access the remote PC.

Step 4. Congratulations! You are now remotely connected to the desired Windows 8.

By following these steps, you can establish a Remote Desktop connection from your Android device to your Windows 8 system, granting you control and access to your PC from a remote location.
AnyViewer: A highly compatible Remote Desktop alternative
When it comes to remotely controlling Windows 8 from an Android device, AnyViewer emerges as an exceptional alternative to Microsoft Remote Desktop. Offering a seamless experience, AnyViewer is a free remote desktop software compatible with both Windows and mobile platforms, including Android and iOS. In addition to its compatibility, AnyViewer boasts several advantages over Remote Desktop.
The reasons why choose AnyViewer instead of Microsoft Remote Desktop
- Intuitive interface and simplified configuration: AnyViewer provides an intuitive interface and a streamlined setup process. Unlike Remote Desktop, it eliminates the need for IP addresses or usernames.
- Direct usage without port forwarding: AnyViewer allows direct usage without requiring port forwarding, even when the two devices are connected over the internet.
- Enhanced Windows Edition support: AnyViewer supports a broader range of Windows editions, including Windows 8 Home and Standard editions, which are not supported by Remote Desktop.
Now, let's explore the steps to control Windows 8 from Android using AnyViewer, which are simpler compared to Remote Desktop Connection Android to Windows 8.
Part 1. Set up AnyViewer on Windows 8
Step 1. Download and install AnyViewer on your computer.
Step 2. Access the login screen and proceed with the registration process. If you already have an account from the official website, you can log in directly.

Step 3. Complete the sign-up form to finalize the registration.

Step 4. You are now successfully logged into AnyViewer, and your device will be automatically associated with the logged-in account.

Part 2. Initiate control from your Android phone
Step 1. Install AnyViewer for Android on your Android device.
Step 2. Log in using the account you created in the previous steps.

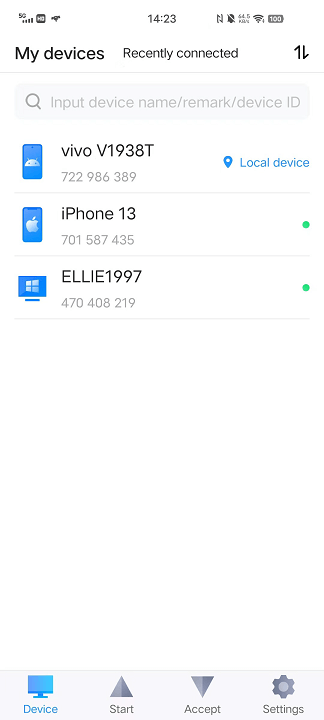
Step 3. The "My devices" list will display the devices logged into the same account.
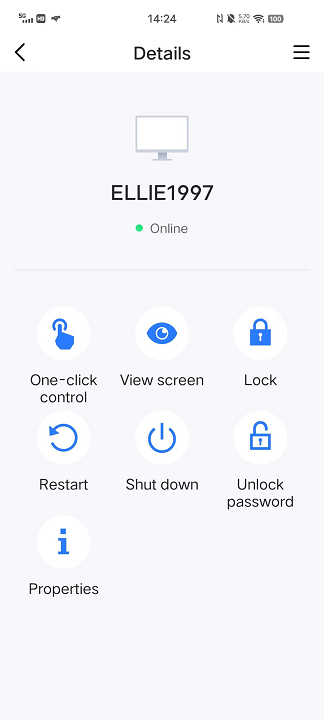
Step 4. Tap on your desired PC from the list and utilize the "One-click control" feature to establish a quick connection.
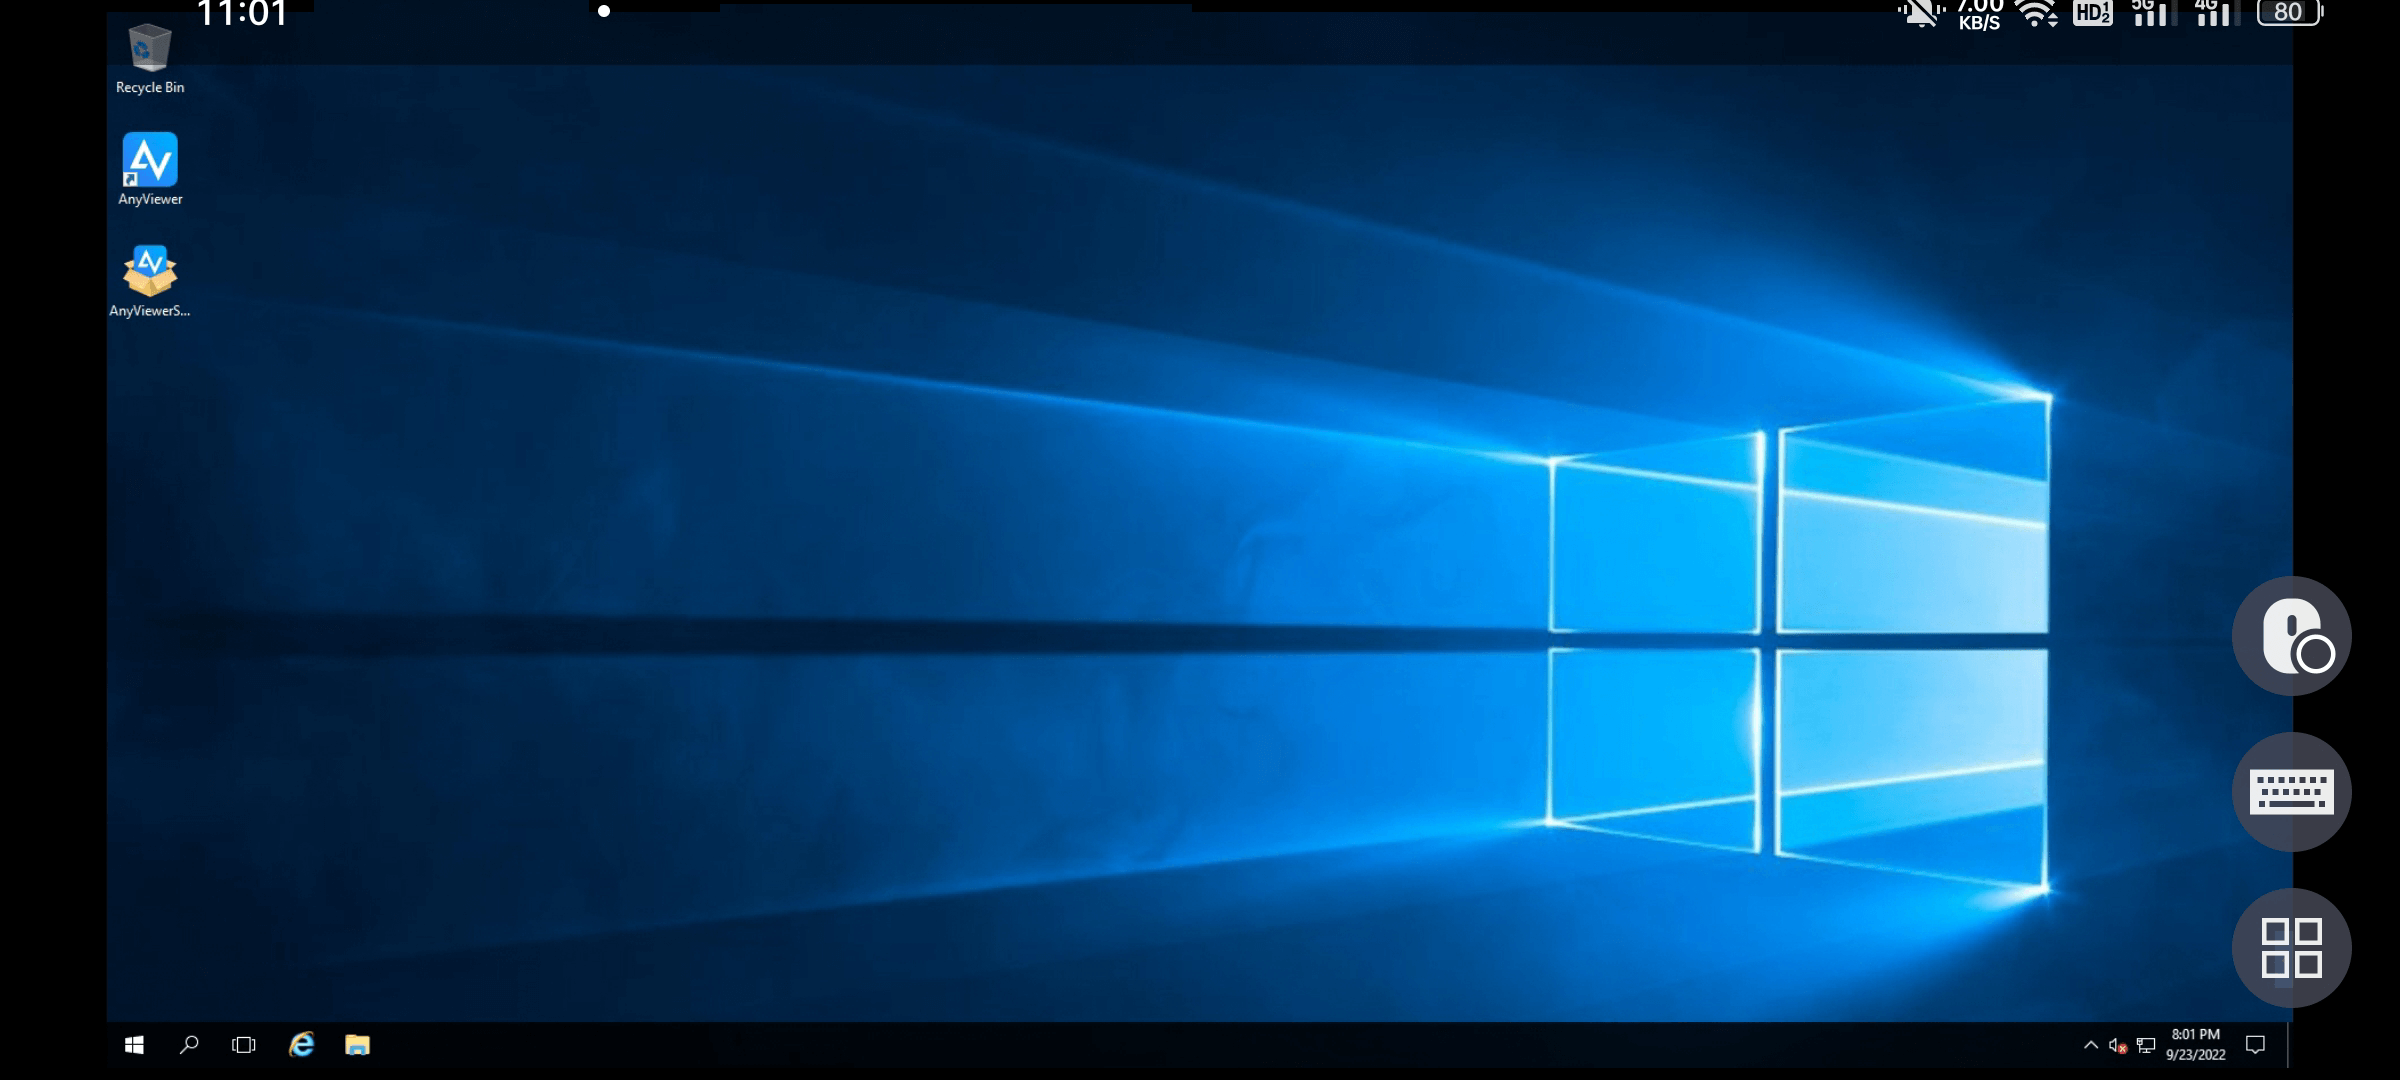
Step 5. Once connected, your Android device will have complete control over Windows 8.
The bottom line
In conclusion, AnyViewer presents itself as a highly compatible and user-friendly alternative to Android Remote Desktop Windows 8. With its intuitive interface, simplified configuration process, and support for a wider range of Windows editions, AnyViewer offers a seamless remote desktop experience. By eliminating the need for port forwarding and providing direct usage across the internet, AnyViewer proves to be a convenient choice. Whether it's for personal or professional use, AnyViewer empowers users to effortlessly access and control their Windows 8 system from their Android devices.
