
Five Methods to Allow Standard User to RDP on Win 10
This post mainly introduces five methods to allow standard user to RDP on Win 10. If you happen to encounter this problem, you can check out the solutions here to solve the problem or choose a RDP alternative.
By Ellie / Updated on December 13, 2024
How can I add standard user to RDP on Wind 10?
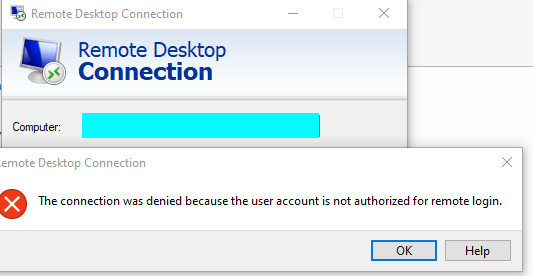
“When I was trying to Remote Desktop into a Windows 10 computer. I got the following error message: The connection was denied because the user account is not authorized for remote login. Seems my account has not been added to the user group. Or does RDP require admin rights? So how can I add my account as a standard user to RDP on Windows 10 and how do I allow remote access to standard user?”
How to allow standard user to RDP on Windows 10
This error normally happens when the computer you’re trying to connect to has not added you as a standard account for remote access. Therefore, here we offer you five methods to allow standard user to RDP on Win 10.
Method 1. Add standard user in System Properties
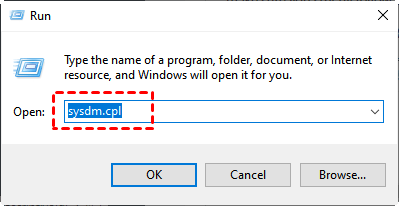
Step 1. Press Win + R to invoke the Run dialog box. Then type in “sysdm.cpl” and hit OK to open System Properties.
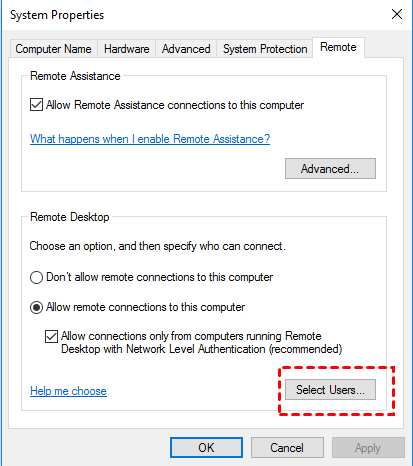
Step 2. Go to the Remote tab, and then click Select Users.
Step 3. Click Add.
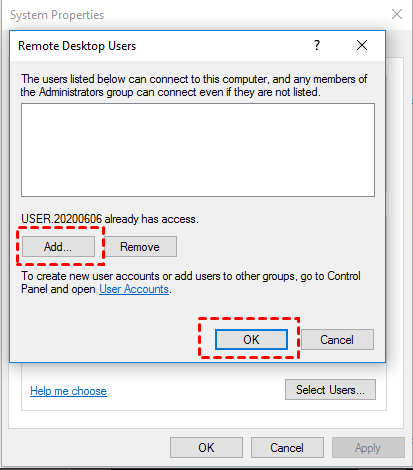
Step 4. Enter the user name, click Check Names, and then click OK.
Step 5. Restart your system for it to take effect.
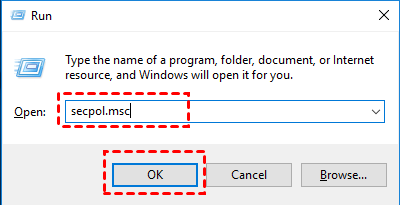
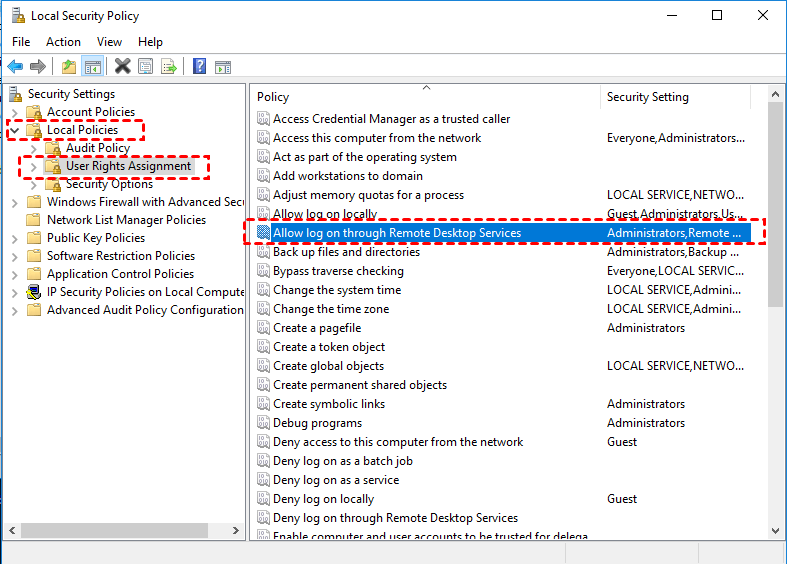
Method 2. Create a new Security Group for Remote Desktop Services
Step 1. Press Win + R to invoke the Run dialog box, then type in “secpol.msc” and press OK.
Step 2. Navigate here: Local Policies > Users Right Assignment. Find Allow log on through Remote Desktop Services on the right pane, and double-click it.
Step 3. Check if the user name has listed here. If not, click Add User or Group.
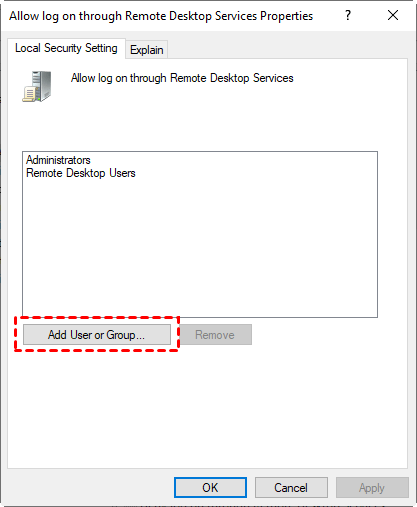
Step 4. Enter the user name, and click OK.

Step 5. Restart your system for it to take effect.
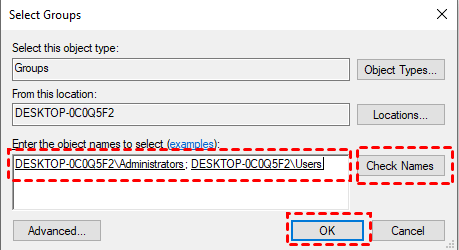
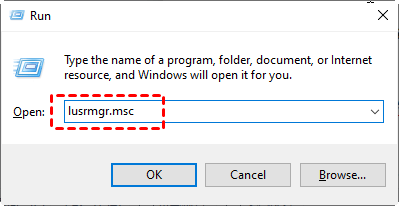
Method 3. Add standard user in Local Users and Groups
Step 1. Press Win + R to invoke the Run dialog box, then type in “lusrmgr.msc” and press OK.
Step 2. Click Groups first, then double-click Remote Desktop Users. After this, click Add in the Remote Desktop Users Properties. Enter the object name in the box, click Check Names and then click OK.

Step 3. Restart your system for it to take effect.
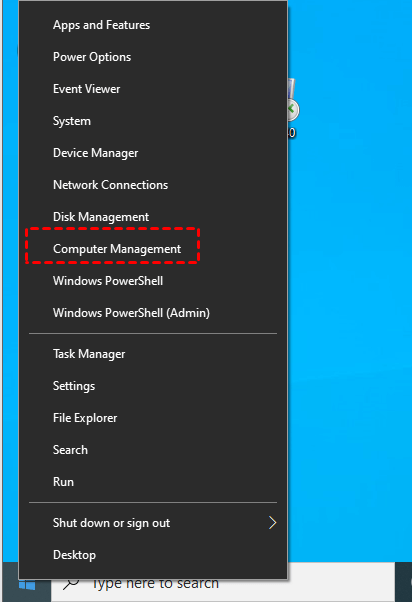
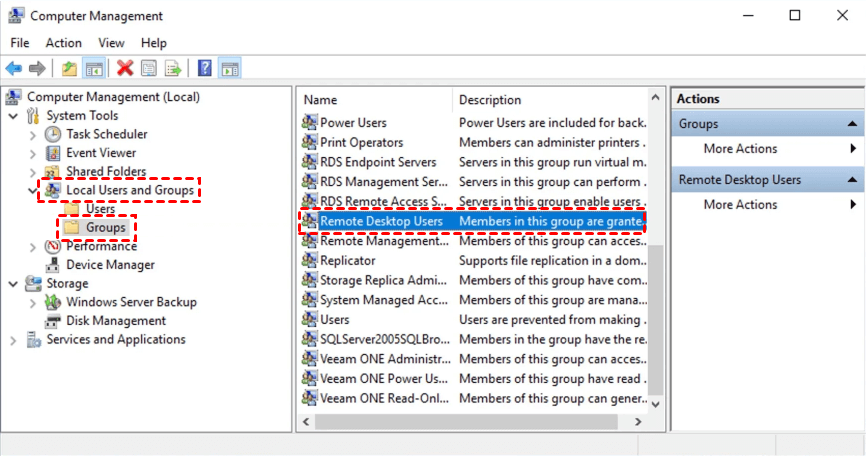
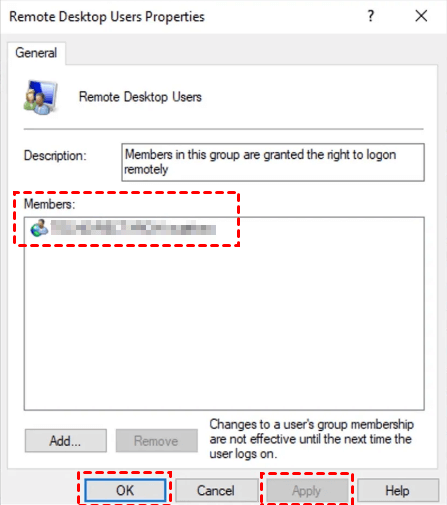
Method 4. Add standard user to the remote user group in Computer Management
Step 1. Right-click Start, find Computer Management, and open it.
Step 2. Navigate here: Local Users and Groups > Groups > Remote Desktop Users.
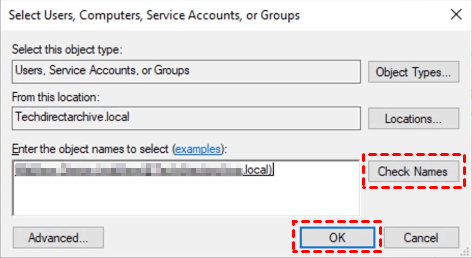
Step 3. On the Remote Desktop Users Properties window, click Add.

Step 4. Enter the object name and click Check Names, then click OK.
Step 5. Then you can see the added user appearing here, click OK, and then Apply.
Method 5. Add standard user to RDP on Windows 10 via PowerShell
The final way is to Add Standard Users to RDP on Win 10 using CMD.
Step 1. On the remote computer, right-click Start, and then choose Windows PowerShell (Admin).
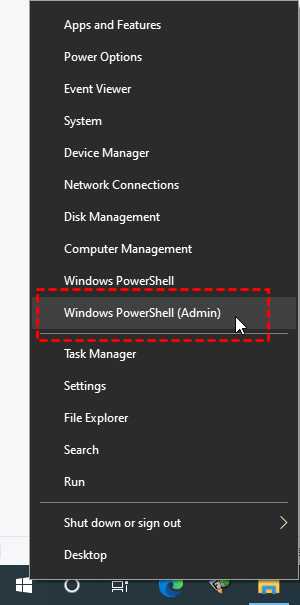
Step 2. Type in the following command and press Enter:
Add-LocalGroupMember -Group "Remote Desktop Users" -Member "USERNAME"
Note: Replace USERNAME with the username of the account that you are adding.

Step 3. Close the Windows PowerShell and check to log in as the added user.
Try free & easy alternative to Remote Desktop Connection for Windows
If you feel the steps to add standard user to RDP to fix RDP error look complicated to you, you can try to use the free and easy third-party remote desktop software AnyViewer. It supports multiple Windows versions, including Windows 10. Next, let’s see how to use AnyViewer on PCs.
- RDP requires an IP address or computer name to achieve remote connection, while AnyViewer doesn’t.
- RDP requires the two devices to be under the same network, while AnyViewer doesn’t.
- RDP is only available for Windows Ultimate, Professional, and Enterprise editions, while AnyViewer supports all editions, including Home, Standard, and Basic of Windows 11/10/8.1/8/7.
Step 1. Download, install, and launch AnyViewer on both computers.
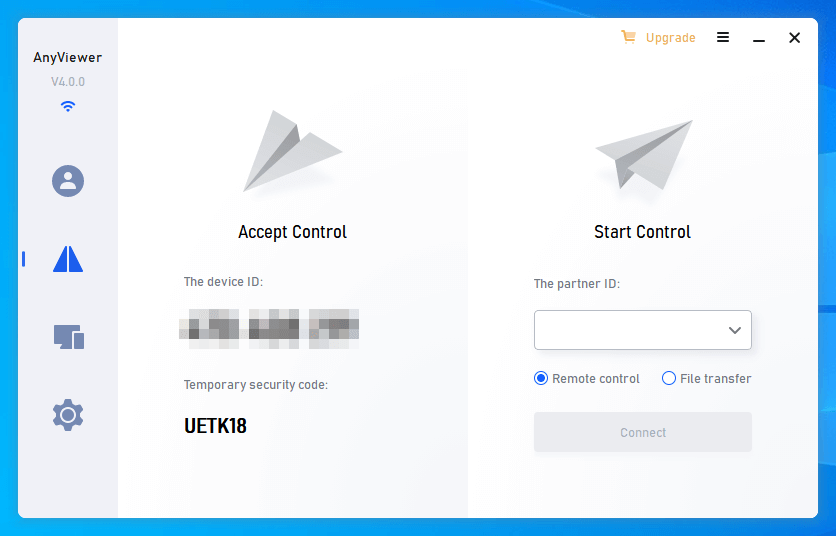
Note: AnyViewer also has an iOS version, you can also remotely control your PC from your iPhone or iPad.
Step 2. Go to Log in, and then click Sign up. (If you already have signed up on its official website, you can log in directly.)

Step 3. Fill in the signup information.

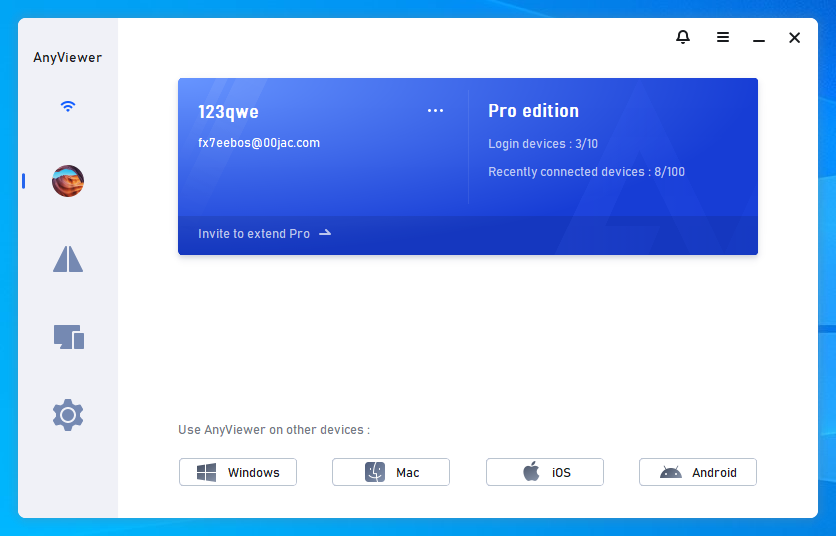
Step 4. Then you can see you successfully logged in to AnyViewer. Your device will automatically be assigned to the account you've logged in to.

Step 5. Log in to the same AnyViewer account on the two devices, then click One-click control to achieve unattended remote access.

Note: If you want to assign more devices to achieve unattended remote access, then you can upgrade your account to a Professional or Enterprise plan. Also, you can connect to another computer in privacy mode, which means you can black the screen and block the mouse and keyboard of the remote computer.
Conclusion
This post mainly introduces five methods to allow standard user to RDP on Win 10. If you think these methods are too complicated for you, we also provide you with another option. You can use the free and easy third-party remote desktop software AnyViewer, which is regarded as the best RDP alternative.
