
3 Ways to Add Domain User to Remote Desktop Group
This post offers three tested ways to add domain user to Remote Desktop group. If you seek a simpler approach to granting users secure remote access permissions to a server, this post offers a superior solution.
By Ellie / Updated on December 13, 2024
What is a Remote Desktop group?
Remote Desktop group is normally known as the Remote Desktop Users group. In Windows operating systems, the Remote Desktop Users group is an inherent feature that confers its members with the requisite permissions for initiating remote desktop sessions.

Typically, individuals in the Remote Desktop Users and Administrators groups can access remote desktops on both workstations and servers. However, on domain controllers, this privilege is restricted exclusively to members of the Administrators group.
Incorporating users into this group enables administrators to regulate remote system connections, fostering a heightened level of security within the remote access environment.
How to create a security Remote Desktop group [2 ways]
Using group-based access whenever feasible is advisable. This facilitates streamlined user access management, simplifying the process of adding or removing users from relevant groups as needed.
Prior to adding individual users to the Remote Desktop Users group, it's advisable to establish a security group to serve as a member. This approach enables the creation of multiple groups as required, enhancing the organization and efficiency of user access management.
Typically, two methods are employed. Follow the steps below to learn how to create a security group and include a domain user in the Remote Desktop group using either the Active Directory Users and Computers (ADUC) console or PowerShell.
Way 1. Use the ADUC console
To create the allow RDP Users group using ADUC console:
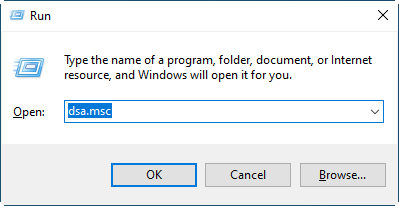
Step 1. Log in to the domain controller and launch the ADUC console. You can do this by opening the Run box using the "Windows" key + "R", and then typing "dsa.msc".
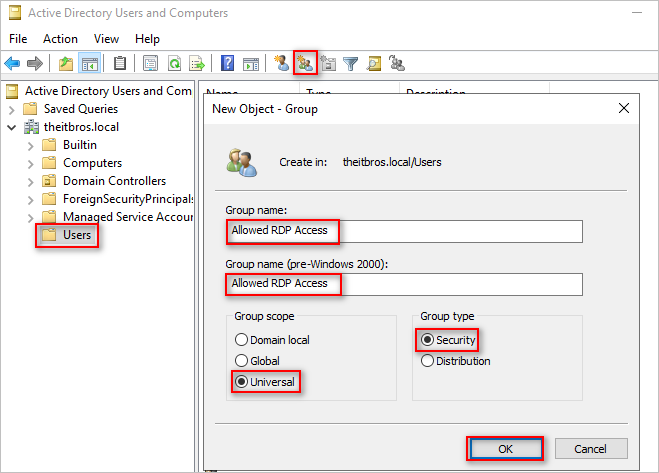
Step 2. Navigate to the desired Active Directory OU container, such as the Users OU.
Step 3. Click on the "New Group" button.
Step 4. In the "New Object - Group" window, input the group name, select the group scope, choose "Security" as the group type, and click "OK".
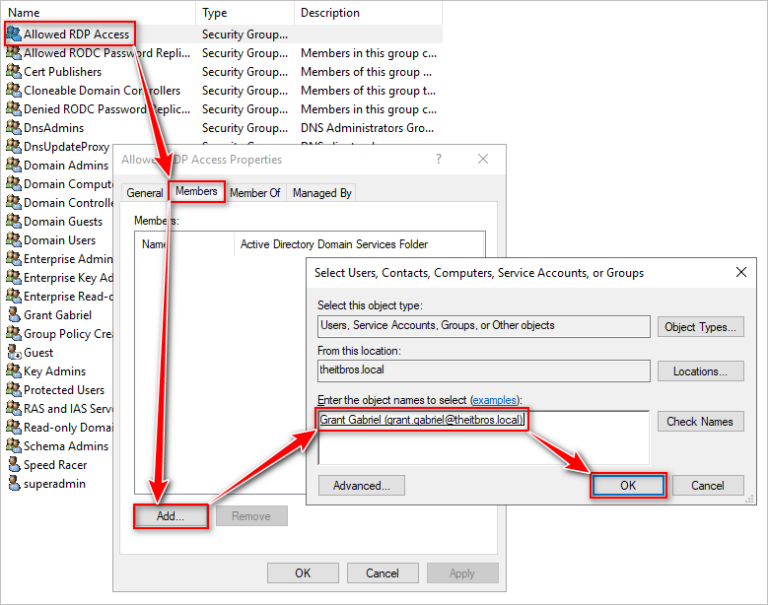
Step 5. Once the security group is established, proceed to add members (users and groups) to it, designating them as Remote Desktop Access users.
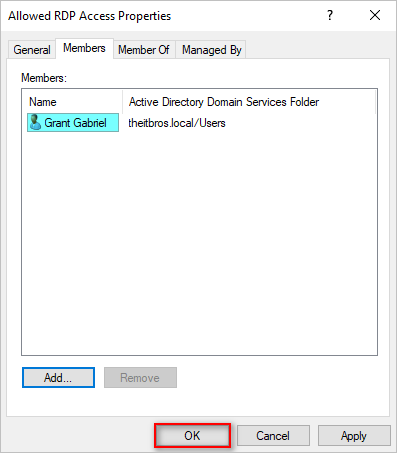
Step 6. After adding the intended members, click "OK" to confirm changes and close the group properties window.
Way 2. Use PowerShell
To create the allow RDP Users group using PowerShell:
Step 1. Log in to the server and initiate an elevated PowerShell session.
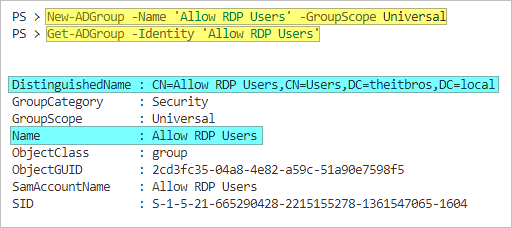
Step 2. Execute the following command to create the security group named "Allow RDP Users" within the Users OU:
- New-ADGroup -Name 'Allow RDP Users' -GroupScope Universal
- Get-ADGroup -Identity 'Allow RDP Users'
How to add domain user to Remote Desktop group [3 ways]
Now that you have created a security group successfully, you can add domain user to this group following the three tested ways below.
Way 1. Add users to the Remote Desktop Users group using GPO
To add domain users to the Remote Desktop Users group via GPO:
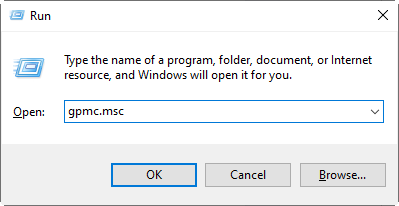
Step 1. Begin by opening the Group Policy Management Console (GPMC) on the domain controller. You can do this by opening the Run box using the "Windows" key + "R", and then typing "gpmc.msc".
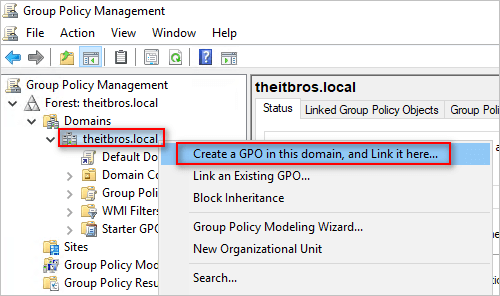
Step 2. Right-click on the domain and select "Create a GPO in this domain, and Link it here."
Note: Alternatively, you can create and link the new GPO in a specific OU.
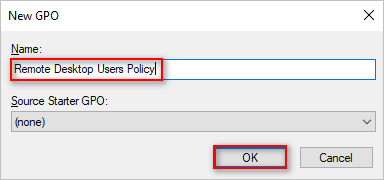
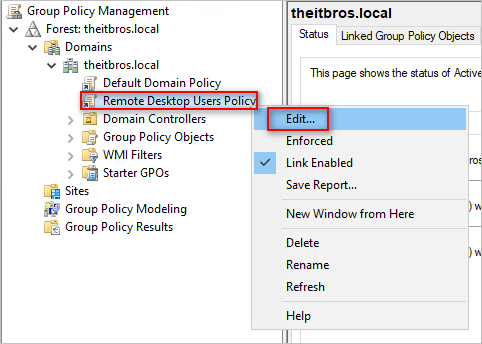
Step 3. Enter "Remote Desktop Users Policy" as the policy name and click "OK".
Step 4. Right-click on the newly created policy and choose "Edit".
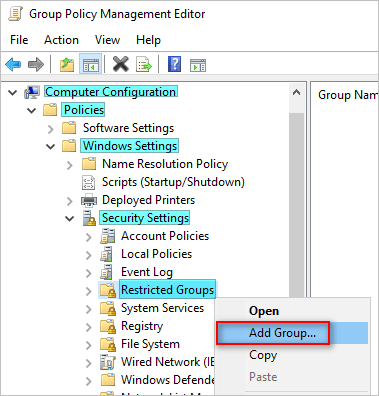
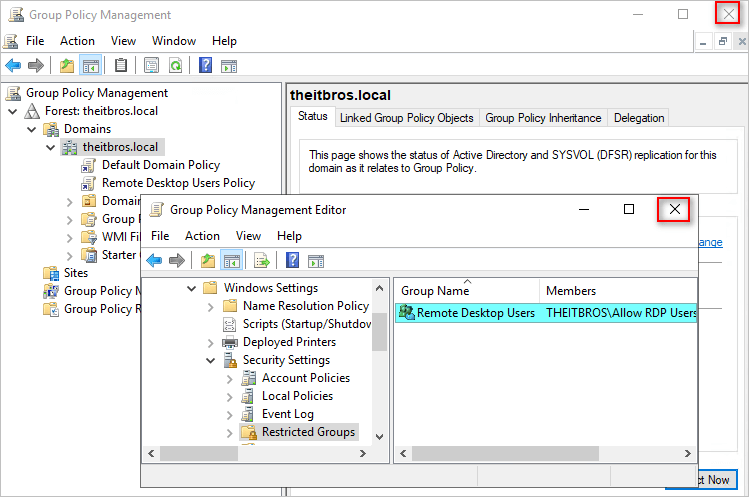
Step 5. Navigate to Computer Configuration > Policies > Windows Settings > Security Settings.
Step 6. Right-click on "Restricted Groups" and select "Add Group".
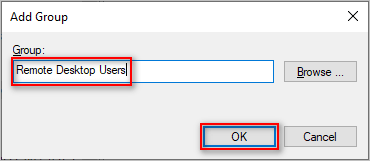
Step 7. In the Add Group dialog box, type "Remote Desktop Users" and click "OK".
Note: Do not click Browse as "Remote Desktop Users" will not appear in Active Directory since it's a local group on each computer.
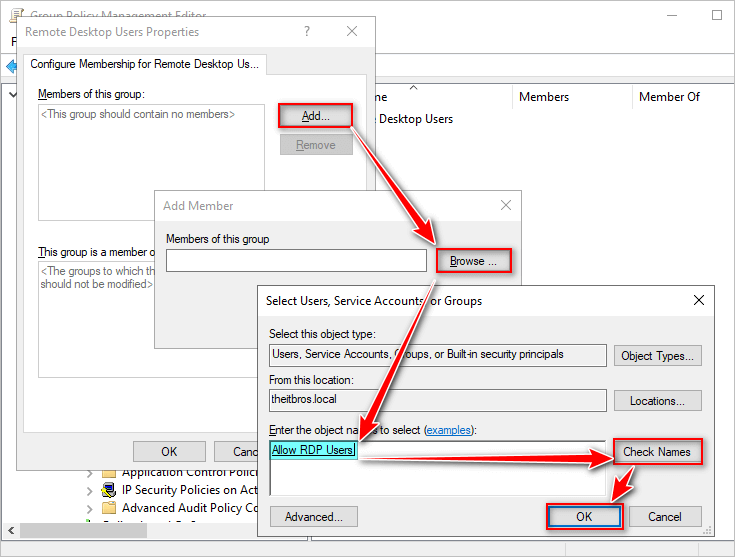
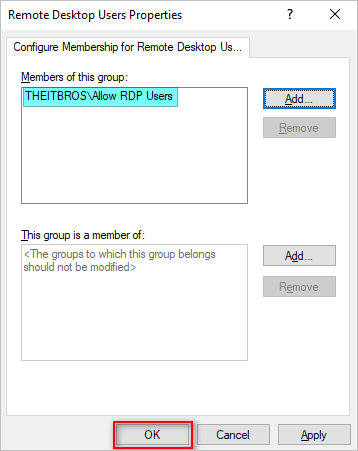
Step 8. The Remote Desktop Users Properties window will open. Under the "Members of this group" property, click "Add".
Step 9. Browse for the security group created earlier ("Allow RDP Users") and designate it as a member of the Remote Desktop Users group.
Note: You can also include domain users in the Remote Desktop Group.
Step 10. Click "OK" on the Remote Desktop Users Properties to save the changes.
Step 11. Close the Group Policy Editor and the Group Policy Management window.
Step 12. Finally, allow time for the group policy to replicate throughout the domain. Alternatively, you can force the group policy for Remote Desktop Users by executing "gpupdate /force".
Way 2. Add users to the Remote Desktop Users group using PowerShell
To add domain user to Remote Desktop Users via PowerShell:
Step 1. Execute the following command:
- Add-LocalGroupMember -Group "Remote Desktop Users"-Member "AzureAD\[email protected]"
![]()
Step 2. Next, utilize the following PowerShell command to verify the group membership:
- Get-LocalGroupMember -Group "Remote Desktop Users"
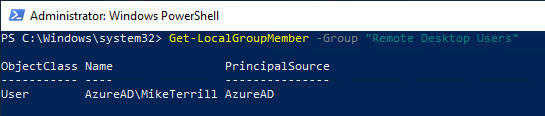
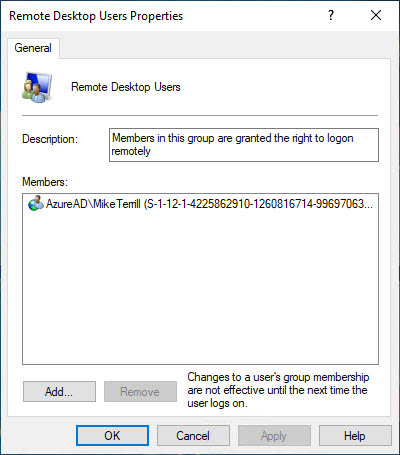
Step 3. Upon inspection, you'll observe that your AAD account has been successfully added. Furthermore, navigating to Computer Management, you'll find it reflected in the user interface as well.
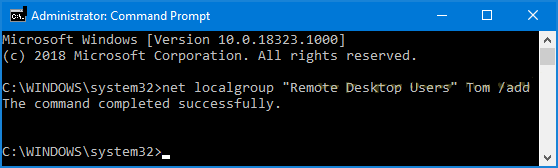
Way 3. Add users to the Remote Desktop Users group using CMD
To add users to the Remote Desktop Users group using CMD:
Step 1. Begin by opening the Command Prompt as an administrator.
Step 2. Enter the following command and press Enter. Make sure to replace "UserName" with the desired user account you wish to add to the Remote Desktop Users group.
- net localgroup "Remote Desktop Users" "UserName" /add
If you need to remove a user from the Remote Desktop Users group, execute the following command:
- net localgroup "Remote Desktop Users" "UserName" /delete
Bonus tip: Secure remote access permission with ease
Incorporating a domain user into the Remote Desktop group enhances the security of the remote access environment. Nevertheless, ensuring secure remote desktop permissions doesn't need to be overly complex.
AnyViewer is a free remote desktop software that places a premium on security. It has the following security features:
- Asymmetric ECC 256-bit end-to-end encryption, ensuring the safety of remote desktop connections.
- Two-factor authentication, which safeguards devices used for unattended remote access.
- A "Join Team" feature that enhances remote work efficiency and supports effective group management, fostering seamless collaboration.
- Role Permission management on the account webpage, allowing the restriction of sub-accounts to specific functions. This helps minimize the risk of unauthorized access and potential data breaches.
- ★Note:
- Both Join Team and Role Permission features are exclusive to AnyViewer Enterprise Edition, please upgrade your account after registering.
Here's how to create sub-account role groups and assign specific remote access permissions:
Step 1. Go to the AnyViewer user information page. Click User Management > Role Permission to create a new role.

Step 2. In this Role permission page, click Edit permission settings.
Step 3. The following shows the permissions you can set.
The bottom line
In conclusion, adding a domain user to the Remote Desktop group can be efficiently achieved through various methods. This post detailed three tested ways: using Group Policy Object (GPO), PowerShell, and Command Prompt. Each method offers a reliable approach to managing remote access permissions securely.
For an even more streamlined and secure remote access solution, consider using AnyViewer, which provides robust features such as encryption, two-factor authentication, and advanced role management. This ensures a secure and efficient remote access environment, enhancing overall productivity and security in remote work settings.
