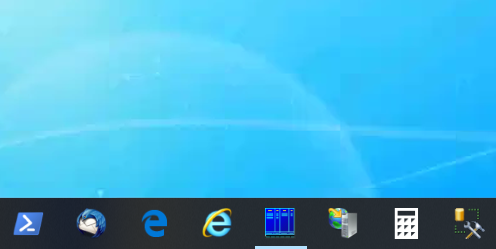
In this post, we introduce 5 ways to get help you fix “Remote Desktop taskbar not responding”. You can choose one of them if you are in this kind of trouble.
“Hello. The Remote desktop taskbar is stuck at the RDP session and is unresponsive. I drop it and then connect to the remote PC again but it’s not responding still. What’s wrong? Are there any fixes that can free me out of this trouble?”

Thanks to the development of technology, remote access is available to help us deal with work and study stuff nowadays. However, if we encounter some issues like Remote Desktop stuck on please wait or the issue illustrated as the user in the case above, the whole remote session will be inconvenient and it will be very frustrating for every one of us.
Here in this part, 5 feasible ways will be shown to fix “Remote Desktop taskbar not responding” on Windows 11, 10, 8, 7. Follow me to operate.
In most cases, the Remote Desktop taskbar will be unresponsive if Windows Explorer has problems. For this reason, we can do as follows to solve the problem:
Step 1. Use the key combination CTRL+ SHIFT+End and then choose Task Manager. (Some shortcuts in Remote Desktop are different from the normal ones.)
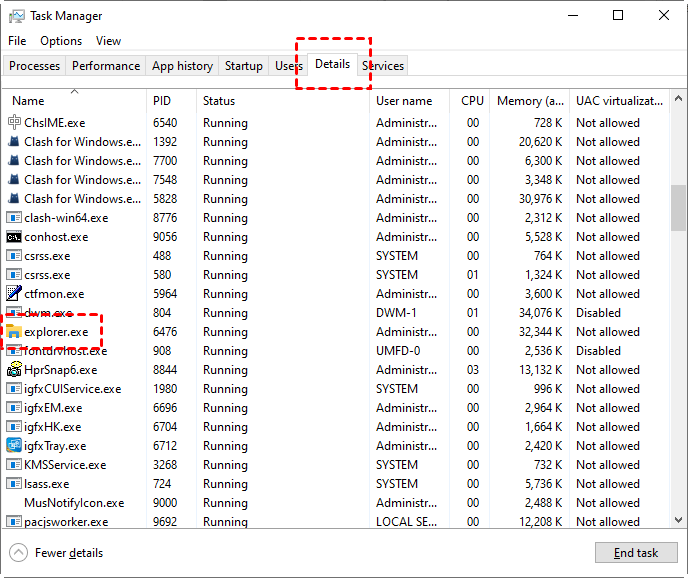
Step 2. Locate the Details tab and Kill the explorer.exe process if it shows up in Task Manager.

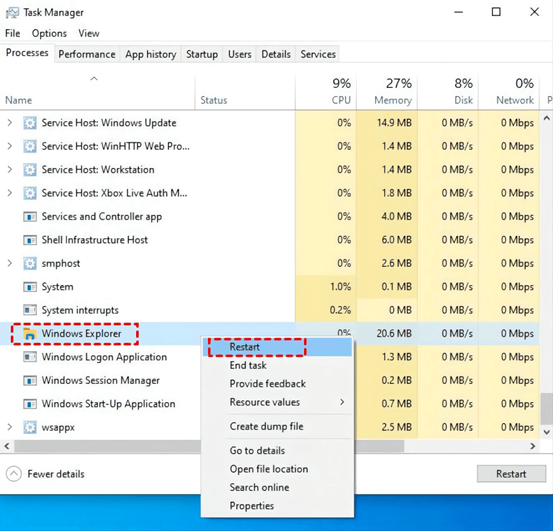
Step 3. Go to File > Processes in the Task Manager and then find Windows Explorer. Right-click on it and then choose Restart. After that, the taskbar not responding in Remote Desktop will be fixed.

The settings of Local Security Authority (LSA) credentials also have an effect on the RDP session taskbar. You could change the value of the related policy to fix the issue.
Step 1. Press Win+ R and then input regedit to open Registry Editor.
Step 2. Navigate to following registry Key: HKEY_LOCAL_MACHINE\SYSTEM\CurrentControlSet\Control\Lsa
Step 3. On the right pane, right-click and then select New > DWORD (32 bit).
Step 4. Name the value as LsaLookupCacheMaxSize.
Step 5. Select Modify after right-click on LsaLookupCacheMaxSize.
Step 6. Make Sure that the Value Data is set to 0, thereafter select OK.
Step 7. Reboot the PC and reconnect to the remote PC to check whether the issue has gone.
Old Windows versions may also cause the “Remote Desktop taskbar not responding”. And some users claim that the different Windows versions could cause the problem. Therefore, we can try to fix the issue by checking our Windows update. But remember to back up your PC in advance to avoid data loss.
Step 1. Press Win + I to open Settings. And then locate Update & Security.
Note: On Windows 7, press Win + R and then input “control panel” > go to System and Security > choose Windows Update to check update.
Step 2. If your Windows version is the newest, try the next solution. You could update your Windows version if it’s not the latest one.
SFC scan is a very useful feature that can scan the corrupted files causing the problem and replace the cached copy with the corrupted one. In this way, you could fix the “Remote Desktop taskbar not responding”. Now follow me to have a try.
Step 1. In the search box, input cmd and then right-click on it. Choose Run as administrator.
Step 2. Type in sfc /scannow and wait for several minutes. When it is completed, reboot the PC and connect to the remote PC again to check whether the Remote Desktop taskbar still is not responding on Windows 11, 10, 8, 7.
Step 4. Wait for the command to finish.
Antivirus software sometimes would automatically prevent some behaviors that may seem harmful to the PC, which also takes a toll on the application running, such as Remote Desktop. Therefore, we can uninstall it for a while and then connect to the remote PC.
Step 1. Press Win + R simultaneously, and then input “appwiz.cpl” and click on OK.
Step 2. Locate the antivirus software and then uninstall it.
After the operations, is your Remote Desktop taskbar responding now? If it is, it’s our great honor that could help you fix the issue. If it isn’t, don’t worry, we recommend you use an efficient & secure remote access tool that not only can free you out of trouble but also give you a better experience on remote sessions. That’s AnyViewer.
With it you can enjoy the following features:
Step 1. Download, install and launch AnyViewer on both computers. Go to Log in, and then click Sign up.
Step 2. Fill in the signup information.
Step 3. Then you can see you successfully logged in to AnyViewer. Your device will automatically be assigned to the account you've logged in to.
Step 4. Log in to the same AnyViewer account on the two devices, then you can achieve a direct connection by clicking One-click control.
Note: You can also upgrade your account to Professional or Enterprise edition to assign more devices and to connect to another computer in privacy mode.
In addition, AnyViewer can also provide users with some practical functions for remote control after a successful connection. Such as lock, logout, restart, command prompt (cmd), etc.
Here in this post, we illustrate 5 ways for you to fix the Remote Desktop taskbar not responding, such as restarting file explorer, adding a reg file, checking for Windows updates and so on. However, if the ways above cannot help you get out of the trouble, you can use AnyViewer as your comfort.