
Easy Steps: How to RDP with Azure AD Joined Windows 10, 11
Do you know how to RDP with Azure AD joined Windows 10, 11 computers? In this post, we will offer a complete guide on RDP to a computer with Azure AD account. Please keep reading to learn more!
By Hester / Updated on May 10, 2024
How do I Remote Desktop with Azure AD?
Hi. I regularly switch between two work devices. If I could access the resources anytime from another computer, it would be simpler for me. For work, I want to join a machine to Azure AD. How can I RDP to an Azure AD joined Windows 10 device? Thanks.”
- Question from a user
![]()
Azure AD is a multi-tenant, cloud-based directory and identity management service provided by Microsoft. Users in an organization can sign up for numerous services and access them from anywhere via the cloud with just one login credential. They can also remote into Azure AD computers via RDP to access everything in the corporate network.
How to RDP with Azure AD joined Windows 10, 11 computer
In this post, we will share how to join a computer to Azure AD and RDP with Azure AD.
Part 1. Join your computer to Azure AD (optional)
First, you need to join your remote PC to Azure AD. If your computer is already Azure AD joined, please skip to Part 2 to proceed with the next steps.
Note: Windows 10 version 1709 or later is required to connect to Azure AD, but 1809 or later to Remote Desktop with Azure AD credentials.
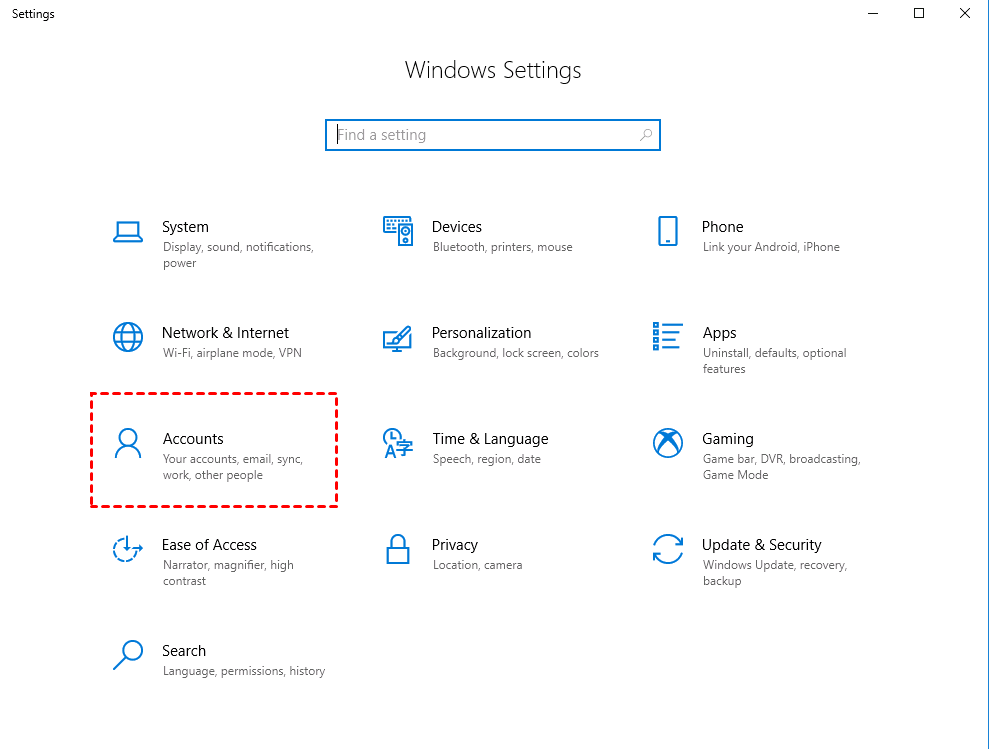
Step 1. Open "Windows Settings" and click "Accounts".
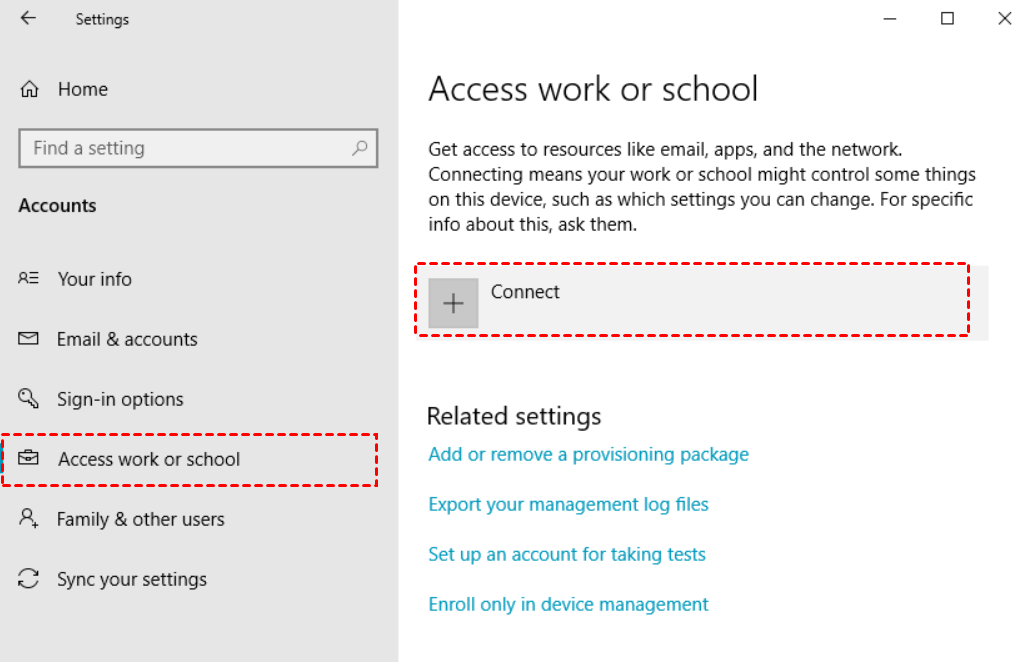
Step 2. Select "Access work or school" from the left and click the "+ Connect" button.
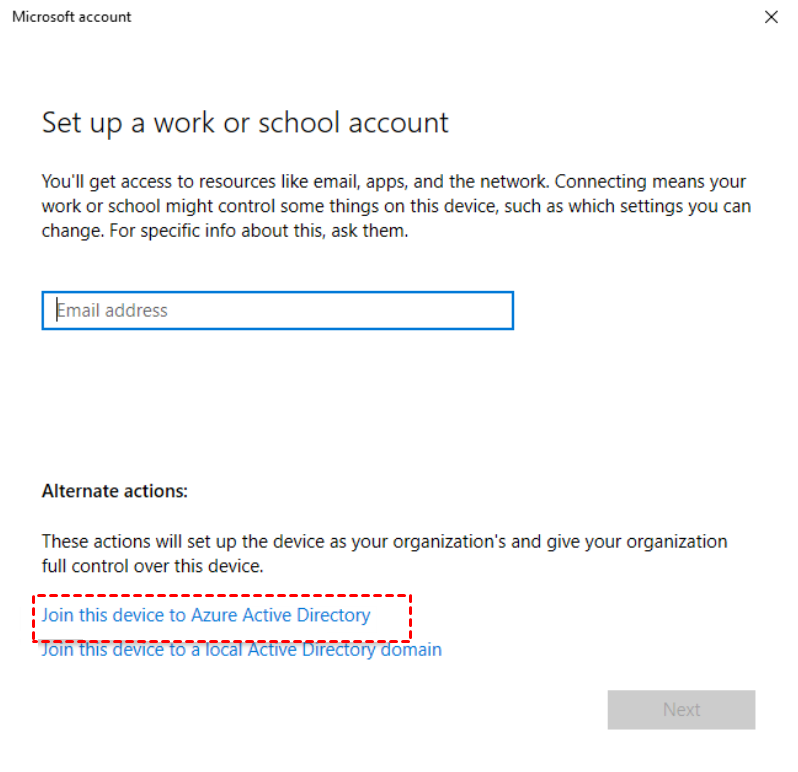
Step 3. Click "Join this device to Azure Active Directory" at the bottom.
Step 4. Enter your email address, authenticate, and check the domain details.

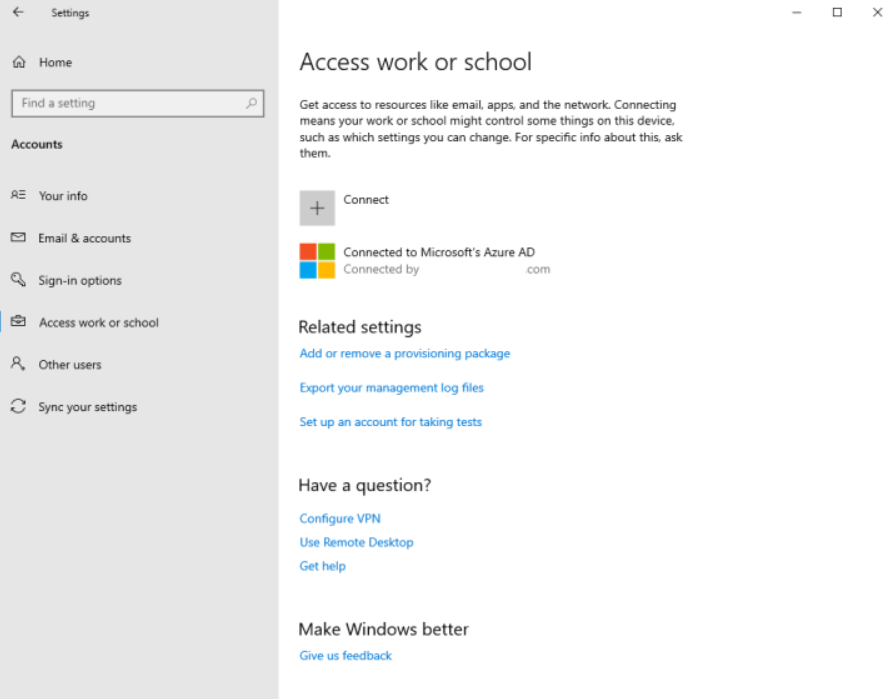
Step 5. You are now connected to your organization's Azure AD, as well as the account used to login.
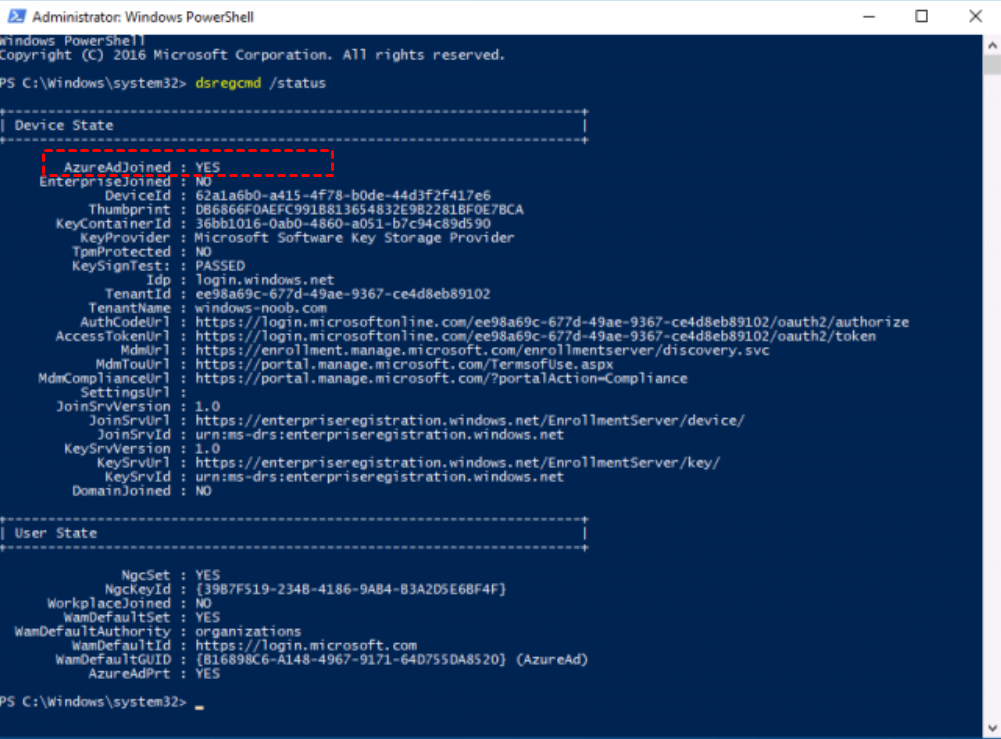
You can also use the PowerShell command to confirm that your device has successfully joined Azure AD.
- dsregcmd /status
If the output shows “AzureAdJoined=YES”, your computer is Azure AD joined.
Part 2. Enable Remote Desktop on the remote computer
Now you need to enable Remote Desktop on the remote computer.
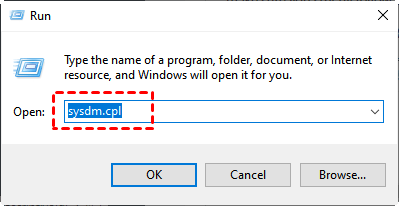
Step 1. Press "Win" + "R", input “sysdm.cpl”, and click "OK".
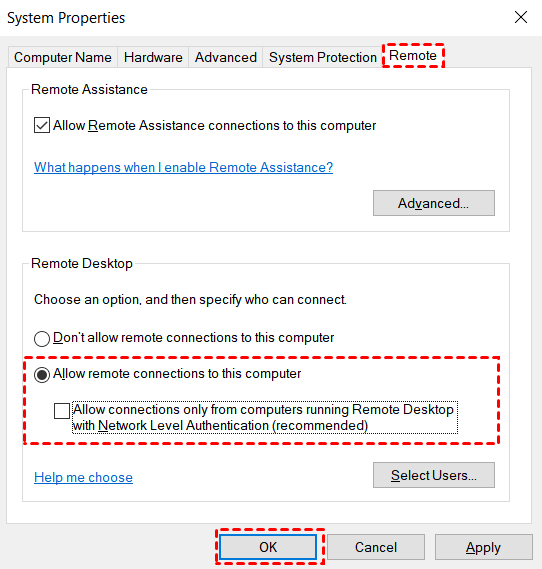
Step 2. Go to the "Remote" tab, check "Allow remote connections to this computer", disable the checkbox from "Allow connections only from computers running Remote Desktop with Network Level Authentication", and click "OK".
Part 3. Remote Desktop to the Azure AD joined computer
RDP to Azure AD joined machines is not as easy as entering an IP address as usual. Let’s look through how to RDP to PC with an Azure AD account.
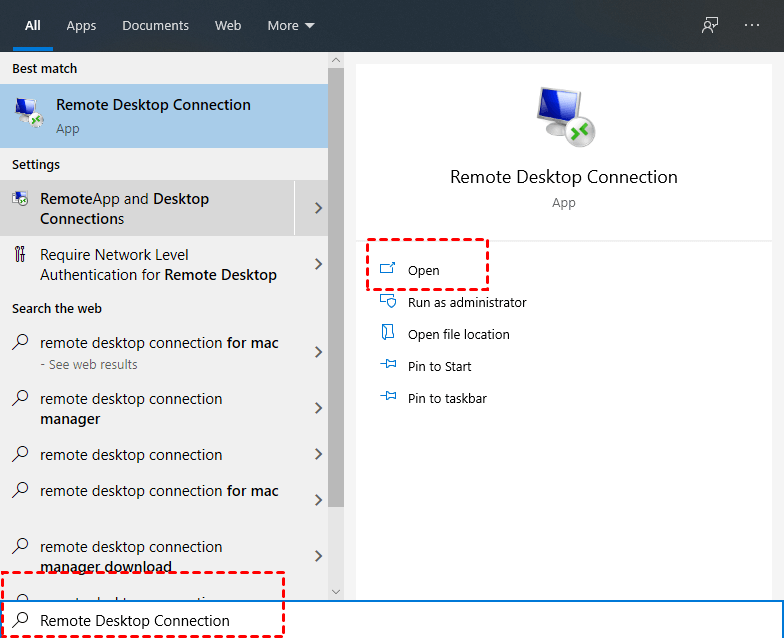
Step 1. On the client computer, search for "Remote Desktop Connection" and click "Open".
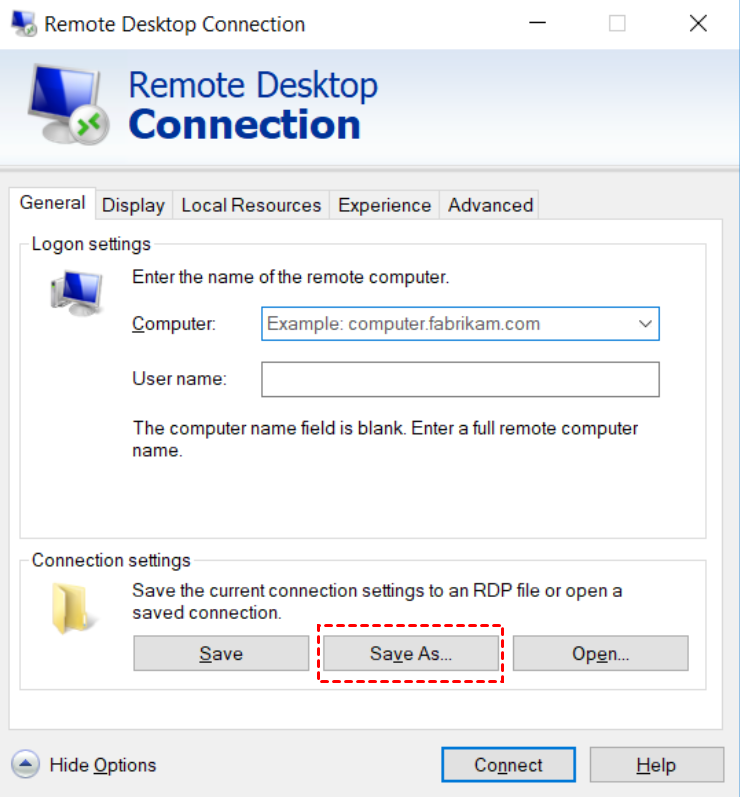
Step 2. Click "Show Options" and click "Save As" to save the RDP file. Give the file a name, for example, "AzureAD_RDP", and save it somewhere easy to find.
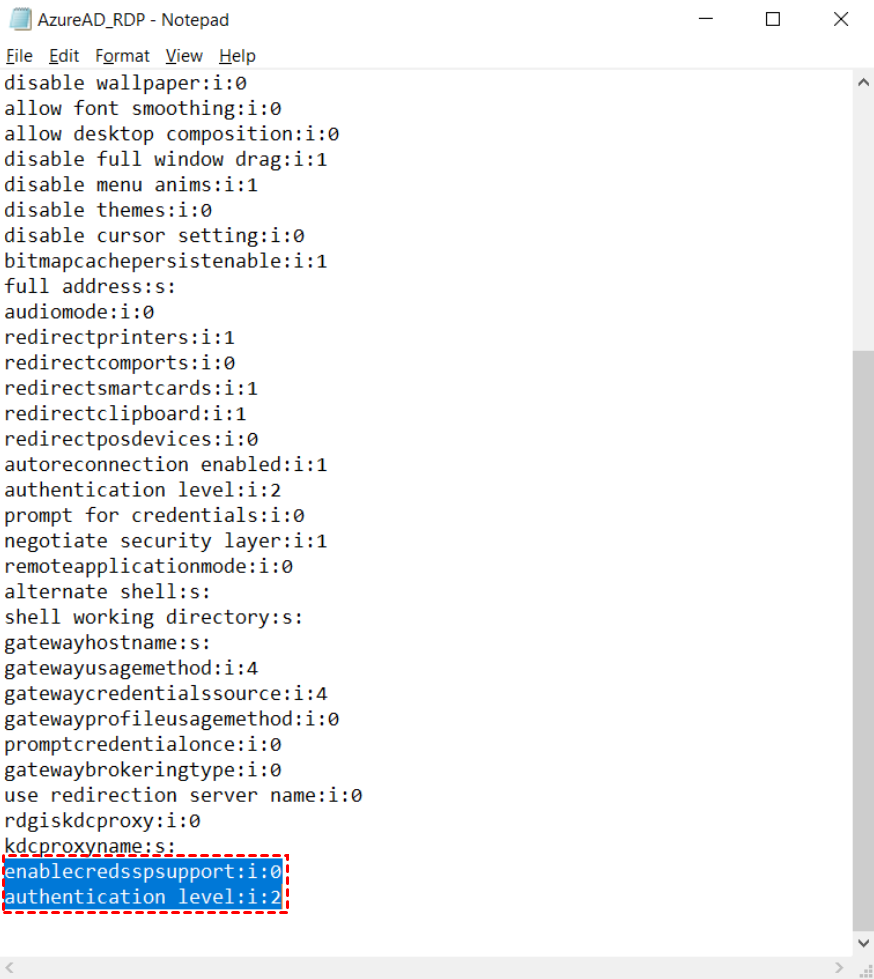
Step 3. Open the saved file using Notepad. Check that the following two lines are present. If not, add them.
- enablecredsspsupport:i:0
- authentication level:i:2
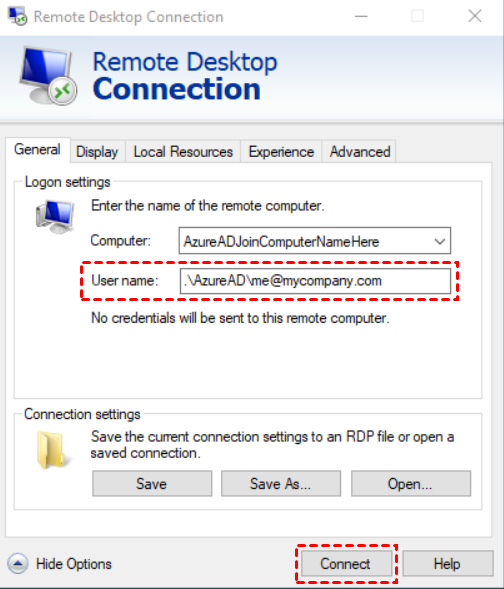
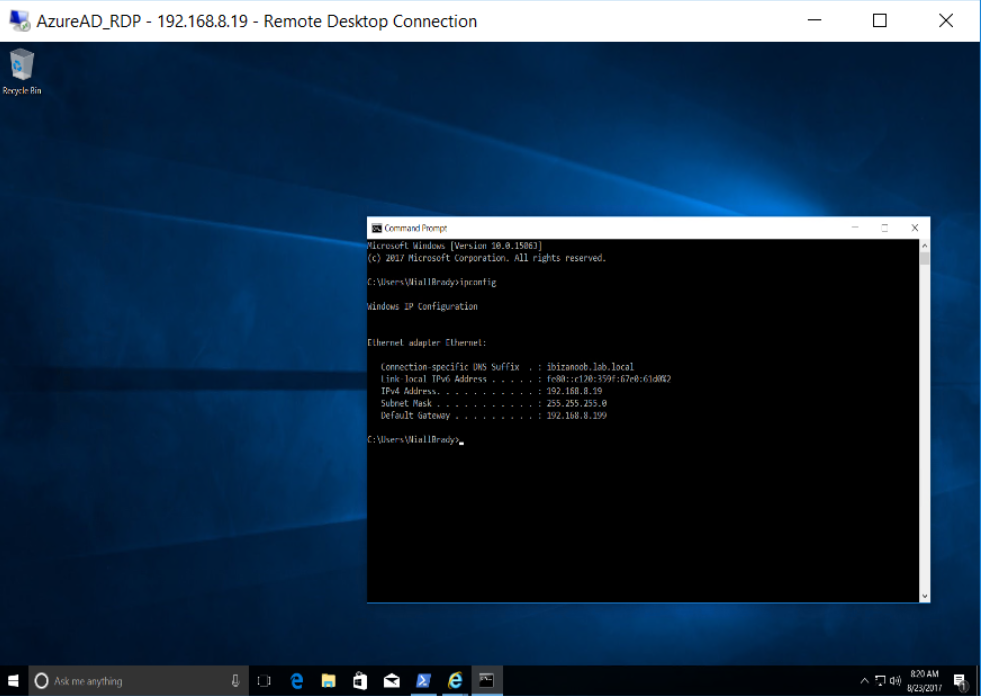
Step 4. Double-click the file and fill in the information. Enter the username of the remote computer that should be formatted as ".\AzureAD\[email protected]". Then click "Connect".
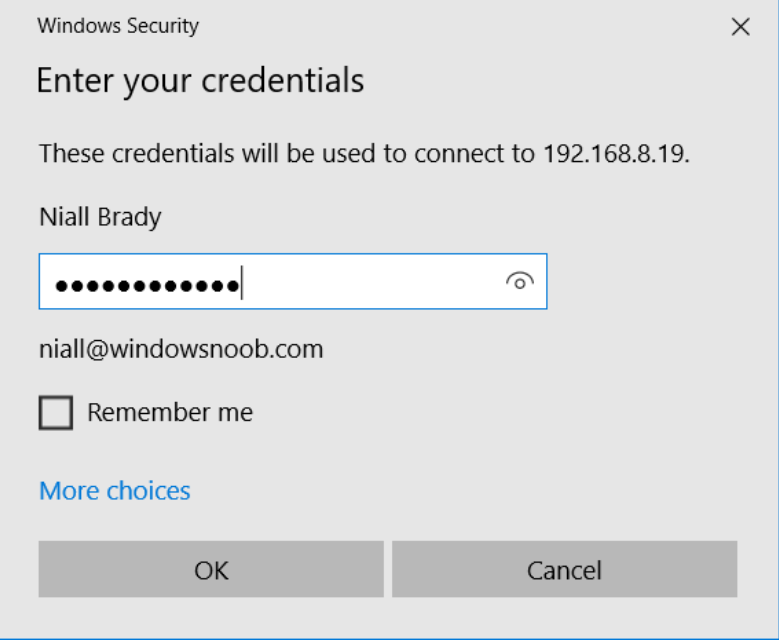
Step 5. Enter your Azure AD password if prompted.
Step 6. Now you can access and control the remote PC.
Bonus tip: An easier way to access remote devices from anywhere
RDP Azure AD joined devices is quite time-consuming because it requires some computer skills. Therefore, it is recommended to use the best remote desktop software AnyViewer to access your remote computers easily.
Compared to RDP, AnyViewer has the following advantages:
- Easier to use. With AnyViewer, you can one-click control the remote computer, while RDP requires entering information like IP address or username.
- Windows Home/Standard supported. AnyViewer supports Windows OS and Windows Server OS, while the RDP server is unavailable on Windows Home or Standard Edition.
- Multiple sessions. AnyViewer supports concurrent sessions to help you manage several computers simultaneously, while RDP only allows multiple sessions on Windows Server with CALs.
- Flexible file transfer modes. AnyViewer enables two file transfer ways, and you can conveniently transfer files between devices when taking or without the remote control.
- Over-Internet connections. AnyViewer allows connections over the Internet without additional configuration, while RDP connection in different networks requires VPN or port forwarding.
You need to download and install AnyViewer on your computers, but it is worth trying overall!
Step 1. On the host machine, click Sign up to create a new account and log in.

Step 2. Sign in to the same account on the client computer. The account will be assigned to your device once you successfully logged in.

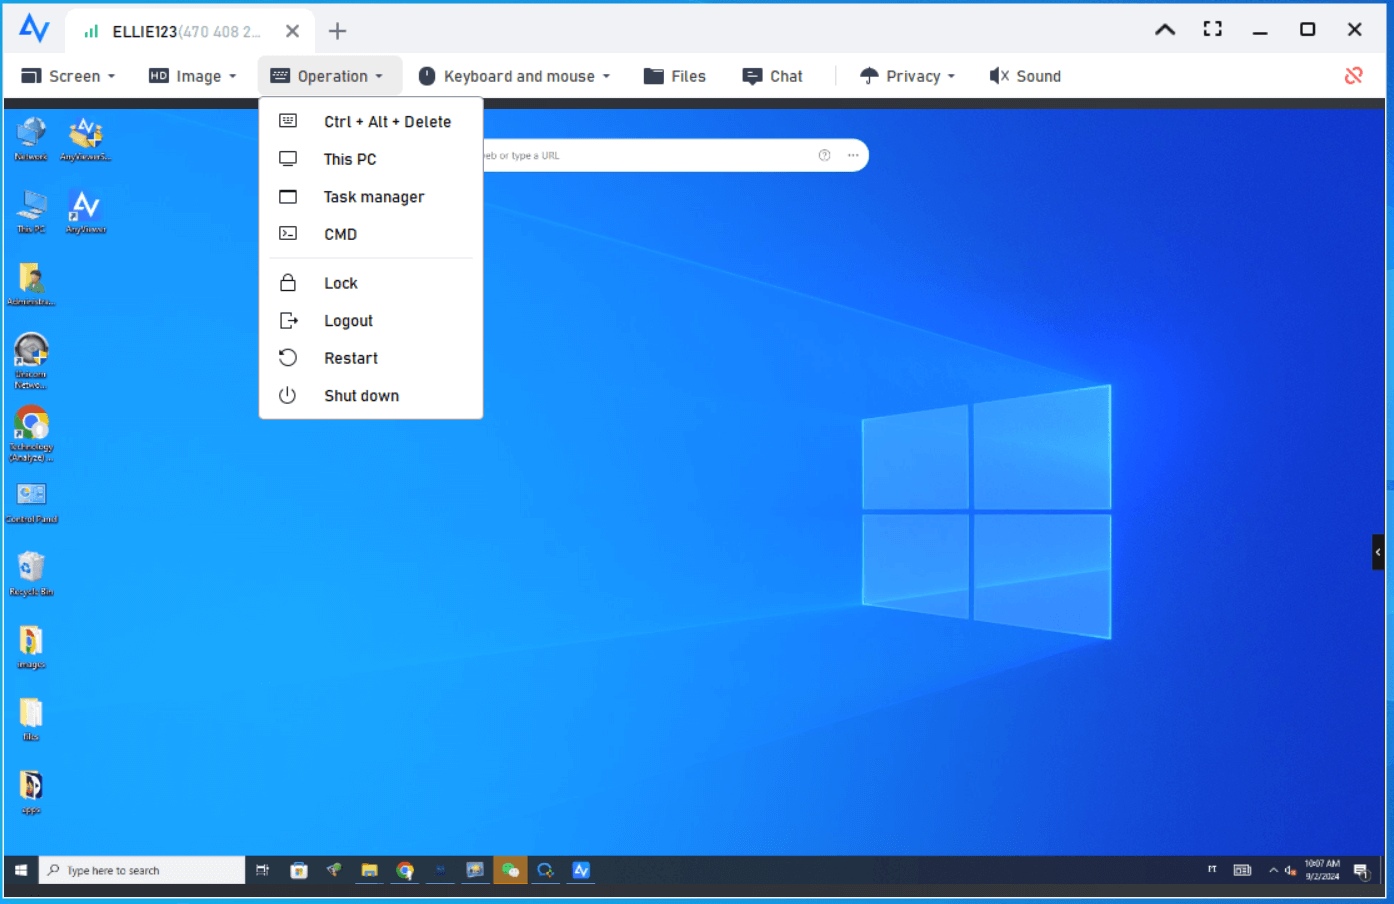
Step 3. You can see the list of assigned devices by going to the Device interface. Click the device you wish to connect to and then click One-click control.

In a matter of seconds, the connection will be created successfully. Then you control your remote computer. The upper toolbar contains several features. You can transfer files, change the resolution, launch CMD, and perform other tasks.
- Notes:✎...
- AnyViewer offers a Professional or Enterprise plan for individuals and businesses with higher needs., including:
- More devices will be allowed to be assigned to the same account for unattended access.
- More concurrent connections simultaneously.
- Black the remote PC screen and disable the remote keyboard & mouse click to protect privacy.
- Faster file transfer speed.
- More screen walls to manage and monitor multiple devices effectively.
- Create groups for enterprise devices to manage large numbers of devices conveniently.
Conclusion
In summary, integrating your Windows devices with Azure AD simplifies remote access to corporate resources. By following straightforward steps to join a computer to Azure AD and enabling Remote Desktop, you can securely establish RDP connections. Although configuring RDP with Azure AD credentials requires some technical know-how, it enhances accessibility to work devices.
For a more user-friendly remote access solution, consider utilizing AnyViewer, offering simplicity, cross-Windows compatibility, and additional features like concurrent sessions and easy file transfers. Whether opting for RDP or exploring alternative remote desktop software, prioritizing seamless and secure remote access is key in today's dynamic work environments.
